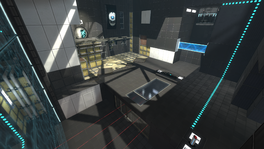
This is the fifty-fourth level of the game, and takes place within an [[Aperture Science]] Test Chamber. This level features the [[Aerial Faith Plate]] and the [[Hard Light Bridge]] as its primary mechanics. [[Turrets]] are present as the main hazard in this level.
This is the fifty-fourth level of the game, and takes place within an [[Aperture Science]] Test Chamber. This level features the [[Aerial Faith Plate]] and the [[Hard Light Bridge]] as its primary mechanics. [[Turrets]] are present as the main hazard in this level.
== Threats faced ==
== Hazards ==
* [[Turrets]]
* [[Turrets]]
== Walkthrough ==
== Walkthrough ==
{{Spoiler|block=yes|
*Place a portal at the end of the [[Hard Light Bridge]] and the other one to the bottom-left corner of the wall next to the [[Emancipation Grill|Emancipation Grills]].
*Push the [[Switch]] and the [[Frankenturret]] should hit the Hard Light Bridge and land in the area with four [[Turrets]] facing it.
*Place a portal to the wall closest to the Frankenturret and another portal to the wall near the Hard Light Bridge.
*Get the Frankenturret and take it through the portal.
*Put a portal on the wall with the Hard Light Bridge and put the other portal to the wall on the right of Wheatley.
*Pick up the Frankenturret and use the [[Aerial Faith Plate]] to hit the Bridge and land on the catwalk.
*Go to the left and put the Frankenturret down, so it won't fall from there.
*Fire the portal from the wall to the wall near the Turrets. Bridge should now block the Turrets.
*Place the Frankenturret on the [[Heavy Duty Super-Colliding Super Button|button]].
*Move to the area under the catwalk. Fire a portal on the wall next to you and to the wall above the catwalk. Go through the portal.
*Go in the [[Chamberlock]].
}}
== Video walkthrough ==
{{walkthrough}}
{{walkthrough}}
== Related achievements ==
{{Show achievement|Portal 2|Smash TV|width=50%}}
{{TestChambersNav}}
{{TestChambersNav}}
Revision as of 15:43, 28 July 2011
“I can't get over how small you are!” This article is a stub. As such, it is not complete. You can help Portal wiki by expanding it.
Chapter 8 - Test Chamber 6
sp_a4_stop_the_box.bsp
This is the fifty-fourth level of the game, and takes place within an Aperture Science Test Chamber. This level features the Aerial Faith Plate and the Hard Light Bridge as its primary mechanics. Turrets are present as the main hazard in this level.