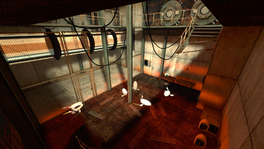
Portal Escape (Part 3)
Jump to navigation
Jump to search
 | “I can't get over how small you are!” This article is a stub. As such, it is not complete. You can help Portal wiki by expanding it. |
This is the twenty-third level of the game. It takes place within the maintenence areas of the facility, and requires the player to utilise Flinging. Turrets are present as the primary hazard.
Mechanics
- Flinging
- Pedestal Button
- Pneumatic Diversity Vent
- Weighted Storage Cube
- Door (behind-the-scenes)
Hazards
Walkthrough
- Walk left to the other side of the corridor and to the center of the dark room. Wait for the pistons to activate and drop down.
- Go to the right and duck near the barrels. Wait for the door behind the barrels to open and then pick up a barrel in front of you and start to move towards the turret and knock it over.
- Turn around and take out the second turret in the same way. The turret is located in the left-hand side.
- Turn to face the last turret and knock it over in the same way. Drop the barrel and look up. You'll see an arrow pointing right.
- Shoot a portal through the hole behind the railings. Put a portal on the wall next to you and go through the portal.
- Place a portal on the wall over the tube and the other on the wall next to you. Go through the portal and jump to the catwalk next to the tube.
- Walk to the corner with a small hole in it. Go through the hole and drop behind the turret. Pick up the turret and throw it away.
- Jump down to the area below, walk forwards for a bit and turn around. Shoot a portal on the angled wall panels facing the roof.
- Place the other portal on the floor and drop through the portal.
- Wait until you've landed and put the same portal directly below yourself. You should go through the portal twice and land on the catwalk.
- Go at the end of the hallway and go through the door behind the Emancipation Grill.
- Push the switch and wait for the Rocket turret to take aim at you. When you hear a sound, move away from the laser and go stand in front of the glass on the other side.
- Wait for the turret to aim at you and then move away from the laser.
- Wait for the rocket to break the glass and then make a run for the door at the back of the room.
- Go to the end of the hallway and through the second door. Fire a portal on the wall facing the glass. Go back to the room with the turret and place a portal on the wall facing the turret.
- Go stand in front of the portal. As soon as the turret aims the laser and makes the sound again quickly move away.
- Wait until the rocket has gone through the portal and then run through the portal and remember to move away from the portal.
- Go stand under the transportation tube and fire a portal directly under yourself. When the turret takes aim at you, move backwards and you'll avoid the rocket.
- Wait for the rocket to smash the transportation tube open and grab the Weighted Storage Cube that falls from the tube.
- Take the cube to the other side under the tube and place it in front of the small vent. Jump on the cube and jump in the vent while crouching in mid-air.
- Shoot a portal to the wall under the fan and go back. Go through the portal.
- Go stand near to the edge and fire a portal on the wall on the other side above the small surface.
- Turn left and walk to the other side of the area.
Alternative Solution
After avoiding the Rocket Turret, the player can stack chairs and other objects in order to access the vent, rather than using a rocket to blast open the pneumatic transport tube and acquire a Weighted Storage Cube.
Video walkthrough


