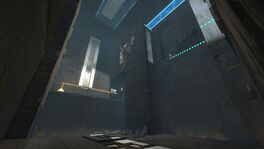
Portal 2 Co-op Course 3 Chamber 1
Jump to navigation
Jump to search
 | “I can't get over how small you are!” This article is a stub. As such, it is not complete. You can help Portal wiki by expanding it. |
 | “Nope, still can't see!” This page would benefit from the addition of one or more images. Please add a suitable image, then remove this notice. |
This is the sixteenth level in Co-op mode of Portal 2 and the first chamber in the course. The chamber teaches the players to use the Hard Light Bridges along with the four portals. Goo is present as the primary hazard of this level.
Summary
The goal of the first room is to teach the use the portals to get around the chamber with the use of portals and Hard Light Bridges. The second room requires that the Light Bridge is used as a blocking tool as well as a quick way to make a temporary bridge.
Contents
Mechanics
Hazards
Walkthrough
| # | Atlas | P-body |
|---|---|---|
| 1 | Fire a portal on the panels where the Hard Light Bridge ends and place the other portal on the wall on the left. | |
| 2 | Go through the portal and continue to walk along the Light Bridge to the other side of the pool of Goo. Drop down to the floor. | |
| 3 | Put the portal you placed on the panels on the left. Go stand on the Light Bridge. | |
| 4 | Walk along the Light Bridge to the right and put a portal on the panels ahead. Shoot the other portal on the wall right next to your first portal facing the other room. | |
| 5 | Enter through the portal and walk over to the other end of the Light Bridge. Drop down and proceed to the checkpoint and the next room. | |
| 6 | Fire a portal on the panel where the Light Bridge ends. | Use the Aerial Faith Plate. |
| 7 | Shoot your other portal on the wallpanels so that the Light Bridge will be generated under your partner in mid-air. | |
| 8 | Walk through the portal. | |
| 9 | Look for the Switch below the Light Bridge emitter. Shoot a portal on the same wall as your first portal so that the Light Bridge is generated on the same level as the switch. | |
| 10 | Go through the portal and use the switch. | |
| 11 | Look for the Edgeless Safety Cube near you and grab it with you. | Replace the portal at the end of the Hard Light Bridge and shoot your other portal on the wall next to it so that the Light Bridge is blocking the Material Emancipation Grill. |
| 12 | Use the Faith Plate. | |
| 13 | Shoot a portal as soon as your partner has touched it on the same part of the wall, but a bit lower so that the Light Bridge now stops your parter from getting all the way to the floor. | |
| 14 | Walk to the area with the Edgeless Safety Cube receptacle and place the Cube on the receptacle. | Run through your portal to the area with the Edgeless Safety Cube receptacle. |
| 15 | Go through the door to the disassembly area. | |
Video walkthrough
-To do-
Related achievements
 |
Bridge Building Complete all test chambers in the Hard-Light Surfaces co-op course |


