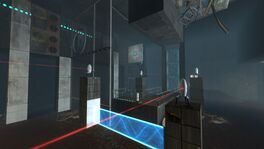
Portal 2 Co-op Course 3 Chamber 7
Jump to navigation
Jump to search
 | “I can't get over how small you are!” This article is a stub. As such, it is not complete. You can help Portal wiki by expanding it. |
 | “Nope, still can't see!” This page would benefit from the addition of one or more images. Please add a suitable image, then remove this notice. |
This is the twenty-second level in Co-op mode of Portal 2 and the seventh chamber in the course. The chamber requires the players to use the Hard Light Bridges to protect themselves from the Turrets.
Summary
The first part of the chamber requires some practice since one of players must protect the other one with the Light Bridge. The players must time their actions to avoid the turret guarding the Aerial Faith Plate. In the second room the players must knock out the turrets with the Cubes.
Contents
Mechanics
- Heavy Duty Super-Colliding Super Button
- Weighted Storage Cube
- Edgeless Safety Cube
- Hard Light Bridges
- Aerial Faith Plate
- Switch
Hazards
Walkthrough
| # | Atlas | P-body |
|---|---|---|
| 1 | Fire a portal to the bottom left corner on the wall on the opposite side. Put the other portal to the small area on the left with the Aerial Faith Plate. | |
| 2 | Place a portal to the wall below where the Hard Light Bridge ends and place the other portal next to the portal on the opposite wall. | |
| 3 | Go through your portal. | |
| 4 | As soon as your partner has gone through the portal, place the portal you used last to the same level as your parter is. | |
| 5 | Look for angled panels to the right of the Turret. Fire a portal there and shoot the other portal to the ceiling above you. Use the Faith Plate. | Place your portal to the lower part of the wall and put the other portal on the wall next to the Faith Plate. Go through the portal and use the Faith Plate. |
| 6 | Proceed to the checkpoint and to the next part of the chamber. | |
| 7 | Shoot a portal on the panel where the Light Bridge ends and put the other portal on the column on the opposite side. The Light Bridge must be placed so that it protects you as you stand on the button. | |
| 8 | Place a portal on the wall on the left side and fire the other portal on the panel that revealed from the ceiling. Go through the portal, use the Switch, and follow the flying trail of trash. Place a portal where the trash hits the wall and put the other portal on the wall facing the turret nearest to you. Use the switch to take out the turret. | |
| 9 | Go stand behind the glass to protect yourself from the turrets. Put a portal on the wall where the trash hits the wall and the other on the pillar next to the turret. | |
| 10 | Use the switch to take out the two remaining turrets. | |
| 11 | Walk to the button and place the portal from the pillar to the panel revealed from the ceiling. | |
| 12 | Use the switch again. | |
| 13 | Catch one of the Edgeless Safety Cubes or the Weighted Storage Cube and place it on the button. Place a portal on the panels revealed from the ceiling and to the wall near the button. Enter through the portal. | |
| 14 | Proceed to the disassembly area. | |
Video walkthrough
-To do-
Related achievements
|
|


