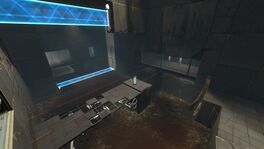
Portal 2 Co-op Course 3 Chamber 6
Jump to navigation
Jump to search
 | “I can't get over how small you are!” This article is a stub. As such, it is not complete. You can help Portal wiki by expanding it. |
 | “Nope, still can't see!” This page would benefit from the addition of one or more images. Please add a suitable image, then remove this notice. |
This is the twenty-first level in Co-op mode of Portal 2 and the sixth chamber in the course. The chamber requires the players to use Hard Light Bridges to protect themselves against multiple turrets. Turrets are present as the primary hazard.
Summary
The chamber consists of two rooms. In the first room the team must use the Hard Light Bridges to protect themselves against the turrets while making their way to the other side of the room. In the second room the team must first get to the area with the switch and then remove their shielding Light Bridge for a few seconds.
Contents
Mechanics
Hazards
Walkthrough
| # | Atlas | P-body |
|---|---|---|
| 1 | Place a portal on wall where the vertical Hard Light Bridge ends and the other portal on the right side of the stairs behind the Light Bridge. | Walk towards the Light Bridge and turn around. Place a portal to the left side of the opening and place the other portal to the left side of the stairs on other side of the Light Bridge. |
| 2 | Enter through the portal that P-body placed (may require jumping). | |
| 3 | Fire the first portal to the wall next to your other portal. | |
| 4 | Go up the stairs to the second part of the room. | |
| 5 | Put your portal you used last to the other end of the corridor. | Shoot both of your portals to the panels next to the stairs. |
| 6 | Walk to checkpoint at the other end of the corridor. Proceed to the next room. | |
| 7 | Look down from the ledge. Fire a portal on wall on the left where the Light Bridge ends. Put the other portal to the wall on the right and walk along the Light Bridge to the platform. | Look upwards and shoot your portal on the wall where the vertically aligned Light Bridge ends. |
| 8 | Walk along the Light Bridge to the platform and place your other portal to the wallpanels next to you. The portal must be placed as close to the right as possible. | |
| 9 | Put your portal on the wallpanels on the right. Don't shoot the portal too close to the portal your partner has placed. Go along the Light Bridge to the next platform in the center of the room. Stand as close to the Switch as possible. | |
| 10 | Walk to the platform and stand under the Edgeless Safety Cube dispenser. Shoot a portal to the wall next to the entrance. | |
| 11 | As soon as the vertical Light Bridge disappears, run towards the switch and use it. Return to your Light Bridge and go to area on the left. | |
| 12 | Wait for your partner to come back to the Light Bridge and place your portal back on the panel it used to be. Find the Safety Cube and take it to the receptacle. Place one of your portals next to the entrance. | |
| 13 | Proceed to the disassembly area. | |
Video walkthrough
-To do-
Related achievements
|
|


