Portal 2 Chapter 3 Test Chamber 16: Difference between revisions
Jump to navigation
Jump to search


Moussekateer (talk | contribs) (Created page with "{{stub}} {{Test Chamber Infobox | title = Chapter 3 - Test Chamber 16 | map = sp_a2_laser_vs_turret.bsp | number = 16 | total = 22 | screenshot = ...") |
Moussekateer (talk | contribs) No edit summary |
||
| Line 22: | Line 22: | ||
== Hazards == | == Hazards == | ||
*[[Thermal Discouragement Beam]] | |||
*[[Turrets]] | *[[Turrets]] | ||
| Line 28: | Line 29: | ||
== Video walkthrough == | == Video walkthrough == | ||
<!--{{youtube||width=640}}--> | <!--{{youtube||width=640}}--> | ||
== Notes == | |||
* If the player destroys the Turret sitting behind the grating as they enter, using the Thermal Discouragement Beam, they can find an alcove behind from which they can observe 4 Turrets and a fat(?) Turret practising for the [[Turret Opera]]. | |||
{{TestChambersNav}} | {{TestChambersNav}} | ||
Revision as of 02:37, 5 May 2011
 | “I can't get over how small you are!” This article is a stub. As such, it is not complete. You can help Portal wiki by expanding it. |
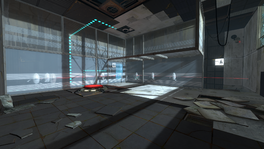
Chapter 3 - Test Chamber 16
sp_a2_laser_vs_turret.bsp

Hazards
Walkthrough
Video walkthrough
Notes
- If the player destroys the Turret sitting behind the grating as they enter, using the Thermal Discouragement Beam, they can find an alcove behind from which they can observe 4 Turrets and a fat(?) Turret practising for the Turret Opera.