Portal 2 Chapter 2 Test Chamber 1: Difference between revisions
Jump to navigation
Jump to search


Moussekateer (talk | contribs) |
Moussekateer (talk | contribs) mNo edit summary |
||
| Line 15: | Line 15: | ||
| icon9 = laser hazard | | icon9 = laser hazard | ||
| icon10 = dirty water | | icon10 = dirty water | ||
| next = Portal 2 Chapter 2 Test Chamber | | next = Portal 2 Chapter 2 Test Chamber 2 | ||
}} | }} | ||
| Line 27: | Line 27: | ||
== Video walkthrough == | == Video walkthrough == | ||
{{ | {{walkthrough}} | ||
== Related achievements == | == Related achievements == | ||
Revision as of 19:10, 30 May 2011
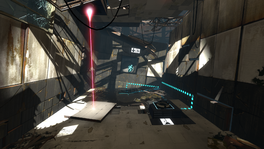
Chapter 2 - Test Chamber 01
sp_a2_laser_intro.bsp

This chamber introduces the Thermal Discouragement Beam to the player.
Hazards
Walkthrough
Proceed to the Victory Lift. Whilst standing on it, shoot a portal on the floor where the Thermal Discouragement Beam makes contact and place the other portal on the ceiling above the receptacle. The Victory Lift will proceed to rise up, from which you can reach the exit door.
Video walkthrough
Related achievements
 |
Undiscouraged Complete the first Thermal Discouragement Beam test |