Portal 2 Chapter 1 Test Chamber 2: Difference between revisions
Jump to navigation
Jump to search


Moussekateer (talk | contribs) mNo edit summary |
Moussekateer (talk | contribs) No edit summary |
||
| Line 39: | Line 39: | ||
== Gallery == | == Gallery == | ||
{{Gallery | |||
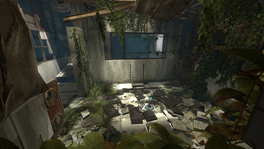
File:Portal 2 Chapter 1 portal gun.png|Deteriorated Test Chamber previously holding the Handheld Portal Device. | |width=192 | ||
File:Portal Test Chamber 02.png|The Test Chamber in [[Portal]]. | |height=108 | ||
File:Portal 2 Chapter 1 fall.png|The tunnel beneath the Test Chamber. | |lines=3 | ||
File:Portal 2 Chapter 1 mural room.png|The room containing the Handheld Portal Device surrounded by [[Rattmann]] murals. | |File:Portal 2 Chapter 1 portal gun.png|alt1=Deteriorated Test Chamber previously holding the Handheld Portal Device|Deteriorated Test Chamber previously holding the Handheld Portal Device. | ||
File:Portal 2 Chapter 1 mural room 2.png|Another view of the murals. | |File:Portal Test Chamber 02.png|alt2=The Test Chamber in Portal|The Test Chamber in [[Portal]]. | ||
File:Portal 2 Chapter 1 computer corridor.png|Computer room. | |File:Portal 2 Chapter 1 fall.png|alt3=The tunnel beneath the Test Chamber|The tunnel beneath the Test Chamber. | ||
File:Portal 2 Chapter 1 deteriorated corridor.png|Deteriorated corridor. | |File:Portal 2 Chapter 1 mural room.png|alt4=The room containing the Handheld Portal Device surrounded by Rattmann murals|The room containing the Handheld Portal Device surrounded by [[Rattmann]] murals. | ||
|File:Portal 2 Chapter 1 mural room 2.png|alt5=Another view of the murals|Another view of the murals. | |||
|File:Portal 2 Chapter 1 computer corridor.png|alt6=Computer room|Computer room. | |||
|File:Portal 2 Chapter 1 deteriorated corridor.png|alt7=Deteriorated corridor|Deteriorated corridor. | |||
}} | |||
{{TestChambersNav}} | {{TestChambersNav}} | ||
[[Category:Portal 2 chambers]] | [[Category:Portal 2 chambers]] | ||
Revision as of 21:36, 31 May 2011
 | “I can't get over how small you are!” This article is a stub. As such, it is not complete. You can help Portal wiki by expanding it. |
Chapter 1 - Test Chamber 02
sp_a1_intro3.bsp

This chamber is the third level of the game, it grants the player the ability to use the single-portal version of the Handheld Portal Device, allowing them to create blue portals of their own.
Hazards
Walkthrough
- Proceed through the door and down the steps into the central area where the pedestal is located.
- After you have landed, walk up the spiral panel arrangement to obtain the Handheld Portal Device.
- Create a portal using the primary fire key on one of the surrounding walls and walk through it, then walk up the ramp to the right.
- Continue walking through various rooms until a ledge is reached. Jump off of this ledge and observe the orange portal to the left.
- Create a portal on one of the surrounding walls, walk through it and observe the door to the left.
- Fire a portal at one of the walls on the same platform as the door; walk back through the orange portal and then through the door and into the chamberlock.
Video Walkthrough
Gallery
|


