Portal 2 Chapter 3 Test Chamber 11: Difference between revisions
Jump to navigation
Jump to search
m It's a gooey walkthrough. |
No edit summary |
||
| (18 intermediate revisions by 10 users not shown) | |||
| Line 2: | Line 2: | ||
{{Test Chamber Infobox | {{Test Chamber Infobox | ||
| title = Chapter 3 | | title = Portal 2 Chapter 3 Test Chamber 11 | ||
| valve-title= Bridge Intro | |||
| map = sp_a2_bridge_intro.bsp | | map = sp_a2_bridge_intro.bsp | ||
| dirty = 1 | |||
| number = 11 | | number = 11 | ||
| total = 22 | | total = 22 | ||
| Line 21: | Line 23: | ||
}} | }} | ||
This is the | This is the twentieth level of the game, and is set within a dilapidated Test Chamber. This level introduces the player to the [[Hard Light Bridge]], and the way in which it can be used to reach otherwise inaccessible areas, with the use of [[Portals]]. The Test Chamber also includes [[Goo]] as its primary environmental hazard, as well as a Rat Man [[Den]]. {{Spoiler text|[[Wheatley]] also makes a brief appearance in this level.}} | ||
== Hazards == | == Contents == | ||
=== Mechanics === | |||
* [[Weighted Storage Cube]] | |||
* [[Heavy Duty Super-Colliding Super Button]] | |||
* [[Vital Apparatus Vent]] | |||
* [[Hard Light Bridge]] | |||
* [[Pedestal Button]] | |||
* [[Panels]] | |||
* Light Strip (blue, pink, white) | |||
* Grating | |||
=== Characters === | |||
* [[Chell]] | |||
* [[GLaDOS]] | |||
* [[Wheatley]] | |||
* [[Prima Donna Turret]] | |||
=== Hazards === | |||
*[[Goo]] | *[[Goo]] | ||
=== Locations === | |||
* ''Aperture Science Enrichment Center'' | |||
* ''Test Chamber 11 (GLaDOS)'' | |||
== Walkthrough == | == Walkthrough == | ||
| Line 65: | Line 89: | ||
== Notes == | == Notes == | ||
* Wheatley makes a quick appearance in the wall in the Rat Man den. | * {{Spoiler|Wheatley makes a quick appearance in the wall in the Rat Man den.}} | ||
* {{Spoiler|A Prima Donna turret makes an appearance in the elevator.}} | |||
{{TestChambersNav}} | {{TestChambersNav}} | ||
[[Category:Portal_2_chambers]] | |||
Latest revision as of 19:12, 19 September 2022
 | “I can't get over how small you are!” This article is a stub. As such, it is not complete. You can help Portal wiki by expanding it. |
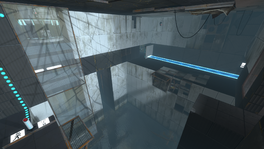
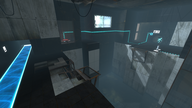
This is the twentieth level of the game, and is set within a dilapidated Test Chamber. This level introduces the player to the Hard Light Bridge, and the way in which it can be used to reach otherwise inaccessible areas, with the use of Portals. The Test Chamber also includes Goo as its primary environmental hazard, as well as a Rat Man Den. Wheatley also makes a brief appearance in this level.
Contents
Mechanics
- Weighted Storage Cube
- Heavy Duty Super-Colliding Super Button
- Vital Apparatus Vent
- Hard Light Bridge
- Pedestal Button
- Panels
- Light Strip (blue, pink, white)
- Grating
Characters
Hazards
Locations
- Aperture Science Enrichment Center
- Test Chamber 11 (GLaDOS)
Walkthrough
- Walk to the Hard Light Bridge and fire a portal at the end of the wall. Then go at the end of the Bridge.
- Turn to the left and shoot a portal on the wall next to the exit.
- Either go through the portal or walk along the Bridge to the Switch and then press it.
- Go to the other side again and then place the same portal on the wall facing the small gap.
- Either go through the portal or jump on to the Bridge and walk into the gap.
- Look to the left and fire the same portal on the wall facing you.
- Walk to the wall and then place the same portal on the wall on the right facing the falling Weighted Storage Cubes.
- Go and catch one of the Storage Cubes and then go through the portal.
- Put the Storage Cube down and place the same portal on the wall opposite of the button.
- Pick up the Storage Cube and go along the Bridge. Then place it on the button.
- Place the same portal on one of the the wallpanels above the Goo and jump on the Bridge.
- Go through the portal and shoot the same portal next to the exit.
- Either go through the portal or walk over the Bridge and then go in the Chamberlock.
Video walkthrough
Related achievements
 |
Bridge Over Troubling Water Complete the first Hard Light Bridge test |
Music
Main article: Portal 2 soundtrack
Hard Sunshine by Aperture Science Psychoacoustics Laboratory [2:48] | ![]() Download |
Download | ![]() Play
Play
Gallery
|
Notes
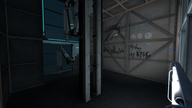
- Wheatley makes a quick appearance in the wall in the Rat Man den.
- A Prima Donna turret makes an appearance in the elevator.


