Portal Test Chamber 04: Difference between revisions
Jump to navigation
Jump to search


mNo edit summary |
mNo edit summary |
||
| Line 44: | Line 44: | ||
|File:Portal TC 04 - Beta 01.jpg|Pre-release Test Chamber 04 | |File:Portal TC 04 - Beta 01.jpg|Pre-release Test Chamber 04 | ||
|File:Portal TC 04 - Beta 02.jpg|Ditto | |File:Portal TC 04 - Beta 02.jpg|Ditto | ||
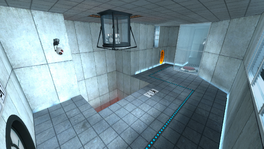
|File:Portal chamber04 01.png|View from the entrance | |File:Portal chamber04 01.png|View from the entrance | ||
|File:Portal chamber04 02.png|Overview | |File:Portal chamber04 02.png|Overview | ||
}} | }} | ||
{{TestChambersNav}} | {{TestChambersNav}} | ||
[[Category:Portal chambers]] | [[Category:Portal chambers]] | ||
Revision as of 19:39, 18 August 2013
 | “I can't get over how small you are!” This article is a stub. As such, it is not complete. You can help Portal wiki by expanding it. |
Test Chamber 04
testchmb_a_02.bsp

This Test Chamber is the fifth level of the game, and combines the basics of portal placement and the use of the Weighted Storage Cube.
Hazards
Walkthrough
- Approach the cube dispenser to activate it.
- Place a portal underneath the Weighted Storage Cube in the pit.
- Collect the cube and place it on the button.
- Proceed to the Chamberlock.
Video walkthrough
Gallery
|


