Portal 2 Chapter 4 Test Chamber 21 (Escape): Difference between revisions
No edit summary |
mNo edit summary |
||
| (38 intermediate revisions by 5 users not shown) | |||
| Line 1: | Line 1: | ||
{{stub}} | {{stub}} | ||
{{DISPLAYTITLE:Portal 2 Chapter 4 Test Chambers 21 & 22 (Escape)}} | |||
{{Test Chamber Infobox | {{Test Chamber Infobox | ||
| title = Portal 2 Chapter 4 Test Chamber 21 | | title = Portal 2 Chapter 4 Test Chamber 21 | ||
| valve-title= | | valve-title= Jailbreak | ||
| map = sp_a2_bts1.bsp | | map = sp_a2_bts1.bsp | ||
| number = 21 | | number = 21 | ||
| Line 21: | Line 21: | ||
}} | }} | ||
This is the thirtieth level of the game, and the final | This is the thirtieth level(s) of the game, and the final parts of Chapter 4. This level is set within two Test Chambers ''(one being a test chamber and one being a maintenance area)'' and the maintenance areas of the [[Aperture Science]] facility. This level advances the central plot, and does not contain any significant [[Portals|Portal]]-related challenges. | ||
{{clr}} | {{clr}} | ||
| Line 31: | Line 31: | ||
| total = 22 | | total = 22 | ||
| screenshot = Portal 2 Chapter 4 Escape.png | | screenshot = Portal 2 Chapter 4 Escape.png | ||
| icon1 = cube dispenser | |||
| icon2 = cube button | |||
| icon3 = cube hazard | |||
| icon4 = player button | |||
| icon5 = water hazard | |||
| icon6 = fling enter | |||
| icon7 = fling exit | |||
| icon8 = turret hazard on | |||
| icon9 = dirty water | |||
| icon10 = crusher hazard on | |||
| next = Portal 2 Chapter 5 Turret Manufacturing | | next = Portal 2 Chapter 5 Turret Manufacturing | ||
}} | }} | ||
| Line 43: | Line 53: | ||
* [[Pedestal Button]] | * [[Pedestal Button]] | ||
* [[Vital Apparatus Vent]] | * [[Vital Apparatus Vent]] | ||
* Light Strip (blue, pink, white, behind-the-scenes) | * Light Strip ''(blue, pink, white, behind-the-scenes)'' | ||
* Catwalk | |||
* Chamberlock ''(test-chamber, behind-the-scenes)'' | |||
=== Characters === | === Characters === | ||
| Line 52: | Line 64: | ||
=== Objective === | === Objective === | ||
* Escape GLaDOS' Test Shaft (Test Chamber 21) | * Escape GLaDOS' Test Shaft (Test Chamber 21) | ||
* Complete GLaDOS' Test Shaft (Test Chamber 21 + 22) (not the fake chamber 22, real chamber 22 is in the walkthrough) | |||
=== Hazards === | === Hazards === | ||
*[[Goo]] | *[[Goo]] | ||
*[[Turrets]] | *[[Turrets]] | ||
*Neurotoxin | *Neurotoxin | ||
* [[Crushers]] | |||
=== Locations === | |||
* ''Aperture Science Enrichment Center'' | |||
* ''Test Chamber 21 (GLaDOS)'' | |||
* ''Sector 37'' | |||
* ''Sector 48 (Test Chamber 22)'' | |||
* ''Turret Manufacturing Chamberlock Entrance'' | |||
* ''Facility'' | |||
{{Spoiler|block=yes| | {{Spoiler|block=yes| | ||
| Line 67: | Line 89: | ||
*Use the portal again to proceed to the chamber lock. | *Use the portal again to proceed to the chamber lock. | ||
=== Actual Course of Action === | === Actual Course of Action === | ||
==== Escaping (Part 1) ==== | ==== Escaping (Part 1) ==== | ||
*Proceed through the intended chamber solution (above) until the lights shut off. | |||
*Wait for [[Wheatley]] to open the wall and run to the Maintenance area. | *Wait for [[Wheatley]] to open the wall and run to the Maintenance area. | ||
*Run to the left and continue forwards. | *Run to the left and continue forwards. | ||
| Line 76: | Line 100: | ||
*Use the Bridge and run away from the Chamber until the Bridge disappears. | *Use the Bridge and run away from the Chamber until the Bridge disappears. | ||
*Turn to the opposite direction and continue running. | *Turn to the opposite direction and continue running. | ||
==== Escaping (Part 2) ==== | ==== Escaping (Part 2) ==== | ||
*Jump from the catwalk to the area between chambers and run forward until you get to the wall. | *Jump from the catwalk to the area between chambers and run forward until you get to the wall. | ||
| Line 83: | Line 108: | ||
*Open a portal on the wall near the third turret. Shoot the other portal behind the panels where the third turret is. Go through the portal. | *Open a portal on the wall near the third turret. Shoot the other portal behind the panels where the third turret is. Go through the portal. | ||
*Run to the right and follow Wheatley until a turret is revealed on the left. | *Run to the right and follow Wheatley until a turret is revealed on the left. | ||
*Get rid of the turret by using a portal and continue following Wheatley. Enter the elevator at the end of the catwalk. | *Get rid of the turret by using a portal and continue following Wheatley. Enter the elevator at the end of the catwalk. | ||
*Wait for the elevator to stop and go through the door. | *Wait for the elevator to stop and go through the door. | ||
}} | }} | ||
| Line 97: | Line 122: | ||
== Trivia == | == Trivia == | ||
*{{Spoiler|If you take too long to escape the test chamber, [[GLaDOS]] will fill the room with neurotoxin.}} | *{{Spoiler|If you take too long to escape the test chamber, [[GLaDOS]] will fill the room with neurotoxin.}} | ||
*{{Spoiler|If you fall for GLaDOS's attempt to trick you back into testing, she traps you and fills the | *{{Spoiler|If you fall for GLaDOS's attempt to trick you back into testing, she traps you and fills the fake Test Chamber 22 with neurotoxin.}} | ||
*{{Spoiler|Halfway through Chamber 22, there's an unknown chamber with a [[Turret]] inside it.}} | |||
== Music == | == Music == | ||
| Line 107: | Line 132: | ||
|width=192 | |width=192 | ||
|height=108 | |height=108 | ||
|lines=2 | |lines=2 | ||
|File:BTSConcept.png|Behind the scenes Concept. | |File:BTSConcept.png|Behind the scenes Concept. | ||
| Line 113: | Line 137: | ||
|File:Portal 2 Chapter 4 Test Chamber 21 escape.png|alt2=The escape begins|The escape begins. | |File:Portal 2 Chapter 4 Test Chamber 21 escape.png|alt2=The escape begins|The escape begins. | ||
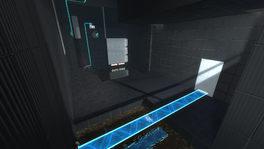
|File:Portal 2 Chapter 4 Test Chamber 21 temptation.png|alt3=GLaDOS attempts to tempt the player back to testing|GLaDOS attempts to tempt the player back to testing. | |File:Portal 2 Chapter 4 Test Chamber 21 temptation.png|alt3=GLaDOS attempts to tempt the player back to testing|GLaDOS attempts to tempt the player back to testing. | ||
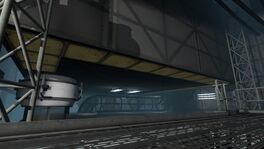
|File:Portal 2 Chapter 4 Test Chamber Escape test sectors.png| | |File:Portal 2 Chapter 4 Test Chamber Escape test sectors.png|alt3=Test sectors to the Turret Creation Line|Test sectors to the Turret Creation Line. | ||
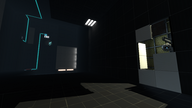
|File:Portal 2 Chapter 4 Test Chamber 21 section 37.png|alt5=First area of escaping|First area of escaping. | |File:Portal 2 Chapter 4 Test Chamber 21 section 37.png|alt5=First area of escaping|First area of escaping. | ||
}} | }} | ||
== Transcript == | == Transcript == | ||
<code>{{Spoiler| | <code>{{Spoiler| | ||
GLaDOS: I've got a surprise for you after this next test. <br> | |||
GLaDOS: I've got a surprise for you after this next test. Not a fake, tragic surprise like last time. | GLaDOS: Not a fake, tragic surprise like last time... ... a ''REAL'' surprise with tragic consequences. <br> | ||
GLaDOS: And real confetti this time. <br> | |||
GLaDOS: | GLaDOS: The good stuff - our last bag. <br> | ||
GLaDOS: Part of me's going to miss it, but at the end of the day, it was JUST taking up space. <br> | |||
[LIGHTS TURN OFF] <br> | [LIGHTS TURN OFF] <br> | ||
GLaDOS: What's going on? | GLaDOS: What's going on? Who turned off the lights? <br> | ||
Wheatley: Hey, [[Chell|buddy]]! <br> | |||
Wheatley: I'm speakin' in an accent that is beyond her range of hearin'. I know I'm early, but we have--- <br> | |||
Wheatley: Hey, [[Chell|buddy]]! <br> | GLaDOS: Look, [[Wheatley|metal ball]] - I CAN hear you. <br> | ||
Wheatley: I'm | Wheatley: Run - I don't need to do the voice - RUN... <br> | ||
GLaDOS: Look, [[Wheatley|metal ball]] - I CAN hear you. | |||
Wheatley: Run | |||
Wheatley: RUN!!! <br> | Wheatley: RUN!!! <br> | ||
Wheatley: Come on, come on! <br> | Wheatley: Come on, come on! <br> | ||
Wheatley: | Wheatley: RUN! Come on! I'm closin' the doors! <br> | ||
Wheatley: | Wheatley: OK, quick recap: we are escaping! That's what's happening now: we're escaping. So you're doing great. Just keep running! <br> | ||
Wheatley: Err, quick word about the future plans that I've got in store. <br> | |||
Wheatley: We're gonna shut down her turret production line, alright, turn off her neurotoxin, and then confront her. <br> | |||
Wheatley: Again though - for the moment - RUN! <br> | |||
Wheatley: This way, this way. <br> | |||
GLaDOS: The irony is you're almost at the last test. <br> | |||
GLaDOS: Here it is. Why don't you just do it? Trust me, it's the easiest way out than whatever asinine plan your friend came up with. <br> | |||
Wheatley: Whaaa? How stupid does she think we are? <br> | |||
Wheatley: Oof. <br> | |||
Wheatley: This way, this way. <br> | |||
Wheatley: Come on, come on! <br> | |||
Wheatley: WAARGH! <br> | |||
Wheatley: What's going on in there?! <br> | |||
Wheatley: Can you--- can you get out?! <br> | |||
Wheatley: We HAVE to get you out of there! <br> | |||
Turret: (Who are you?!) <br> | |||
Wheatley: Try to make your way back out here! <br> | |||
Turret: (Malfunctioning!) <br> | |||
Turret: (Shutting down.) <br> | |||
Wheatley: I heard gunfire! A bit late for this, but look out for gunfire! Probably doesn't help at this point, but I have at least tried. <br> | |||
Turret: (Awww!) <br> | |||
Turret: (Why?) <br> | |||
Turret: (WHEE! OW, OW, OW, OW, OW!) <br> | |||
Turret: (I don't blame you.) <br> | |||
Wheatley: You're OK! Great, come on! <br> | |||
Wheatley: This way, this way. <br> | |||
Wheatley: Turrets! <br> | |||
Wheatley: Go, go, go, go. <br> | |||
Wheatley: There's the exit! We're almost out of here. <br> | |||
[TESTCHAMBER MOVEMENT] <br> | |||
Wheatley: She's bringing the whole place down. HURRY! HURRY! This way. <br> | |||
Wheatley: GET IN THE LIFT! GET IN THE LIFT! <br> | |||
Wheatley: We made it, made it, made it, made it. <br> | |||
Wheatley: I'll meet you on the other side! <br> | |||
}}</code> | }}</code> | ||
{{TestChambersNav}} | {{TestChambersNav}} | ||
[[Category:Portal_2_chambers]] | [[Category:Portal_2_chambers]] | ||
Latest revision as of 01:44, 15 December 2023
 | “I can't get over how small you are!” This article is a stub. As such, it is not complete. You can help Portal wiki by expanding it. |
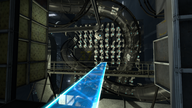
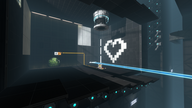
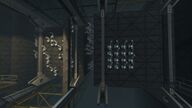
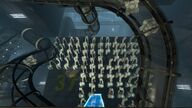
This is the thirtieth level(s) of the game, and the final parts of Chapter 4. This level is set within two Test Chambers (one being a test chamber and one being a maintenance area) and the maintenance areas of the Aperture Science facility. This level advances the central plot, and does not contain any significant Portal-related challenges.
Contents
Mechanics
- Heavy Duty Super-Colliding Super Button
- Weighted Storage Cube
- Hard Light Bridge
- Pedestal Button
- Vital Apparatus Vent
- Light Strip (blue, pink, white, behind-the-scenes)
- Catwalk
- Chamberlock (test-chamber, behind-the-scenes)
Characters
Objective
- Escape GLaDOS' Test Shaft (Test Chamber 21)
- Complete GLaDOS' Test Shaft (Test Chamber 21 + 22) (not the fake chamber 22, real chamber 22 is in the walkthrough)
Hazards
Locations
- Aperture Science Enrichment Center
- Test Chamber 21 (GLaDOS)
- Sector 37
- Sector 48 (Test Chamber 22)
- Turret Manufacturing Chamberlock Entrance
- Facility
Walkthrough
Intended Chamber Solution
- Place a portal on the wall where the Hard Light Bridge ends and the other one on the left side of the exit.
- Go through the portal and push the Switch.
- Continue to walk to the cube.
- Put the cube on the button.
- Use the portal again to proceed to the chamber lock.
Actual Course of Action
Escaping (Part 1)
- Proceed through the intended chamber solution (above) until the lights shut off.
- Wait for Wheatley to open the wall and run to the Maintenance area.
- Run to the left and continue forwards.
- Turn right on just before the catwalk ends.
- Turn left and jump down. Continue by to the right up the stairs.
- Run forward as much as you can. Turn left and continue running.
- Jump down on the left side.
- Use the Bridge and run away from the Chamber until the Bridge disappears.
- Turn to the opposite direction and continue running.
Escaping (Part 2)
- Jump from the catwalk to the area between chambers and run forward until you get to the wall.
- Pick up the turret and knock over the turret behind it.
- Turn left and go behind the tube and knock over the third turret.
- Let go off the turret (make sure it gets knocked over).
- Open a portal on the wall near the third turret. Shoot the other portal behind the panels where the third turret is. Go through the portal.
- Run to the right and follow Wheatley until a turret is revealed on the left.
- Get rid of the turret by using a portal and continue following Wheatley. Enter the elevator at the end of the catwalk.
- Wait for the elevator to stop and go through the door.
Video walkthrough
Download demo files: ![]() Part 1 –
Part 1 – ![]() Part 2
Part 2
Related achievements
| SaBOTour Make a break for it |
| Good Listener Take GLaDOS' escape advice |
Trivia
- If you take too long to escape the test chamber, GLaDOS will fill the room with neurotoxin.
- If you fall for GLaDOS's attempt to trick you back into testing, she traps you and fills the fake Test Chamber 22 with neurotoxin.
- Halfway through Chamber 22, there's an unknown chamber with a Turret inside it.
Music
An Accent Beyond by Aperture Science Psychoacoustics Laboratory [2:58] | ![]() Download |
Download | ![]() Play
Play
Gallery
|
Transcript
GLaDOS: I've got a surprise for you after this next test.

GLaDOS: Not a fake, tragic surprise like last time... ... a REAL surprise with tragic consequences.

GLaDOS: And real confetti this time.

GLaDOS: The good stuff - our last bag.

GLaDOS: Part of me's going to miss it, but at the end of the day, it was JUST taking up space.

[LIGHTS TURN OFF]

GLaDOS: What's going on? Who turned off the lights?

Wheatley: Hey, buddy!

Wheatley: I'm speakin' in an accent that is beyond her range of hearin'. I know I'm early, but we have---

GLaDOS: Look, metal ball - I CAN hear you.

Wheatley: Run - I don't need to do the voice - RUN...

Wheatley: RUN!!!

Wheatley: Come on, come on!

Wheatley: RUN! Come on! I'm closin' the doors!

Wheatley: OK, quick recap: we are escaping! That's what's happening now: we're escaping. So you're doing great. Just keep running!

Wheatley: Err, quick word about the future plans that I've got in store.

Wheatley: We're gonna shut down her turret production line, alright, turn off her neurotoxin, and then confront her.

Wheatley: Again though - for the moment - RUN!

Wheatley: This way, this way.

GLaDOS: The irony is you're almost at the last test.

GLaDOS: Here it is. Why don't you just do it? Trust me, it's the easiest way out than whatever asinine plan your friend came up with.

Wheatley: Whaaa? How stupid does she think we are?

Wheatley: Oof.

Wheatley: This way, this way.

Wheatley: Come on, come on!

Wheatley: WAARGH!

Wheatley: What's going on in there?!

Wheatley: Can you--- can you get out?!

Wheatley: We HAVE to get you out of there!

Turret: (Who are you?!)

Wheatley: Try to make your way back out here!

Turret: (Malfunctioning!)

Turret: (Shutting down.)

Wheatley: I heard gunfire! A bit late for this, but look out for gunfire! Probably doesn't help at this point, but I have at least tried.

Turret: (Awww!)

Turret: (Why?)

Turret: (WHEE! OW, OW, OW, OW, OW!)

Turret: (I don't blame you.)

Wheatley: You're OK! Great, come on!

Wheatley: This way, this way.

Wheatley: Turrets!

Wheatley: Go, go, go, go.

Wheatley: There's the exit! We're almost out of here.

[TESTCHAMBER MOVEMENT]

Wheatley: She's bringing the whole place down. HURRY! HURRY! This way.

Wheatley: GET IN THE LIFT! GET IN THE LIFT!

Wheatley: We made it, made it, made it, made it.

Wheatley: I'll meet you on the other side!


