Portal 2 Chapter 3 Test Chamber 10: Difference between revisions
Jump to navigation
Jump to search


No edit summary |
Moussekateer (talk | contribs) No edit summary |
||
| Line 17: | Line 17: | ||
| icon9 = fling exit on | | icon9 = fling exit on | ||
| icon10 = dirty water | | icon10 = dirty water | ||
| previous = Portal 2 Chapter 3 Test Chamber | | previous = Portal 2 Chapter 3 Test Chamber 9 | ||
| next = Portal 2 Chapter 3 Test Chamber 11 | | next = Portal 2 Chapter 3 Test Chamber 11 | ||
}} | }} | ||
| Line 27: | Line 27: | ||
== Video walkthrough == | == Video walkthrough == | ||
{{walkthrough}} | |||
== Gallery == | |||
{{Gallery | |||
|width=192 | |||
|height=108 | |||
|lines=2 | |||
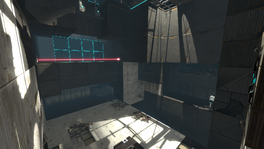
|File:Portal 2 Chapter 3 Test Chamber 10 overview.png|alt1=An overview of the Test Chamber|An overview of the Test Chamber. | |||
|File:Portal 2 Chapter 3 Test Chamber 10 overview 2.png|alt2=Another view|Another view. | |||
|File:Portal 2 Chapter 3 Test Chamber 10 overview 3.png|alt2=Another view|Another view. | |||
}} | |||
== Related achievements == | == Related achievements == | ||
Revision as of 23:51, 1 June 2011
 | “I can't get over how small you are!” This article is a stub. As such, it is not complete. You can help Portal wiki by expanding it. |
Chapter 3 - Test Chamber 10
sp_a2_ricochet.bsp

Hazards
Walkthrough
Video walkthrough
Gallery
|


Related achievements
 |
Overclocker Complete Test Chamber 10 in 70 seconds |