This chamber introduces the player to advanced manoeuvres using [[Aerial Faith Plate|Aerial Faith Plates]].
== Hazards ==
== Hazards ==
Line 25:
Line 26:
== Walkthrough ==
== Walkthrough ==
{{Spoiler|block=yes|
*Walk towards the left of the chamber, then look back to the right to spot two angled portalable platforms. Place a portal on each platform.
*Walk back to the entrance of the chamber and use the Faith Plate there.
*Once at the destination, press the [[Switch|switch]] to release garbage onto the initial Faith Plate. When instructed, press the button again to release a [[Weighted Storage Cube]]. While facing the direction of the switch, note the [[Heavy Duty Super-Colliding Super Button]] to the bottom left.
*When the Cube arrives, place it on the Button by placing a portal above the Button, and then dropping the Cube through the portal.
*The exit door will now open, proceed into the [[Chamberlock]].
}}
== Video walkthrough ==
== Video walkthrough ==
{{walkthrough}}
{{walkthrough}}
Line 44:
Line 51:
|lines=3
|lines=3
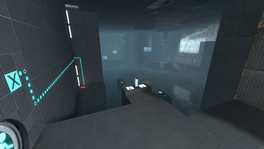
|File:Portal 2 Chapter 2 Test Chamber 6 overview.png|alt1=An overview of the Test Chamber|An overview of the Test Chamber.
|File:Portal 2 Chapter 2 Test Chamber 6 overview.png|alt1=An overview of the Test Chamber|An overview of the Test Chamber.
|File:Portal 2 Chapter 2 Test Chamber 6 rat man den.png|alt2=Rat Man den found in the Test Chamber, where [[Hoopy the Hoop]] can be seen|[[Doug Rattmann|Rat Man]] den found in the Test Chamber, where [[Hoopy the Hoop]] can be seen.
|File:Portal 2 Chapter 2 Test Chamber 6 rat man den.png|alt2=Rat Man den found in the Test Chamber, where [[Hoopy the Hoop]] can be seen|{{Spoiler|[[Doug Rattmann|Rat Man]] den found in the Test Chamber, where [[Hoopy the Hoop]] can be seen.}}|spoiler2=yes
}}
}}
{{TestChambersNav}}
{{TestChambersNav}}
[[Category:Portal 2 chambers]]
[[Category:Portal 2 chambers]]
Revision as of 19:14, 4 July 2011
“I can't get over how small you are!” This article is a stub. As such, it is not complete. You can help Portal wiki by expanding it.
Chapter 2 - Test Chamber 06
sp_a2_trust_fling.bsp
This chamber introduces the player to advanced manoeuvres using Aerial Faith Plates.
Walk towards the left of the chamber, then look back to the right to spot two angled portalable platforms. Place a portal on each platform.
Walk back to the entrance of the chamber and use the Faith Plate there.
Once at the destination, press the switch to release garbage onto the initial Faith Plate. When instructed, press the button again to release a Weighted Storage Cube. While facing the direction of the switch, note the Heavy Duty Super-Colliding Super Button to the bottom left.
When the Cube arrives, place it on the Button by placing a portal above the Button, and then dropping the Cube through the portal.
The exit door will now open, proceed into the Chamberlock.