Portal 2 Chapter 2 Test Chamber 3: Difference between revisions
Jump to navigation
Jump to search
m Added description, but there ain't much to say here. |
m +fixes |
||
| Line 27: | Line 27: | ||
== Walkthrough == | == Walkthrough == | ||
Upon entering the chamber look up, | {{Spoiler|block=yes| | ||
*Upon entering the chamber look up, a [[Discouragement Redirection Cube]] is visible, get to it using portals. | |||
*Grab the cube and jump to the platform in the middle of a chamber. Put the cube on the platform such that it redirects a lower [[Thermal Discouragement Beam]] to the receptacle. Then go back to the original location of the Discouragement Redirection Cube, look up to find another receptacle on the ceiling. | |||
*Place a portal on the wall where the upper Thermal Discouragement Beam makes contact and place another portal under the second receptacle. | |||
*After both beams are redirected to the receptacles the exit doors will open, proceed to the [[Chamberlock]]. | |||
}} | |||
== Video walkthrough == | == Video walkthrough == | ||
| Line 43: | Line 48: | ||
|height=108 | |height=108 | ||
|lines=2 | |lines=2 | ||
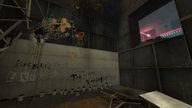
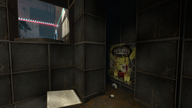
|File:Portal 2 Chapter 2 Test Chamber 3 Rat Man den.png|alt1=A Rat Man den|A [[Doug Rattmann|Rat Man]] den. | |File:Portal 2 Chapter 2 Test Chamber 3 Rat Man den.png|alt1=A Rat Man den|{{Spoiler|A [[Doug Rattmann|Rat Man]] den.}}|spoiler1=yes | ||
|File:Portal 2 Chapter 2 Test Chamber 3 Rat Man den radio.png|alt2=Radio playing Exile Vilify found in the den|Radio playing [[Portal 2 soundtrack|Exile Vilify]] found in the den. | |File:Portal 2 Chapter 2 Test Chamber 3 Rat Man den radio.png|alt2=Radio playing Exile Vilify found in the den|{{Spoiler|Radio playing [[Portal 2 soundtrack|Exile Vilify]] found in the den.}}|spoiler2=yes | ||
}} | }} | ||
{{TestChambersNav}} | {{TestChambersNav}} | ||
[[Category:Portal 2 chambers]] | [[Category:Portal 2 chambers]] | ||
Revision as of 13:09, 4 July 2011
 | “I can't get over how small you are!” This article is a stub. As such, it is not complete. You can help Portal wiki by expanding it. |
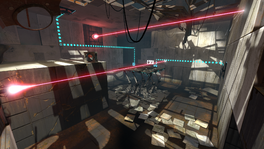
This is the thirteenth level of the game, and takes place within a dilapidated Test Chamber. This level introduces the player to multiple Thermal Discouragement Beams within a single chamber.
Hazards
Walkthrough
- Upon entering the chamber look up, a Discouragement Redirection Cube is visible, get to it using portals.
- Grab the cube and jump to the platform in the middle of a chamber. Put the cube on the platform such that it redirects a lower Thermal Discouragement Beam to the receptacle. Then go back to the original location of the Discouragement Redirection Cube, look up to find another receptacle on the ceiling.
- Place a portal on the wall where the upper Thermal Discouragement Beam makes contact and place another portal under the second receptacle.
- After both beams are redirected to the receptacles the exit doors will open, proceed to the Chamberlock.
Video walkthrough
Music
Main article: Portal 2 soundtrack
1. Exile Vilify - 4:46 by The National
Gallery
|


