Portal 2 Chapter 2 Test Chamber 1: Difference between revisions
Jump to navigation
Jump to search
No edit summary |
Cupofspiders (talk | contribs) standardiza |
||
| Line 39: | Line 39: | ||
{{Show achievement|Portal 2|Undiscouraged}} | {{Show achievement|Portal 2|Undiscouraged}} | ||
= | == Trivia == | ||
This test is the same | * This test is heavily implied to be the same as Chamber 06 from the first game, as Energy Pellet emitters and receptacles can be seen being swapped for their laser equivalents. | ||
== Gallery == | == Gallery == | ||
{{Gallery | {{Gallery | ||
Revision as of 01:22, 5 December 2021
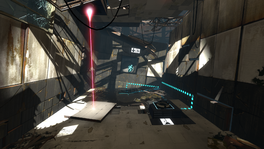
This is the tenth level of the game, and takes place within a dilapidated Test Chamber. This level introduces the Thermal Discouragement Beam, and the way in which it can be used to activate Panels and thereby grant access to inaccessible areas. This Chamber corresponds with Test Chamber 06 from the original Portal.
Hazards
Walkthrough
- Proceed to the Victory Lift.
- While standing on it, shoot a portal on the floor where the Thermal Discouragement Beam makes contact and place the other portal on the ceiling above the receptacle.
- The Victory Lift will rise, proceed to the Chamberlock.
Video walkthrough
Related achievements
 |
Undiscouraged Complete the first Thermal Discouragement Beam test |
Trivia
- This test is heavily implied to be the same as Chamber 06 from the first game, as Energy Pellet emitters and receptacles can be seen being swapped for their laser equivalents.
Gallery
|


