Portal Test Chamber 15: Difference between revisions
Jump to navigation
Jump to search
Camden12343 (talk | contribs) mNo edit summary |
|||
| (6 intermediate revisions by 4 users not shown) | |||
| Line 22: | Line 22: | ||
This [[Test Chamber]] is the sixteenth level of the game, and introduces the player to more advanced [[Flinging]] techniques. The Chamber also requires the player to utilise [[High Energy Pellet]]s and work with timed [[Switch]]es. | This [[Test Chamber]] is the sixteenth level of the game, and introduces the player to more advanced [[Flinging]] techniques. The Chamber also requires the player to utilise [[High Energy Pellet]]s and work with timed [[Switch]]es. | ||
=== Mechanics === | |||
* [[Victory Lift]] | |||
* [[Unstationary Scaffold]] | |||
* [[High Energy Pellet]] ''(launcher and catcher)'' | |||
* [[Emancipation Grill]] | |||
* [[Flinging]] | |||
* [[Pedestal Button]] | |||
== Hazards == | == Hazards == | ||
* [[High Energy Pellet]] | * [[High Energy Pellet| Getting hit by a High Energy Pellet]] | ||
* [[Goo]] | * [[Goo]] | ||
Latest revision as of 02:54, 4 July 2023
 | “I can't get over how small you are!” This article is a stub. As such, it is not complete. You can help Portal wiki by expanding it. |
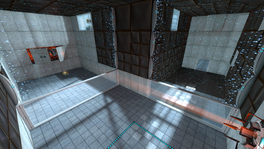
This Test Chamber is the sixteenth level of the game, and introduces the player to more advanced Flinging techniques. The Chamber also requires the player to utilise High Energy Pellets and work with timed Switches.
Mechanics
- Victory Lift
- Unstationary Scaffold
- High Energy Pellet (launcher and catcher)
- Emancipation Grill
- Flinging
- Pedestal Button
Hazards
Walkthrough
- Go stand in front of the glass and turn around. Look up and fire a portal on the extended wallpanels.
- Then look down right in front of you. You should see floortiles with a different color. Shoot a portal on the tiles.
- Go through the portal. You should then automatically fall through it for the second time. If you succeeded, you'll reach the other side of the chamber.
- Go to the second part of the chamber. Put a portal on the panels over the lift on the left.
- When the High Energy Pellet disappears, shoot the other portal on the wall from where the Pellet used to bounce off.
- Wait for the Pellet to enter the portal and then go through the Emancipation Grill to the Receptacle.
- Place a portal on the wall where the pellet is bouncing off (the wall in front of you) and the other one on the ceiling over the Receptacle.
- Wait for the pellet to hit the Receptacle and then go stand on the lift.
- Go at the end of the hallway and enter the third part of the chamber.
- Look for the extended panels above the hallway and shoot a portal on them.
- Go in the small room on the side of the chamber and up the small stairs.
- Shoot a portal on the floor below and jump through the portal.
- As soon as you have gone through, look for the place where you are about to land and quickly fire the same portal on the floor.
- You should then go through the portal and then get to the other side of the chamber.
- Shoot a portal on the extended wallpanels above the receptacle and the other one on the floor with different color of tiles and go through the portal.
- You should automatically fall through for a second time and then land on the other side of the glass.
- Put the two portals on the walls next to the angled wallpanels and wait for the Pellet to go through. The Pellet should then go in the receptacle.
- Fire a portal on the wall behind the angled wallpanels and the other one on the floor in front of the other portal.
- Go drop through the portal and shoot the same portal where you just landed.
- You should then get back to the other side of the glass.
- Go stand in front of the 'door' on the right and shoot a portal at the end of the hallway.
- Put the other portal on the wall near you. Wait for the Unstationary Scaffolding to get in front of the portal.
- Go through the portal and look at the wall on the left. Fire the portal at the end of the hallway.
- Wait for the platform to get to the start of the hallway and go stand in front of the portal.
- Wait for another platform to get in front of the portal and then go through it. Look to the right and shoot a portal over to the part of the chamber.
- Wait for the platform to get to the start of the hallway and go through the portal.
- Go stand on one of the lifts and wait for the lift to reach the top.
- Place a portal on the wall of the room and turn around. Fire the second portal in a similiar room on the other side.
- Push the Switch and run through the portal to push the other switch. Then shoot portals on the extended wall facing the receptacle and the other portal on the floor below the Pellet emitter.
- Now the Victory Lift has been lowered. Go stand on it and enter the Chamberlock.
Alternative Solutions
- In the very last room, players are able to fling themselves onto the victory lift using the altitude from either of the two lifts.
Trapping Yourself
- use the alternate solution but instead of flinging to the exit, open both doors and fling inside.
- GLaDOS will be forced to open the button door


