Portal 2 Chapter 9 Mash-up: Difference between revisions
Jump to navigation
Jump to search
No edit summary |
|||
| (28 intermediate revisions by 7 users not shown) | |||
| Line 2: | Line 2: | ||
{{Chamber infobox | {{Chamber infobox | ||
| title = Chapter 9 - | | title = Portal 2 Chapter 9 Mash-up | ||
| valve-title= Finale 1 | | valve-title= Finale 1 | ||
| map = sp_a4_finale1.bsp | | map = sp_a4_finale1.bsp | ||
| number = 17 | | number = 17 | ||
| total = 19 | | total = 19 | ||
| screenshot = Chapter | | screenshot = Portal 2 Chapter 8 Test Chamber 17.png | ||
| icon1 = cube dispenser on | | icon1 = cube dispenser on | ||
| icon2 = cube button on | | icon2 = cube button on | ||
| Line 22: | Line 22: | ||
}} | }} | ||
This is the fifty-seventh level of the game and the first part of Chapter 9. The level takes place within an [[Aperture Science]] Test Chamber and the maintenance areas of the facility, and features the [[Aerial Faith Plate]], [[Excursion Funnel]] and [[Conversion Gel]]. [[Crushers]] are present as the primary hazard in this level. | This is the fifty-seventh level of the game and the first part of Chapter 9. The level takes place within an [[Aperture Science]] decoy Test Chamber and the maintenance areas of the facility, and features the [[Aerial Faith Plate]], [[Excursion Funnel]] and [[Conversion Gel]]. [[Crushers]] are present as the primary hazard in this level. | ||
== Hazards == | == Contents == | ||
* | |||
=== Mechanics === | |||
* [[Aerial Faith Plate]] | |||
* [[Conversion Gel]] | |||
* [[Excursion Funnel]] | |||
=== Hazards === | |||
* Deadly Pits | |||
* [[Crushers]] | * [[Crushers]] | ||
=== Characters === | |||
* [[Chell]] | |||
* [[GLaDOS]] | |||
* [[Wheatley]] | |||
=== Locations === | |||
* ''Test Chamber 17 (Wheatley)'' | |||
* ''Wheatley's Trap'' | |||
* ''Aperture Science Facility'' | |||
=== Objective === | |||
* Get to Wheatley and plug GLaDOS in. | |||
== Walkthrough == | == Walkthrough == | ||
{{Spoiler|block=yes| | {{Spoiler|block=yes| | ||
*Go across the corridor to the decoy chamber. | |||
*Use the [[Aerial Faith Plate]] and wait until you get on solid ground. | *Use the [[Aerial Faith Plate]] and wait until you get on solid ground. | ||
*Fire a portal on the [[Conversion Gel]] and the other one on the wall next to the monitors. | *Fire a portal on the [[Conversion Gel]] and the other one on the wall next to the monitors. | ||
| Line 61: | Line 88: | ||
==Trivia== | ==Trivia== | ||
* When portalling the tile in the middle of the conversion gel, the game will always place the opposite colored portal onto the escape route at the same time. | * When portalling the tile in the middle of the conversion gel, the game will always place the opposite colored portal onto the escape route at the same time. This makes the escape foolproof for players who forget which portal they placed last. | ||
==Gallery== | |||
{{Gallery | |||
|width=192 | |||
|height=108 | |||
|lines=2 | |||
|File:Chapter 9 Chamber 17.jpg|alt1=Wheatley's trap|Wheatley's trap. | |||
}} | |||
{{TestChambersNav}} | {{TestChambersNav}} | ||
[[Category:Portal 2 chambers]] | [[Category:Portal 2 chambers]] | ||
Latest revision as of 03:23, 23 February 2026
 | “I can't get over how small you are!” This article is a stub. As such, it is not complete. You can help Portal wiki by expanding it. |
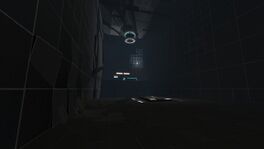
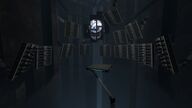
This is the fifty-seventh level of the game and the first part of Chapter 9. The level takes place within an Aperture Science decoy Test Chamber and the maintenance areas of the facility, and features the Aerial Faith Plate, Excursion Funnel and Conversion Gel. Crushers are present as the primary hazard in this level.
Contents
Mechanics
Hazards
- Deadly Pits
- Crushers
Characters
Locations
- Test Chamber 17 (Wheatley)
- Wheatley's Trap
- Aperture Science Facility
Objective
- Get to Wheatley and plug GLaDOS in.
Walkthrough
- Go across the corridor to the decoy chamber.
- Use the Aerial Faith Plate and wait until you get on solid ground.
- Fire a portal on the Conversion Gel and the other one on the wall next to the monitors.
- A drop of Conversion Gel will paint your platform. Shoot either portal under yourself to get to the catwalk. It doesn't matter which, as for instance you use a blue portal above the catwalk and then fire one underneath, the orange one will be moved over.
- Continue walking along the catwalk.
- Stop when you get to the end of the catwalk and shoot a portal on platform below the catwalk.
- Place the other portal on the wall on the right higher above.
- Jump through the portal on the platform.
- Walk along the catwalk.
- Stop when Wheatley uses the Crusher.
- Put a portal on the wall on the left to the catwalk further away.
- Go back a few steps and fire a portal on the wall and go through the portal.
- Run through the Emancipation Grill on the left.
Video walkthrough
Related achievement
 |
The Part Where He Kills You This is that part |
 |
Pit Boss Show that pit who's boss |
Music
Main article: Portal 2 soundtrack
The Part Where He Kills You by Aperture Science Psychoacoustics Laboratory [3:23] | ![]() Download |
Download | ![]() Play
Play
Fake escape
Near the start of the excursion funnel, there's a girder that looks like a possible escape from Wheatley's clutches. However, not only doesn't it lead to any portalable surface, it doesn't actually exist in the first place: Any object, player included, passes right through it.
Trivia
- When portalling the tile in the middle of the conversion gel, the game will always place the opposite colored portal onto the escape route at the same time. This makes the escape foolproof for players who forget which portal they placed last.
Gallery
|


