* This map contains one of the only "impossible" areas within the game, referenced in the developer commentary. Test chamber "75" is actually very far outside the bounds of the map.
* This map contains one of the only "impossible" areas within the game, referenced in the developer commentary. Test chamber "75" is actually very far outside the bounds of the map.
* Also as described in the developer commentary, placing a portal to avoid the "mashy spike plate" is made to be foolproof, so that if the player accidentally shoots the wrong portal, their portals are swapped to prevent falling to their doom.
* Also as described in the developer commentary, placing a portal to avoid the "mashy spike plate" is made to be foolproof, so that if the player accidentally shoots the wrong portal, their portals are swapped to prevent falling to their doom.
* The number of turrets on the Test Chamber 75 sign is 8, the same as the turrets in the room. The picture of the sign on this wiki page is actually inaccurate.
== Gallery ==
== Gallery ==
Revision as of 16:16, 18 June 2024
“I can't get over how small you are!” This article is a stub. As such, it is not complete. You can help Portal wiki by expanding it.
Put a portal at the end of the Funnel and the other one facing the door.
Jump in the Funnel and wait for a panel to appear further away.
Wait until you get to the wall and then leave the Funnel. Run along the catwalk.
Go through the door and wait for the Repulsion Gel pipe to smash the catwalk.
Jump from the small Repulsion Gel splash to the catwalk on the other side.
Fire a portal on the wall next to the catwalk without handrails and go along the catwalk until you reach the first stairs.
Look upwards and put the other portal on the ceiling. Then go through the first portal.
Stand on the button and shoot a portal below the falling Repulsion Gel.
Fire the other portal on the big wall next to the Turrets. Aim the portal so the Gel dropping through paints the Turrets. Do this to all of the Turrets. The frame in front may cause smaller blobs to splash on the platform.
Shoot a portal on the angled wall hanging from the ceiling above the Aerial Faith Plate.
Place the other portal on a surface where you can go through it.
Use the Faith Plate to get back on the catwalk and go through the door further away.
This map contains one of the only "impossible" areas within the game, referenced in the developer commentary. Test chamber "75" is actually very far outside the bounds of the map.
Also as described in the developer commentary, placing a portal to avoid the "mashy spike plate" is made to be foolproof, so that if the player accidentally shoots the wrong portal, their portals are swapped to prevent falling to their doom.
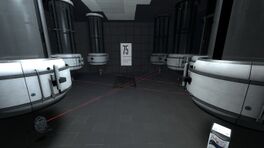
The number of turrets on the Test Chamber 75 sign is 8, the same as the turrets in the room. The picture of the sign on this wiki page is actually inaccurate.