Portal 2 Chapter 4 Test Chamber 20: Difference between revisions
→Walkthrough: Added one too. |
m This is essentially a repeat of the article opening |
||
| (17 intermediate revisions by 13 users not shown) | |||
| Line 2: | Line 2: | ||
{{Test Chamber Infobox | {{Test Chamber Infobox | ||
| title = Chapter 4 | | title = Portal 2 Chapter 4 Test Chamber 20 | ||
| valve-title= Triple Laser | |||
| map = sp_a2_triple_laser.bsp | | map = sp_a2_triple_laser.bsp | ||
| number = 20 | | number = 20 | ||
| Line 21: | Line 22: | ||
}} | }} | ||
This is the | This is the twenty-ninth level of the game, and is the first level to be set within a fully-repaired and functional [[Aperture Science]] Test Chamber. This level requires the player to combine precise [[Portals|Portal]]-placement and multiple [[Thermal Discouragement Beam]]s in order to proceed. | ||
== Hazards == | == Contents == | ||
=== Mechanics === | |||
* Laser Receptacle | |||
* [[Discouragement Redirection Cube]] | |||
* Laser Relays | |||
* Light Strip (blue, pink) | |||
=== Characters === | |||
* [[Chell]] | |||
* [[GLaDOS]] | |||
=== Objective === | |||
* Complete GLaDOS' Test Shaft (Test Chamber 20) | |||
=== Hazards === | |||
*[[Thermal Discouragement Beam]] | *[[Thermal Discouragement Beam]] | ||
=== Locations === | |||
* ''Aperture Science Enrichment Center'' | |||
* ''Test Chamber 20 (GLaDOS)'' | |||
== Walkthrough == | == Walkthrough == | ||
| Line 34: | Line 54: | ||
*Go to the [[Chamberlock]]. | *Go to the [[Chamberlock]]. | ||
}} | }} | ||
It is also possible to complete this chamber without placing any portals if you position the cubes correctly and use a cube and quickly move the cube from side to side. If you do it correctly, holding down the strafe right movement key (default D) the door will open for a split second, letting you slip inside. This is a more difficult solution to the puzzle so the basic solution is recommended. | |||
== Video walkthrough == | == Video walkthrough == | ||
| Line 51: | Line 73: | ||
{{TestChambersNav}} | {{TestChambersNav}} | ||
[[Category:Portal_2_chambers]] | |||
Latest revision as of 22:53, 19 October 2022
 | “I can't get over how small you are!” This article is a stub. As such, it is not complete. You can help Portal wiki by expanding it. |
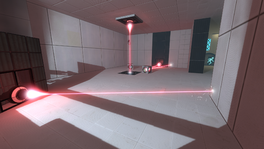
This is the twenty-ninth level of the game, and is the first level to be set within a fully-repaired and functional Aperture Science Test Chamber. This level requires the player to combine precise Portal-placement and multiple Thermal Discouragement Beams in order to proceed.
Contents
Mechanics
- Laser Receptacle
- Discouragement Redirection Cube
- Laser Relays
- Light Strip (blue, pink)
Characters
Objective
- Complete GLaDOS' Test Shaft (Test Chamber 20)
Hazards
Locations
- Aperture Science Enrichment Center
- Test Chamber 20 (GLaDOS)
Walkthrough
- Walk over to the Beams and place a portal on the wall on the left-side where the Beam ends.
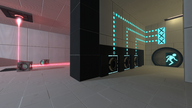
- Place the other portal to the column facing the three Receptacles.
- Pick up the cube that is already redirecting one of the Beams. Place the cube in front of the portal, so the Beam activates the middle Receptacle.
- Pick up the other cube and place it over the beam coming from the ceiling. Aim it at the Receptacle on the right side.
- Go to the Chamberlock.
It is also possible to complete this chamber without placing any portals if you position the cubes correctly and use a cube and quickly move the cube from side to side. If you do it correctly, holding down the strafe right movement key (default D) the door will open for a split second, letting you slip inside. This is a more difficult solution to the puzzle so the basic solution is recommended.
Video walkthrough
Music
Triple Laser Phase by Aperture Science Psychoacoustics Laboratory [4:15] | ![]() Download |
Download | ![]() Play
Play
Gallery
|


