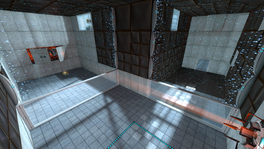
Test Chamber 15 (Bonus)
Jump to navigation
Jump to search
 | “I can't get over how small you are!” This article is a stub. As such, it is not complete. You can help Portal wiki by expanding it. |
This is the third Bonus map of the game. It is unlocked when the original Test Chamber 15 has been completed.
Hazards
Strategy
Portals
- It's possible to get the first energy pellet into the receptacle with just two portals, but it takes a bit of experimentation (using quick-save/reload). The sweet spot for the exit portal is a bit to the left of where the lift is. Let the pellet bounce around until it hits the receptacle.
- Don't bother with the second energy pellet puzzle. Get past the slime channel by shooting portals through portals:
- Go to the start of the channel and shoot one portal down to the far end and the other on the wall beside you.
- Creep through the portal just until you can shoot again without dropping through. There's a telltale buzzing noise and the launcher sight changes.
- Shoot your [i]exit[i] portal down to the far end. Go for the wall that faces around the corner, not the one facing back to you. As soon as you shoot, step back: if you don't get out of the portal before your shot lands, you'll drop into the slime.
- Edge through again and shoot a portal into the far chamber.
- In the final room, put a portal at the foot of the victory lift, then step up onto one of the other platforms, put your second portal on the floor below and jump through. Manoeuvre onto the victory lift platform as you fly up through the exit portal.
Steps
- When using floor portals, close your exit portal as soon as you pop out of it, by firing the same colour somewhere else. This is easy if you have a portal-friendly ceiling above, but can be tricky if you have to cast around for a surface mid-flight.
- Use floor-to-floor whenever possible - you can cover any distance without taking a single step. Place your exit portal first, then shoot the entry portal at your feet and throw the exit portal away as you come through.
- Place a portal as far ahead as you can see and another right in front of the chamberlock. Jump through and cancel the exit portal.
- Use floor-to-floor to get right against the emancipation grid.
Time
-To do-
Award requirements
| Portals | Steps | Time | ||||||
|---|---|---|---|---|---|---|---|---|
| Bronze | Silver | Gold | Bronze | Silver | Gold | Bronze | Silver | Gold |
| 23 Portals | 21 Portals | 14 Portals | 75 Steps | 65 Steps | 55 Steps | 105 Seconds | 85 Seconds | 54 Seconds |
Video strategies
-To do-


