Portal Test Chamber 03: Difference between revisions
Jump to navigation
Jump to search


m (Minor tweaks.) |
(added image) |
||
| Line 41: | Line 41: | ||
|height=108 | |height=108 | ||
|lines=1 | |lines=1 | ||
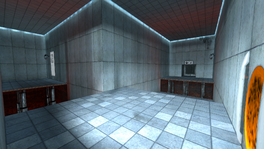
|File:Portal Test Chamber 03_01.png | |File:Portal TC 03 - Beta 01.jpg|Pre-release Test Chamber 03 | ||
|File:Portal Test Chamber 03_01.png|Sideview. | |||
}} | }} | ||
{{TestChambersNav}} | {{TestChambersNav}} | ||
[[Category:Portal chambers]] | [[Category:Portal chambers]] | ||
Revision as of 20:04, 18 August 2013
 | “I can't get over how small you are!” This article is a stub. As such, it is not complete. You can help Portal wiki by expanding it. |
Test Chamber 03
testchmb_a_01.bsp

This Test Chamber is the fourth level of the game and introduces the player to the basic principles of portal-placement.
Hazards
None
Walkthrough
- Place a portal on a nearby wall and walk through it.
- Look to the right to see the Chamberlock, fire a portal at one of the walls near it. Walk back through the portal.
- Proceed in to the Chamberlock.
Video walkthrough
Gallery
|

