Portal 2 Chapter 3 Test Chamber 13: Difference between revisions
No edit summary |
No edit summary |
||
| Line 77: | Line 77: | ||
|File:Portal 2 Chapter 3 Test Chamber 13 overview 3.png|alt1=Another view|Another view. | |File:Portal 2 Chapter 3 Test Chamber 13 overview 3.png|alt1=Another view|Another view. | ||
}} | }} | ||
== Transcript == | |||
<code>{{Spoiler| | |||
[ARRIVAL] <br> | |||
GLaDOS: This next test involves turrets. You remember them, right? They're the pale, spherical things that are made of bullets. Oh, wait. That's you in five seconds. Good luck. <br> | |||
Turret: Hey! <br> | |||
Turret: AWWWWWWW! <br> | |||
Turret: Critical error. <br> | |||
Turret: Deploying! <br> | |||
Turret: Selfish error! <br> | |||
Turret: Shutting down. <br> | |||
Turret: Activated! <br> | |||
Turret: Malfunctioning! <br> | |||
Wheatley: I know I'm early, but we have--- <br> | |||
GLaDOS: Look, [[Wheatley|metal ball]] - I CAN hear you. <br> | |||
Wheatley: Run, I don't need to do the voice. RUN... <br> | |||
[WHEATLEY OPENS THE PANELS] <br> | |||
Wheatley: RUN!!! <br> | |||
Wheatley: Come on, come on! <br> | |||
Wheatley: Run! Come on - I'm closing the doors! <br> | |||
Wheatley: Run! Come on - I'm closing the doors! <br> | |||
}}</code> | |||
{{TestChambersNav}} | {{TestChambersNav}} | ||
[[Category:Portal_2_chambers]] | [[Category:Portal_2_chambers]] | ||
Revision as of 12:21, 16 February 2022
 | “I can't get over how small you are!” This article is a stub. As such, it is not complete. You can help Portal wiki by expanding it. |
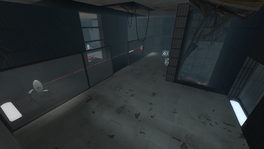
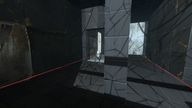
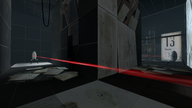
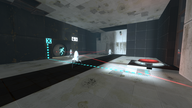
This is the twenty-second level of the game, and is set within a dilapidated Test Chamber. This level reintroduces the player to Turrets, and the way in which they can be disabled through direct interaction, or by using a Weighted Storage Cube.
Contents
Mechanics
- Weighted Storage Cube
- Heavy Duty Super-Colliding Super Button
- Vital Apparatus Vent
- Stairs
- Light Strip (blue, pink, white)
Characters
Objective
- Complete GLaDOS' Test Shaft (Test Chamber 13)
Hazards
Walkthrough
- Pick up the Turret in front of you and throw it sideways to disable it.
- Look around the corner and fire a portal on the wall behind the second turret. Then place the other portal on the wall next to you.
- Lift the turret through the portal and disable it by putting it sideways on the floor.
- Go to the corner where the turret was and go to the right.
- Place a portal under the third turret and it will fall through and be disabled.
- Go where the third turret used to be and then go up the stairs.
- Shoot a portal above the nearest turret and the other one under the Weighted Storage Cube on the floor in front of you.
- Do the same to the other turret.
- Pick up the last Storage Cube and carry it to the other side of the glass.
- Go around the corner and use the Storage Cube as a shield when knocking over the remaining three turrets from closest to the furthest.
- When all of the turrets are disabled, place the Storage Cube on the button.
- Go in the Chamberlock and jump down from the catwalk.
- Walk to the catwalk on the left and through the door.
Video walkthrough
Music
I'm Different by Aperture Science Psychoacoustics Laboratory [4:28] | ![]() Download |
Download | ![]() Play
Play
Gallery
|
Transcript
[ARRIVAL]

GLaDOS: This next test involves turrets. You remember them, right? They're the pale, spherical things that are made of bullets. Oh, wait. That's you in five seconds. Good luck.

Turret: Hey!

Turret: AWWWWWWW!

Turret: Critical error.

Turret: Deploying!

Turret: Selfish error!

Turret: Shutting down.

Turret: Activated!

Turret: Malfunctioning!

Wheatley: I know I'm early, but we have---

GLaDOS: Look, metal ball - I CAN hear you.

Wheatley: Run, I don't need to do the voice. RUN...

[WHEATLEY OPENS THE PANELS]

Wheatley: RUN!!!

Wheatley: Come on, come on!

Wheatley: Run! Come on - I'm closing the doors!

Wheatley: Run! Come on - I'm closing the doors!


