Portal Test Chamber 10: Difference between revisions
Jump to navigation
Jump to search
Created page with "{{stub}} {{Chamber infobox | title = Test Chamber 10 | map = testchmb_a_10.bsp | number = 10 | total = 19 | screenshot = Portal Test Chamber 10.pn..." |
Forgot to remove non-active icons. |
||
| Line 7: | Line 7: | ||
| total = 19 | | total = 19 | ||
| screenshot = Portal Test Chamber 10.png | | screenshot = Portal Test Chamber 10.png | ||
| icon1 = cube dispenser | | icon1 = cube dispenser | ||
| icon2 = cube hazard | | icon2 = cube hazard | ||
| icon3 = pellet hazard | | icon3 = pellet hazard | ||
| icon4 = pellet catcher | | icon4 = pellet catcher | ||
Revision as of 18:36, 22 June 2011
 | “I can't get over how small you are!” This article is a stub. As such, it is not complete. You can help Portal wiki by expanding it. |
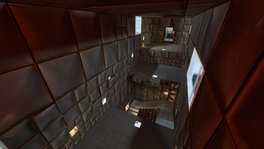
This chamber is the eleventh level of the game. The level is used to introduce the player to flinging. In the level, GLaDOS explains that forward momentum is preserved between portals.
Hazards
- none
Walkthrough
- Place a portal on a nearby wall or on the floor.
- Proceed through the portal onto the platform.
- Proceed up the stairs and onto the extended piece of floor.
- Place a portal on the floor below you, and jump through.
- Place your portal on the piece of wall that recedes outwards upon entering.
- Jump through the orange portal.
- Place your portal on the piece of wall that recedes outwards upon landing
- Jump through the orange portal once again.
- Proceed into the chamberlock.


