Portal 2 Chapter 3 Test Chamber 13: Difference between revisions
Jump to navigation
Jump to search
No edit summary |
|||
| (11 intermediate revisions by 5 users not shown) | |||
| Line 2: | Line 2: | ||
{{Test Chamber Infobox | {{Test Chamber Infobox | ||
| title = Chapter 3 | | title = Portal 2 Chapter 3 Test Chamber 13 | ||
| valve-title= Turret Intro | | valve-title= Turret Intro | ||
| map = sp_a2_turret_intro.bsp | | map = sp_a2_turret_intro.bsp | ||
| Line 8: | Line 8: | ||
| number = 13 | | number = 13 | ||
| total = 22 | | total = 22 | ||
| screenshot = Portal 2 Chapter 3 Test Chamber 13 | | screenshot = Portal 2 Chapter 3 Test Chamber 13.png | ||
| icon1 = cube dispenser | | icon1 = cube dispenser | ||
| icon2 = cube button on | | icon2 = cube button on | ||
| Line 25: | Line 25: | ||
This is the twenty-second level of the game, and is set within a dilapidated Test Chamber. This level reintroduces the player to [[Turrets]], and the way in which they can be disabled through direct interaction, or by using a [[Weighted Storage Cube]]. | This is the twenty-second level of the game, and is set within a dilapidated Test Chamber. This level reintroduces the player to [[Turrets]], and the way in which they can be disabled through direct interaction, or by using a [[Weighted Storage Cube]]. | ||
== Hazards == | == Contents == | ||
=== Mechanics === | |||
* [[Weighted Storage Cube]] | |||
* [[Heavy Duty Super-Colliding Super Button]] | |||
* [[Vital Apparatus Vent]] | |||
* Stairs | |||
* Light Strip (blue, pink, white) | |||
=== Characters === | |||
* [[Chell]] | |||
* [[GLaDOS]] | |||
=== Objective === | |||
* Complete GLaDOS' Test Shaft (Test Chamber 13) | |||
=== Hazards === | |||
*[[Turrets]] | *[[Turrets]] | ||
=== Locations === | |||
* ''Aperture Science Enrichment Center'' | |||
* ''Test Chamber 13 (GLaDOS)'' | |||
== Walkthrough == | == Walkthrough == | ||
| Line 40: | Line 61: | ||
*Pick up the last Storage Cube and carry it to the other side of the glass. | *Pick up the last Storage Cube and carry it to the other side of the glass. | ||
*Go around the corner and use the Storage Cube as a shield when knocking over the remaining three turrets from closest to the furthest. | *Go around the corner and use the Storage Cube as a shield when knocking over the remaining three turrets from closest to the furthest. | ||
**This section can also be passed by placing portals above the final three turrets, and a portal on a wall in safety, and dropping cubes on the turrets. | |||
*When all of the turrets are disabled, place the Storage Cube on the [[Heavy Duty Super-Colliding Super Button|button]]. | *When all of the turrets are disabled, place the Storage Cube on the [[Heavy Duty Super-Colliding Super Button|button]]. | ||
*Go in the [[Chamberlock]] and jump down from the catwalk. | *Go in the [[Chamberlock]] and jump down from the catwalk. | ||
| Line 61: | Line 83: | ||
|File:Portal 2 Chapter 3 Test Chamber 13 overview 3.png|alt1=Another view|Another view. | |File:Portal 2 Chapter 3 Test Chamber 13 overview 3.png|alt1=Another view|Another view. | ||
}} | }} | ||
== Trivia == | |||
* This is the only chamber in this test track to end with a catwalk. | |||
{{TestChambersNav}} | {{TestChambersNav}} | ||
[[Category:Portal_2_chambers]] | [[Category:Portal_2_chambers]] | ||
Latest revision as of 08:03, 4 May 2024
 | “I can't get over how small you are!” This article is a stub. As such, it is not complete. You can help Portal wiki by expanding it. |
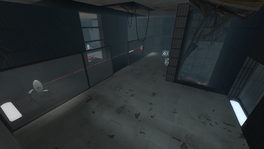
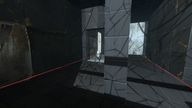
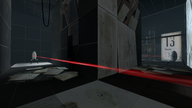
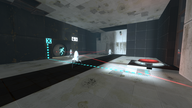
This is the twenty-second level of the game, and is set within a dilapidated Test Chamber. This level reintroduces the player to Turrets, and the way in which they can be disabled through direct interaction, or by using a Weighted Storage Cube.
Contents
Mechanics
- Weighted Storage Cube
- Heavy Duty Super-Colliding Super Button
- Vital Apparatus Vent
- Stairs
- Light Strip (blue, pink, white)
Characters
Objective
- Complete GLaDOS' Test Shaft (Test Chamber 13)
Hazards
Locations
- Aperture Science Enrichment Center
- Test Chamber 13 (GLaDOS)
Walkthrough
- Pick up the Turret in front of you and throw it sideways to disable it.
- Look around the corner and fire a portal on the wall behind the second turret. Then place the other portal on the wall next to you.
- Lift the turret through the portal and disable it by putting it sideways on the floor.
- Go to the corner where the turret was and go to the right.
- Place a portal under the third turret and it will fall through and be disabled.
- Go where the third turret used to be and then go up the stairs.
- Shoot a portal above the nearest turret and the other one under the Weighted Storage Cube on the floor in front of you.
- Do the same to the other turret.
- Pick up the last Storage Cube and carry it to the other side of the glass.
- Go around the corner and use the Storage Cube as a shield when knocking over the remaining three turrets from closest to the furthest.
- This section can also be passed by placing portals above the final three turrets, and a portal on a wall in safety, and dropping cubes on the turrets.
- When all of the turrets are disabled, place the Storage Cube on the button.
- Go in the Chamberlock and jump down from the catwalk.
- Walk to the catwalk on the left and through the door.
Video walkthrough
Music
Main article: Portal 2 soundtrack
I'm Different by Aperture Science Psychoacoustics Laboratory [4:28] | ![]() Download |
Download | ![]() Play
Play
Gallery
|
Trivia
- This is the only chamber in this test track to end with a catwalk.


