Portal 2 Sixense MotionPack DLC Test Chamber 2: Difference between revisions
Jump to navigation
Jump to search
mNo edit summary |
No edit summary |
||
| Line 1: | Line 1: | ||
{{stub}} | {{stub}} | ||
{{Test Chamber Infobox | {{Test Chamber Infobox | ||
| title = Sixense MotionPack DLC Test Chamber | | title = Sixense MotionPack DLC Test Chamber 2 | ||
| map = sp_a2_sx_reaching.bsp | | map = sp_a2_sx_reaching.bsp | ||
| dirty = 1 | | dirty = 1 | ||
Revision as of 16:05, 30 December 2021
 | “I can't get over how small you are!” This article is a stub. As such, it is not complete. You can help Portal wiki by expanding it. |
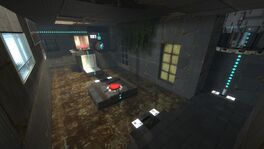
This is the second chamber from the Portal 2 Sixense MotionPack DLC.
Hazards
Walkthrough
- Upon entering the chamber, you will be greeted by a Switch. Press the switch and it will drop a Weighted Storage Cube.
- Using one-to-one, move the cube through the air and onto the button that's in the Goo. This will raise a platform for you to cross.
- Cross over the newly risen platform and look ahead. Place a portal on the surface above and one on the ground in front of you. Use one-to-one again so that you can drop the cube through the portal on the ground and press the button.
- After the button is pressed, another platform will rise out of the water. Walk across and go through the portal that was used for the cube.
- Grab the cube and use one-to-one to move it into the air and around the metal grate that blocks the final button. Drop it onto the button.
- Proceed to the open Chamberlock.


