(One intermediate revision by the same user not shown)
Line 9:
Line 9:
== Hazards ==
== Hazards ==
* Falling to Death
* Falling to Death
* [[Death Fizzler]]
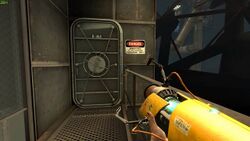
* [[Turrets]]
== Walkthrough ==
== Walkthrough ==
== Video walkthough ==
===Story Mode===
====Chamber====
* Press the [[Pedestal Button]] to dispense [[Repulsion Gel]] on the floor.
* Place your first portal on the floor underneath the [[Repulsion Gel]] tube.
* Place your second portal on the wall on the ledge at the back of the room.
* Press the [[Pedestal Button]] again to dispense [[Repulsion Gel]] onto the ledge.
* Jump up to the grate platform with the [[Repulsion Gel]] on the floor and ledge.
* Walk outside and press the [[Pedestal Button]] to drop a [[Cube]] onto the raised platform.
* Move your first portal to the wall above the outside [[Pedestal Button]].
* Walk back inside and move your second portal to a spot on the floor close to the grate platform.
* Jump into the portal to fling yourself to the raised platform.
* Pick up the [[Cube]] and jump to the grate platform.
** If you miss the jump, you can use your portals to get up without losing the [[Cube]] in the [[Material Emancipation Grill]] doorway.
* Bounce over to the door to the second area.
* Place the [[Cube]] on the [[Heavy Duty Super-Colliding Super Button]] to open the door.
* Enter the second area.
* Move your first portal to the wall next to the second [[Heavy Duty Super-Colliding Super Button]].
* Return to the first area.
* Pick up the [[Cube]] and take it through the portal to the second area.
* Place the [[Cube]] on the second [[Heavy Duty Super-Colliding Super Button]] to disable the [[Material Emancipation Grill]] in the second area and turn on one blocking off the [[Cube]] and [[Heavy Duty Super-Colliding Super Button]].
* Place your first portal on the floor behind the disabled [[Material Emancipation Grill]].
* Place your second portal on the floor in the first area.
* Go through the portal to the first area.
* Jump up to the grate platform with the [[Repulsion Gel]] on the floor and ledge.
* Jump into the portal from the grate platform to fling yourself upwards in the second area.
* Press the [[Pedestal Button]] at the ceiling in the second area to change the [[Death Fizzler]] to a [[Material Emancipation Grill]].
* Walk through the [[Material Emancipation Grill]].
* Drop down to the [[Repulsion Gel]] tube and walk across it to Pump Station Beta.
====Pump Stations====
* Drop to the ground.
* Head to the left and enter the door that opens.
* Walk to the rear-left pillar.
* Place your first portal at the top of the pillar, on the spot marked with a red X.
* Place your second portal on the floor at the base of the pillar.
* Drop through the portal and land in the portal again as you're falling to fling yourself to the pump station.
* Walk inside the pump station and flip the switch to turn on the [[Propulsion Gel]].
* Drop to the floor.
* Move your first portal to the wall through the broken window below the pump station.
* Move your second portal to the floor underneath the [[Propulsion Gel]].
* Wait a few seconds to let the [[Propulsion Gel]] dispense in the hallway.
* Drop through the portal and run through the hall, grabbing or knocking over the turret at the end to stop it shooting you.
* Pull the lever in the officer labelled "OVERRIDE".
* Walk through the [[Material Emancipation Grill]] in the hallway.
* Turn left and walk through the door.
* After following Virgil's directions, turn around and walk back and enter the door on the right.
* Flip the switch to turn on the [[Repulsion Gel]].
* Walk through the gate that opens and follow the catwalk to the right, going through the door at the end.
* Walk through the hall to the next door.
* Go through the door and [[Material Emancipation Grill]], then go up the stairs to the left to the next door which opens to the next big area.
* Place your first portal on the floor portal surface you see immediately out of the door.
* From the ledge you can see another floor portal surface below and to the right. Place your second portal there.
* Jump into your second portal to fling yourself upward from your first portal.
* While in the air, move your second portal to the nearby wall portal surface (as high as possible) to fling yourself onto the top of the next test chamber.
* Walk toward the large "EXIT" decal and drop down to the catwalk to access the elevator.
===Advanced Mode===
====Chamber====
* Walk outside through the [[Material Emancipation Grill]].
* Place your first portal on the wall above the grate platform.
* Place your second portal on the wall beside you.
* Go through the portal and press the [[Pedestal Button]] to drop a [[Cube]] onto the raised platform.
* Walk back inside on the grate platform and move your second portal to a spot on the floor close to the grate platform.
* Jump into the portal to fling yourself to the raised platform.
* Pick up the [[Cube]] and jump to the grate platform.
** If you miss the jump, you can use your portals to get up without losing the [[Cube]] in the [[Material Emancipation Grill]] doorway.
* Move your first portal to the floor near the ledge with the door.
* Jump into the portal to fling yourself up to the door.
* Place the [[Cube]] on the [[Heavy Duty Super-Colliding Super Button]] to open the door.
* Enter the second area.
* Move your first portal to the wall next to the second [[Heavy Duty Super-Colliding Super Button]].
* Return to the first area.
* Pick up the [[Cube]] and take it through the portal to the second area.
* Place the [[Cube]] on the second [[Heavy Duty Super-Colliding Super Button]] to disable the [[Material Emancipation Grill]] in the second area and turn on one blocking off the [[Cube]] and [[Heavy Duty Super-Colliding Super Button]].
* Place your first portal on the floor behind the disabled [[Material Emancipation Grill]].
* Place your second portal on the floor in the first area.
* Go through the portal to the first area.
* Walk outside through the [[Material Emancipation Grill]].
* Get up to the grate platform with your portals as before.
* Walk inside and move your first portal to the floor behind the disabled [[Material Emancipation Grill]] in the second area, which you can see through a grate wall.
* Place your second portal on a spot on the floor close to the grate platform.
* Jump into the portal from the grate platform to fling yourself upwards in the second area.
* Press the [[Pedestal Button]] at the ceiling in the second area to change the [[Death Fizzler]] to a [[Material Emancipation Grill]].
* Walk through the [[Material Emancipation Grill]].
* Drop down to the [[Repulsion Gel]] tube and walk across it to Pump Station Beta.
====Pump Stations====
* Drop to the ground.
* Head to the left and enter the door that opens.
* Place your first portal at the top of any pillar on the inside.
* Place your second portal at the base of the pillar.
* Go through the portal to get to the high-up platform.
* Walk to the left side of the platform and move your first portal to the floor between the platform and the pump station.
* Walk to the opening in the middle of the grate platform and move your second portal to the floor below.
* Jump down into this portal to fling yourself into the air beside the grate platform.
* While in the air, move your first portal to the top of the rear-left pillar, on the spot marked with a red X, to fling yourself to the pump station.
* Walk inside the pump station and flip the switch to turn on the [[Propulsion Gel]].
* Drop to the floor.
* Move your first portal to the wall through the broken window below the pump station.
* Move your second portal to the floor underneath the [[Propulsion Gel]].
* Wait a few seconds to let the [[Propulsion Gel]] dispense in the hallway.
* Drop through the portal and run through the hall, grabbing or knocking over the turret at the end to stop it shooting you.
* Pull the lever in the officer labelled "OVERRIDE".
* Walk through the [[Material Emancipation Grill]] in the hallway.
* Turn left and walk through the door.
* After following Virgil's directions, turn around and walk back and enter the door on the right.
* Flip the switch to turn on the [[Repulsion Gel]].
* Walk through the gate that opens and follow the catwalk to the right, going through the door at the end.
* Walk through the hall to the next door.
* Go through the door and [[Material Emancipation Grill]], then go up the stairs to the left to the next door which opens to the next big area.
* Place your first portal on the floor portal surface you see immediately out of the door.
* From the ledge you can see another floor portal surface below and to the right. Place your second portal there.
* Jump into your second portal to fling yourself upward from your first portal.
* While in the air, move your second portal to the nearby wall portal surface (as high as possible) to fling yourself onto the top of the next test chamber.
* Walk toward the large "EXIT" decal and drop down to the catwalk to access the elevator.
==Easter Egg walkthrough==
* Follow the regular walkthrough until you are on top of the test chamber at the end.
* Look to the left from the "EXIT" decal to see a structure with a portal surface at the bottom. Move a portal there.
* Jump down to a safe spot that isn't the catwalk to the elevator.
* Find another portal surface and move your other portal there.
* Hop through the portal to get to the structure.
* Follow the catwalk to the vitrified door, ignoring Virgil.
Walk through the gate that opens and follow the catwalk to the right, going through the door at the end.
Walk through the hall to the next door.
Go through the door and Material Emancipation Grill, then go up the stairs to the left to the next door which opens to the next big area.
Place your first portal on the floor portal surface you see immediately out of the door.
From the ledge you can see another floor portal surface below and to the right. Place your second portal there.
Jump into your second portal to fling yourself upward from your first portal.
While in the air, move your second portal to the nearby wall portal surface (as high as possible) to fling yourself onto the top of the next test chamber.
Walk toward the large "EXIT" decal and drop down to the catwalk to access the elevator.
Get up to the grate platform with your portals as before.
Walk inside and move your first portal to the floor behind the disabled Material Emancipation Grill in the second area, which you can see through a grate wall.
Place your second portal on a spot on the floor close to the grate platform.
Jump into the portal from the grate platform to fling yourself upwards in the second area.
Walk through the gate that opens and follow the catwalk to the right, going through the door at the end.
Walk through the hall to the next door.
Go through the door and Material Emancipation Grill, then go up the stairs to the left to the next door which opens to the next big area.
Place your first portal on the floor portal surface you see immediately out of the door.
From the ledge you can see another floor portal surface below and to the right. Place your second portal there.
Jump into your second portal to fling yourself upward from your first portal.
While in the air, move your second portal to the nearby wall portal surface (as high as possible) to fling yourself onto the top of the next test chamber.
Walk toward the large "EXIT" decal and drop down to the catwalk to access the elevator.
Easter Egg walkthrough
Follow the regular walkthrough until you are on top of the test chamber at the end.
Look to the left from the "EXIT" decal to see a structure with a portal surface at the bottom. Move a portal there.
Jump down to a safe spot that isn't the catwalk to the elevator.
Find another portal surface and move your other portal there.
Hop through the portal to get to the structure.
Follow the catwalk to the vitrified door, ignoring Virgil.