Rexaura Test Chamber 01: Difference between revisions
Jump to navigation
Jump to search
Page added |
Added the walkthrough |
||
| (3 intermediate revisions by one other user not shown) | |||
| Line 2: | Line 2: | ||
{{Chamber infobox | {{Chamber infobox | ||
| title = Test Chamber 01 | | title = Test Chamber 01 | ||
| map = | | valve-title= Holder | ||
| map = rex_01_holder.bsp | |||
| number = 01 | | number = 01 | ||
| total = 19 | | total = 19 | ||
| Line 10: | Line 11: | ||
}} | }} | ||
This [[Test Chamber]] is the second level of the game, and introduces the player to the [[Weighted Storage Cube]], as well as the [[Heavy Duty Super Colliding Super Button]] and the [[Hydromagnetic Cube Stability Unit]] | This [[Test Chamber]] is the second level of the game, and introduces the player to the [[Weighted Storage Cube]], as well as the [[Heavy Duty Super Colliding Super Button]] and the [[Hydromagnetic Cube Stability Unit]]. | ||
== Hazards == | == Hazards == | ||
| Line 18: | Line 19: | ||
== Walkthrough == | == Walkthrough == | ||
{{Spoiler|block=yes| | {{Spoiler|block=yes| | ||
* Grab the cube and put it into the Hydromagnetic Cube Stability Unit. Note the projected path of the energy pellet on the floor. | |||
* Fire a portal at the spot where the energy pellet hits the wall. | |||
* In the next room, jump down onto the lowered [[Panel|Panels]]. | |||
* Fire a portal on a wall on either side of the depression and take a cube through it. | |||
* Put the cube into a Cube Stability Unit. | |||
* Repeat the last two steps on the other side. | |||
* Place a portal at the spot on the wall where the energy pellet is bouncing. | |||
* When the pellet goes through that portal, fire another on the pushed out panel to the first one's right. | |||
}} | }} | ||
| Line 25: | Line 33: | ||
{{ModTestChambersNav}} | {{ModTestChambersNav}} | ||
[[Category:Rexaura | [[Category:Rexaura chambers]] | ||
Latest revision as of 17:58, 7 April 2017
 | “I can't get over how small you are!” This article is a stub. As such, it is not complete. You can help Portal wiki by expanding it. |
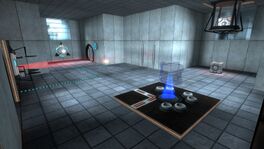
This Test Chamber is the second level of the game, and introduces the player to the Weighted Storage Cube, as well as the Heavy Duty Super Colliding Super Button and the Hydromagnetic Cube Stability Unit.
Hazards
Walkthrough
- Grab the cube and put it into the Hydromagnetic Cube Stability Unit. Note the projected path of the energy pellet on the floor.
- Fire a portal at the spot where the energy pellet hits the wall.
- In the next room, jump down onto the lowered Panels.
- Fire a portal on a wall on either side of the depression and take a cube through it.
- Put the cube into a Cube Stability Unit.
- Repeat the last two steps on the other side.
- Place a portal at the spot on the wall where the energy pellet is bouncing.
- When the pellet goes through that portal, fire another on the pushed out panel to the first one's right.
Video walkthrough
| |||||||||||||||||||||||||||||||||||||||||||||||||||||||||||||||||||||||||||||||||||||||


