Hub: Difference between revisions
Jump to navigation
Jump to search
No edit summary |
|||
| (60 intermediate revisions by 11 users not shown) | |||
| Line 1: | Line 1: | ||
{{ | {{Needimage}} | ||
{{Chamber infobox | {{Chamber infobox | ||
| title = Hub | | title = Hub | ||
| map = | | map = mp_coop_lobby_2.bsp<br>mp_coop_lobby_3.bsp | ||
| screenshot = Portal 2 Hub. | | valve-title = Hub | ||
| screenshot = Portal 2 Hub.jpg | |||
| number = 00 | |||
| previous = Portal 2 Co-op Calibration Course | | previous = Portal 2 Co-op Calibration Course | ||
| next = Portal 2 Co-op Course 1 Chamber 1 | | next = Portal 2 Co-op Course 1 Chamber 1 | ||
}} | }} | ||
The '''Computer Intelligence Training and Enrichment Center Human Test Subject Research Center''' or '''CinTech''' (pronounced Sin-Tech) or the '''Hub''' is a section of [[Aperture Science]] that is featured exclusively during the [[Cooperative Testing Initiative]]. | |||
Most beginners (or players who made a [[Cooperative_Testing_Initiative#Reset_progress|reset]] recently) continue to the [[Portal 2 Co-op Course 1 Chamber 1|01 ''Doors'']], [[Portal_2_courses_during_Cooperative_Testing_Initiative#Course_One:_Team_Building|Course 1: ''Team Building'']] from here. The next [[Test Chamber]] can be almost anything when at least one player has unlocked it... | |||
The ''[[Cooperative Testing Initiative/Credits|Credits]]'' map isn't accessible from here. | |||
== | == Courses == | ||
{{main|Portal 2 courses during Cooperative Testing Initiative}} | |||
{{:Portal 2 courses during Cooperative Testing Initiative}} | |||
== | == Notes == | ||
* [[ | * The Hub has [[Aerial Faith Plate]]s, [[Hard Light Bridge]]s, and [[Panels]] that allow for easy traversal of the chamber. | ||
* Players cannot access the [[Portal 2 Co-op Calibration Course|Calibration Course]] from any door in the Hub. It must be re-accessed using the pause menu or developer console. | |||
* {{Spoiler|After you complete the final course, ''Mobility Gels'', the [[Announcer]] then speaks to the players in the Hub. This will happen even if one of the players has not completed co-op mode. As such, one player will miss out on GLaDOS' story-related lines and the unique "new area unlocked" animations that this map plays when neither player has completed a part.}} | |||
* The Steam version of Portal 2 automatically unlocks all courses while playing in local split-screen, so this will also prevent the unique sequences from being used.<ref>[http://steamcommunity.com/app/620/discussions/0/864951657941091415/#c864951657965247978 "Portal 2 split screen coop NOT saving progress"]</ref> | |||
* Console versions of Portal 2 track co-op progress in split-screen correctly. | |||
== | == Trivia == | ||
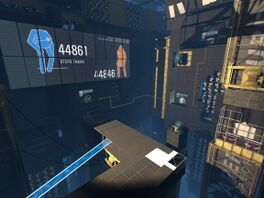
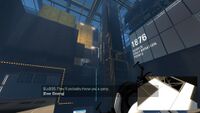
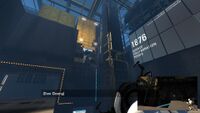
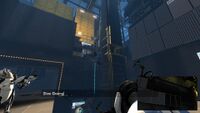
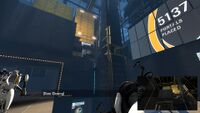
* It features a large screen that displays the total steps players have taken since starting co-op, as well as total portals fired and other statistics. | |||
* There are 2 different map files for the hub. {{code|mp_coop_lobby_2}} is the original version of the hub present in the game at release, while {{code|mp_coop_lobby_3}} added {{Spoiler|the Art Therapy DLC course.}} | |||
** {{code|mp_coop_lobby_2}} is only used when playing with a partner who doesn't have the [[Peer Review]] DLC installed. Since the PC and Switch versions of Portal 2 bundle Peer Review with the base game rather than being a separate download, this is only possible in the Xbox 360 and PS3 versions of the game. On PC, the map can also be loaded through the developer console, and still functions as expected. | |||
** {{code|mp_coop_lobby_2}} is also used for the [[Developer commentary]], which is single-player only. | |||
** There is no {{code|mp_coop_lobby}}; unused resource lists indicate that this was an early version of the hub which was replaced later in the game's development. | |||
* As the host (Atlas/player 1), to reset your progress so that your testing partner can experience the story in the Hub from the beginning, use the console to enter in {{code|mp_mark_all_maps_incomplete}}. You won't lose your achievements or your accumulated stats (portals placed, footsteps taken, etc.), but after resetting the level with {{spoiler|{{code|changelevel mp_coop_lobby_2}}}} (or {{code|3}}), all of the test chambers will be closed off and you'll hear GLaDOS's lines again. If your friend was further along with ''some'' of the sections done, you can use {{code|mp_mark_course_complete}} and then 0, 1, 2, or 3, depending on what their last completed section was, to make your completion progress roughly equal. Finally, use {{code|changelevel}} again to load the map with the changes applied. | |||
* There are small speakers with the label 409 in the chamber changer for every course (including art therapy), which can play 3 [[Turret voice lines]] at random. ([[Media:Turret turretlaunched04.wav|"Noooooo!"]], [[Media:Turret turretlaunched08.wav|"Hooray!"]] and [[Media:Turret turretlaunched11.wav|"Goodbye!"]]) | |||
* The acronym making "CinTech" is a little bit unusual, but if the right letters are bolded, you get "'''C'''omputer '''in'''telligence '''T'''raining and '''e'''nrichment '''c'''enter '''h'''uman Test Subject Research Center". | |||
== Gallery == | == Gallery == | ||
{{Spoiler| | |||
{{Gallery | {{Gallery | ||
|width=192 | |width=192 | ||
|height=108 | |height=108 | ||
|lines=1 | |lines=1 | ||
|File:Portal 2 Hub view.png|alt1= | |File:Portal 2 Hub view.png|alt1=Courses 1, 4 and 5|Courses 1, 4 and 5 | ||
|File:Portal 2 Hub Course View.png|alt2=Disassembly chamber|Disassembly chamber. | |File:Portal 2 Hub Course View.png|alt2=Disassembly chamber|[[Disassembly chamber]] with closed panel. | ||
}} | }} | ||
{{ | |block=yes | ||
}} | |||
== Trivia == | |||
{{Spoiler|block=yes| | |||
=== Animation 5 === | |||
''Upon first-time-unlocking of course 5'': | |||
<gallery widths=200> | |||
File:mp coop lobby 30500.jpg|{{Voice line|GLaDOS|mp_coop_paint_come_along01}} | |||
File:mp coop lobby 30501.jpg|{{Voice line|GLaDOS|mp_coop_paint_come_along02}} | |||
File:mp coop lobby 30502.jpg|{{Voice line|GLaDOS|mp_coop_paint_come_along03}} | |||
File:mp coop lobby 30503.jpg|{{Voice line|GLaDOS|mp_coop_paint_come_along04}} | |||
File:mp coop lobby 30504.jpg|{{Voice line|GLaDOS|mp_coop_paint_come_along05}} | |||
File:mp coop lobby 30505.jpg|6 | |||
File:mp coop lobby 30506.jpg|{{Voice line|GLaDOS|mp_coop_paint_come_along06}} | |||
File:mp coop lobby 30507.jpg|8 | |||
File:mp coop lobby 30508.jpg|9 | |||
</gallery> | |||
<gallery widths=200> | |||
File:mp coop lobby 30510.jpg|1 | |||
File:mp coop lobby 30511.jpg|2 | |||
File:mp coop lobby 30512.jpg|3 | |||
File:mp coop lobby 30513.jpg|4 | |||
File:mp coop lobby 30514.jpg|5 | |||
File:mp coop lobby 30515.jpg|6 | |||
File:mp coop lobby 30516.jpg|7 | |||
File:mp coop lobby 30517.jpg|8 | |||
File:mp coop lobby 30518.jpg|9 | |||
</gallery> | |||
{{clear}} | |||
}}<!--spoiler--> | |||
== [[Announcer]]'s voice lines == | |||
* {{Voice line|Announcer|mp_hub_return01}} (only played upon first-time-unlocking of the Art Therapy course) | |||
* {{Voice line|Announcer|mp_hub_return02}} | |||
* {{Voice line|Announcer|mp_hub_return03}} | |||
* {{Voice line|Announcer|mp_hub_return04}} | |||
* {{Voice line|Announcer|mp_hub_return05}} | |||
* {{Voice line|Announcer|mp_hub_return06}} | |||
* {{Voice line|Announcer|mp_hub_return07}} | |||
== References == | |||
<references/> | |||
{{Portal2Co-opTestChambersNav}} | |||
Latest revision as of 09:10, 15 February 2026
 | “Nope, still can't see!” This page would benefit from the addition of one or more images. Please add a suitable image, then remove this notice. |
The Computer Intelligence Training and Enrichment Center Human Test Subject Research Center or CinTech (pronounced Sin-Tech) or the Hub is a section of Aperture Science that is featured exclusively during the Cooperative Testing Initiative.
Most beginners (or players who made a reset recently) continue to the 01 Doors, Course 1: Team Building from here. The next Test Chamber can be almost anything when at least one player has unlocked it...
The Credits map isn't accessible from here.
Courses
Main article: Portal 2 courses during Cooperative Testing Initiative
Portal 2 courses during Cooperative Testing Initiative
Notes
- The Hub has Aerial Faith Plates, Hard Light Bridges, and Panels that allow for easy traversal of the chamber.
- Players cannot access the Calibration Course from any door in the Hub. It must be re-accessed using the pause menu or developer console.
- After you complete the final course, Mobility Gels, the Announcer then speaks to the players in the Hub. This will happen even if one of the players has not completed co-op mode. As such, one player will miss out on GLaDOS' story-related lines and the unique "new area unlocked" animations that this map plays when neither player has completed a part.
- The Steam version of Portal 2 automatically unlocks all courses while playing in local split-screen, so this will also prevent the unique sequences from being used.[1]
- Console versions of Portal 2 track co-op progress in split-screen correctly.
Trivia
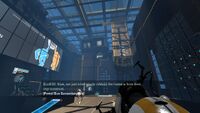
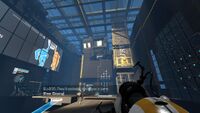
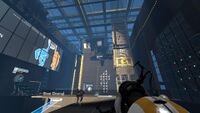
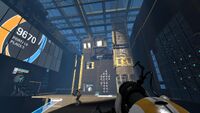
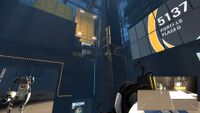
- It features a large screen that displays the total steps players have taken since starting co-op, as well as total portals fired and other statistics.
- There are 2 different map files for the hub.
mp_coop_lobby_2is the original version of the hub present in the game at release, whilemp_coop_lobby_3added the Art Therapy DLC course.mp_coop_lobby_2is only used when playing with a partner who doesn't have the Peer Review DLC installed. Since the PC and Switch versions of Portal 2 bundle Peer Review with the base game rather than being a separate download, this is only possible in the Xbox 360 and PS3 versions of the game. On PC, the map can also be loaded through the developer console, and still functions as expected.mp_coop_lobby_2is also used for the Developer commentary, which is single-player only.- There is no
mp_coop_lobby; unused resource lists indicate that this was an early version of the hub which was replaced later in the game's development.
- As the host (Atlas/player 1), to reset your progress so that your testing partner can experience the story in the Hub from the beginning, use the console to enter in
mp_mark_all_maps_incomplete. You won't lose your achievements or your accumulated stats (portals placed, footsteps taken, etc.), but after resetting the level withchangelevel mp_coop_lobby_2(or3), all of the test chambers will be closed off and you'll hear GLaDOS's lines again. If your friend was further along with some of the sections done, you can usemp_mark_course_completeand then 0, 1, 2, or 3, depending on what their last completed section was, to make your completion progress roughly equal. Finally, usechangelevelagain to load the map with the changes applied. - There are small speakers with the label 409 in the chamber changer for every course (including art therapy), which can play 3 Turret voice lines at random. ("Noooooo!", "Hooray!" and "Goodbye!")
- The acronym making "CinTech" is a little bit unusual, but if the right letters are bolded, you get "Computer intelligence Training and enrichment center human Test Subject Research Center".
Gallery
|
Trivia
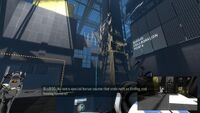
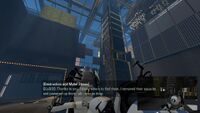
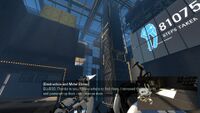
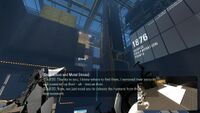
Animation 5
Upon first-time-unlocking of course 5:
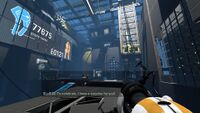
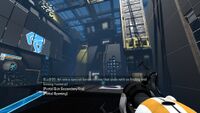
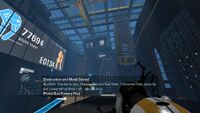
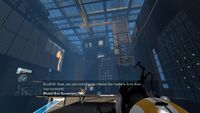
-
6
-
8
-
9
-
1
-
2
-
3
-
4
-
5
-
6
-
7
-
8
-
9
Announcer's voice lines
- "Welcome to the Computer Intelligence Training and Enrichment Center Human Test Subject Research Center. You have unlocked all available courses." |
 Download |
  Play (only played upon first-time-unlocking of the Art Therapy course)
 - "Warning! All testing courses are currently available." |
 Download |
  Play
Play - "Congratulations on successfully returning to the central hub room. From here you can select all previously completed courses." |
 Download |
  Play
Play - "For your testing convenience, all tests are available and all safety precautions within testing chambers have been deactivated." |
 Download |
  Play
Play - "Welcome back to the central hub. All test courses are available. You may redundantly solve the courses at your leisure." |
 Download |
  Play
Play - "Thank you for completing the testing courses. If you enjoyed your experience, you may now re-enter the testing course of your choice." |
 Download |
  Play
Play - "By completing all test courses, you have achieved Level C security clearance. You may now access all testing courses and three of Aperture Science's 176 restrooms." |
 Download |
  Play
Play


