GLaDOS: Difference between revisions
m Added a quotation. |
m Undo revision 189375 |
||
| (270 intermediate revisions by 84 users not shown) | |||
| Line 1: | Line 1: | ||
{{ | {{Featured article tag}} | ||
[[Image:GLaDOS P2.png|right|401px|GLaDOS in ''Portal 2'']] | |||
{{Quotation|'''GLaDOS'''|Okay, look: We both said a lot of things that you're going to regret, but I think we can put our differences behind us; for science... you monster.|sound=GLaDOS chellgladoswakeup06.wav}} | {{Quotation|'''GLaDOS'''|Okay, look: We both said a lot of things that you're going to regret, but I think we can put our differences behind us; for science... you monster.|sound=GLaDOS chellgladoswakeup06.wav}} | ||
{{ | '''GLaDOS''' ('''G'''enetic '''L'''ifeform '''a'''nd '''D'''isk '''O'''perating '''S'''ystem) is the [[Cores#Central Core|central core]] designed to control, guide, and oversee the [[Aperture Science]] computer-aided Enrichment Center. With the ability to shift and move facilities and various chambers, GLaDOS is able to achieve a seamless and almost infinite testing design whilst residing in the [[Central AI Chamber]]. | ||
In possession of a feminine programming, {{Spoiler|she is the antagonist of ''[[Portal]]''}} and {{spoiler|the first half of the single-player campaign in ''[[Portal 2]]''.}} {{spoiler|During the later half, she becomes the game's {{W|tritagonist}}.}} In the game's cooperative campaign, GLaDOS is the testing supervisor of [[Atlas]] and [[P-body]]. | |||
== Background == | |||
{{spoiler|GLaDOS was a creation of [[Aperture Science]], a [[Cores|personality core]] designed exactly to be fitted as a central computer mainframe. The project began under the oversight of [[Cave Johnson]] over the company and was an attempt to create a fully functional, advanced artificial intelligence which was originally intended to be occupied by Johnson as one of his attempts to cheat death. After it became apparent to Johnson that he may die of moon rock poisoning before development on GLaDOS would be completed, Johnson motioned for the scientists to insert [[Caroline]] instead.}} | |||
After a decade's worth of hard work, GLaDOS was officially activated as part of one of the many events during the company's "Bring Your Daughter to Work" day. Since she was able to take control of half of the facility's features, GLaDOS began killing most of its inhabitants by flooding the Enrichment Center with [[neurotoxin]]. However, only a few if not only one of the staff such as [[Doug Rattman]] had survived her attacks along with the series' main protagonist, [[Chell]]. The destruction of the company also coincided with an invasion of Earth, which had occurred two days after at Aperture's rival company, [[Black Mesa]]. This ultimately led to the negligence of the outside world from realizing's fate, as all attention had been diverted to Black Mesa and the aforementioned invasion. | |||
Since the attack, she has managed the company to her limits. {{spoiler|Her first test subject and the series' main protagonist, [[Chell]], was given a warning of GLaDOS' true colors with the help of Rattmann. She confronts GLaDOS in her chamber at the end of ''[[Portal]]'', which allowed GLaDOS to develop an even deeper hatred for her after she was awakened at the beginning of ''[[Portal 2]]''.}} | |||
== Overview == | |||
=== ''Portal'' === | |||
{{See also|Portal}} | |||
[[File:GLaDOS P1.png|thumb|120px|right|GLaDOS in ''[[Portal]]'', with [[Cores#Personality Cores|personality cores]] attached.]] | |||
Before the events of ''Portal'', one of Aperture's technicians, [[Doug Rattman]], successfully evaded GLaDOS' attempts to flood the Enrichment Center with [[neurotoxin]]. He then took refuge in several departments throughout the facility and began tampering with the initial test subject roster, rearranging [[Chell]] to the top of the list as Test Subject #1 instead. Since GLaDOS initiated a lockdown, Rattman was forced to live his whole life hiding between the backstages of [[Test Chambers]] in the Enrichment Center. He then left various warnings of GLaDOS through graffiti that could only be found behind several corrupted [[Panels|wall panel]]s in Test Chambers, in hopes that Chell would later stumble upon them. GLaDOS was able to operate the company all while residing in her Central AI Chamber, despite lacking full control over the facility. | |||
She then awakens Chell for her mandatory testing of the [[Handheld Portal Device]], which began the events of ''Portal''. During these periods, she constantly intimidated Chell during her performances and gave bitter yet innocent sarcastic notions by simply acting out like conveniently placed pre-recorded messages. {{spoiler|Several tests later, Chell would later discover the various graffiti left behind by Rattmann and immediately became aware that this was not the case, but was forced to play along with GLaDOS' plans.}} | |||
After Chell completed the final test chamber, {{spoiler|GLaDOS immediately revealed her true colors as she attempts to lower her into a pit of fire. Chell was able to escape her attempt to incinerate her and from there, Chell makes her way throughout the facility in an attempt to escape, to GLaDOS' horror. As she traverses the facility, she realizes the only way to escape from it is to confront GLaDOS in [[Central AI Chamber|her chamber]], a conflict which Chell won by incinerating all of her personality cores. After the conflict, GLaDOS was heavily damaged and thrown into the parking lot, where she remained dormant for an unspecified amount of time as the facility degraded over the years.}} | |||
=== ''Portal 2'' === | |||
{{See also|Portal 2}} | |||
==== Reawakening era ==== | |||
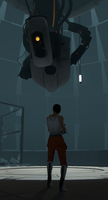
[[File:Sp a1 wakeup0061.jpg|thumb|right|170px|The remains of GLaDOS' backup body after her conflict in ''Portal''.]] | |||
Beginning the major events of ''Portal 2'', GLaDOS is reactivated in her backup body through the accidental efforts of both [[Wheatley]] and [[Chell]] having tried to access an escape lift to the surface in the [[Central AI Chamber]], as both of them were previously trapped in the building following GLaDOS' destruction. {{spoiler|She immediately realizes the presence of Chell and Wheatley standing before her upon awakening. Despite her newly profound hatred for Chell having destroyed her, she uses Wheatley as an object for relieving her anger by crushing him.}} | |||
GLaDOS then decides to return Chell to the facility's science experiments to further her cause of science, but now have a lot of resentment against Chell for her previous destruction (she claims at one point that she had to relive the last moments of her fight with Chell over and over which, if true, would be a long time indeed), she constantly makes various taunts and snarky remarks at Chell while testing her, and plans to try to kill her again. | |||
[[File:Sp a2 core0476.jpg|thumb|150px|right|{{spoiler|GLaDOS lowering a neurotoxin tube, with [[Wheatley]] rolling inside.}}]] | |||
{{spoiler|However, [[Wheatley]] later resurfaces and was still alive despite the critical damage inflicted onto him by GLaDOS. With his help, Chell was able to escape from GLaDOS' [[Test Chambers|testing tracks]] and went through the facility to sabotage her vital strategy components, such as the production of [[neurotoxin]]. Finally reaching her newly redesigned chamber, they were then able to defeat GLaDOS together, replacing her with Wheatley as the facility's overseer. Wheatley, intimidated by GLaDOS' response to how useless he is, traps GLaDOS in a potato battery and throws her into the depths of the Enrichment Center alongside Chell.}} | |||
{{spoiler|After Wheatley became corrupted by his new position and power, GLaDOS and Chell worked together, initially as unwilling partners, to restore control over the facility (which further degraded and corrupted under the influence of Wheatley, to the point where the facility's reactor core will undergo a meltdown). During this time, the duo try to find their way out of the depths of the Enrichment Center where they approach several vintage [[Test Chambers]] previously managed by Aperture CEO, [[Cave Johnson]] and his secretary [[Caroline]].}} | |||
{{spoiler|As Chell and GLaDOS continue to journey through the pasts of Aperture Science located in the salt mine deep beneath the Enrichment Center, GLaDOS slowly becomes familiar to Johnson and Caroline. As they are finally ready to leave the salt mine, GLaDOS spots a poster on the wall, showing what to do in the case of a rogue AI, a paradox. GLaDOS also has an epiphany on who Caroline is but remains silent on the matter.}} | |||
[[File:Portal2 GLaDOS Potato.png|thumb|left|150px|{{spoiler|PotatOS}}]] | |||
{{spoiler|The duo then have made their way back to the modern Enrichment Center, where Chell and GLaDOS use the paradox on Wheatley, but ultimately fail because Wheatley is too unintelligent to understand it. They are put through [[Wheatley]]'s [[Test Chambers|testing tracks]]. When Wheatley later realizes that GLaDOS had built two robot test subjects prior to Chell and Wheatley's sabotage over the facility early on in the game, he finally attempts to dispose both GLaDOS and Chell. When the duo manages to escape from his grasp, they head to the Central AI Chamber to confront him. GLaDOS proposes that Chell is to attach her back into her body to resume her control over the facility. The conflict was then resolved by their conjoint efforts, resulting in the exile of Wheatley to outer space and reconciliation between each other.}} | |||
[[File:Glados ending monologue.jpg|thumb|150px|right|{{spoiler|GLaDOS during the single-player ending monologue.}}]] | |||
{{spoiler|After repairing the entire facility to its state before Wheatley's control, GLaDOS begins to become even more affected by her recently acquired morality, emotions and gained her consciousness after discovering who [[Caroline]] was. She realizes that Chell was not an enemy, but could be considered a close friend. Part of her "rogue AI" nature disagreed with this change of heart. GLaDOS was then able to trace Caroline's consciousness in her system, moments before the [[Announcer]] reveals that GLaDOS has deleted Caroline from her system. She then expels Chell from the facility to avoid further trouble beyond her control. However, Chell is then comforted through her elevated ride to the surface by a [[Turret Opera]] which remains unknown as to why the event occurred.}} | |||
{{spoiler|Before [[Chell]] could leave the Enrichment Center for good, GLaDOS decides to return Chell's [[Weighted Companion Cube|Companion Cube]] from her tests in ''[[Portal]]'' by ejecting it from the lift.}} | |||
From then on, she conducts tests on the two robot test subjects; [[Atlas]] and [[P-body]]. | |||
==== Cooperative testing era ==== | |||
{{spoiler|Sometime after Chell is freed from the Enrichment Center,}} GLaDOS has been primarily focusing on her two new android test subjects [[Atlas]] and [[P-body]], as part of the [[Cooperative Testing Initiative]]. Typical of her nature, she would constantly find a way to crush their spirits via sarcasm and expressing herself to be having little hope for them. | |||
{{spoiler|At the end of the first testing course, ''[[Cooperative Testing Initiative#Course One: Team Building|Team Building]]'', she deploys the bots outside the official testing track, announcing that "this next test is so outside the box that I can't- I mean WON'T even tell you what you're looking for". She leaves the bots to use common sense to figure out what they should be looking for by themselves, as they find a large disc and bring it into a projector room. Despite the clear warning "DO NOT TRUST HER" written on a whiteboard in the room, the bots place the disc into the projector - in which she begins scanning for files and documents she refuses to disclose. After she was done, she initiated a self-destruct on the bots and reassembled them back at the [[Hub]].}} | |||
{{spoiler|This topic remains untouched through the entirety of their second testing track, ''[[Cooperative Testing Initiative#Course Two: Mass and Velocity|Mass and Velocity]]''. However, at the end of this course, it became clear that she would continually send them outside the testing tracks again to handle her secret full takeover on the facility. As Atlas and P-body work together to get each other past the air circulation maintenance section, they find another disc and install it into the projector. GLaDOS again scans through and proceeds to tell them that she did not need them to do this, and pretends their mission did not matter after self-destructing them again.}} | |||
{{spoiler|When the bots reach the third course, ''[[Cooperative Testing Initiative#Course Three: Hard-Light Surfaces|Hard-Light Surfaces]]'', GLaDOS' utter disappointment in the duo becomes more clear. Their "deaths" never bring the satisfaction she had with the death of humans, as the bots can just easily be rebuilt again each time they are destroyed. Meanwhile, she is secretly working on an attempt to replace Atlas and P-body. At the end of this course, the bots install a disc that contains the Enrichment Center's current overall security code, which she tries to block out from their range of hearing by uttering "blah blah blah" repeatedly as the [[Announcer]] relays the codes.}} | |||
{{spoiler|In the fourth course, ''[[Cooperative Testing Initiative#Course Four: Excursion Funnels|Excursion Funnels]]'', GLaDOS builds slight hope in keeping Atlas and P-body still as predicted by her sudden change of mood from the previous course. She now wants the bots to feel conflicted against each other - hoping to enhance a more "competitive" and bitter testing run, simply by manipulating them into thinking that one of them has been "reporting" to her behind the others' back, or how P-body is "not [Atlas'] first cooperative testing partner". The bots still carry on regardless, where GLaDOS' disappointment in the two reprises in her tone of voice. On the last test, she gets them to install the final disc to her full control over the facility - assuring them it was a clerical error by humans on how it was not done any earlier before they died. As the bots install it, overview maps of every section of the facility begin projecting onto the screen, followed by her mischievous yet anticipated tone of voice when revealing that "[she] can see everything now".}} | |||
[[File:Coop human vault door.jpg|thumb|170px|right|{{spoiler|[[Atlas]] and [[P-body]] upon reaching the [[Human Vault]].}}]] | |||
{{spoiler|Reassembled back at the hub, GLaDOS tells the bots that they have just one more testing course to complete - ''[[Cooperative Testing Initiative#Course Five: Mobility Gels|Mobility Gels]]''. She deploys the entrance to this course into the hub and sends them deep beneath the Enrichment Center to the Aperture Science Innovators era, a bottom section of the salt mine. GLaDOS convinces them to rescue the "dying, trapped, crying" live human test subjects preserved in a cryogenic vault that were preserved since the 20th century. Once they finally reach this vault at the end of the course, GLaDOS reveals a great deal of anticipation and obsession over "rescuing" them. In an attempt to unlock the vault, the bots had to perform gestures like any human would - as the vault was an anti-robot section. Despite how sinister she sounded after the bots observed the hundreds of humans in cryogenic stasis, they disregarded it and began dancing in triumph. Now extracting all of the human test subjects, she begins processing their files - which apparently turned out to be only one person's file.}} | |||
{{ | {{spoiler|As she no longer needs Atlas and P-body as her test subjects, she began testing the humans in an attempt to develop them into her cold minions. Her plan fails as the humans are unable to withstand her extreme testing courses and all of the hundreds of test subjects that were found began dying within just a week of testing. It became apparent that she needed Atlas and P-body back as her facility began to malfunction all of a sudden, in addition to her lack of test subjects.}} | ||
[[File:Central core prototype chassis.jpg|thumb|130px|left|{{spoiler|[[Cores#Central Core|GLaDOS]] prototype seen at the end of ''Art Therapy''.}}]] | |||
{{spoiler|When the bots are rebuilt again, she deploys the additional testing course; ''[[Cooperative Testing Initiative#Art Therapy|Art Therapy]]''. As the bots begin testing, she treats the course as if it were an art museum despite the obvious malfunctioning environment such as her lack of control in putting the test chambers together properly, and a flood arising around a section of the facility during testing. Eventually, the reassembly machines have begin malfunctioning - causing her to wait three days before the robots could be reassembled to deliver the duo to their next test chamber. GLaDOS then gives in and confesses that she is in need of their help and that someone has been tampering with the facility via control of an old prototype chassis of the [[Cores#Central Core|central core]]. To resolve this, she trains the bots into becoming her "killing machines" by deploying them into more challenging tests during their course. GLaDOS then sends them closer to the chamber housing the chassis, and later jokingly calls them as her "Special Team Falling Into Acid Force". When the bots reach the chamber, they discover it was never a person, but even worse - a bird nesting above the keyboard on the machine. GLaDOS, thanks to her ornitophobia back when she was a potato, panics and instructs them abort the mission, before P-body closes a hatch that the bird flew out from. As the bots stare at the chassis, GLaDOS panics that the bird had been "gestating clones" on the keyboard and forces them to destroy the eggs. With the bots hesitant, she conjures a better idea and houses the birds in the [[Central AI Chamber]], where she could nurture them directly.}} | |||
[[File:Glados arttherapy birds.jpg|thumb|150px|right|{{spoiler|GLaDOS and the birds.}}]] | |||
{{spoiler|GLaDOS begins to show compassion toward the birds as she realizes their ability to use their beaks and considers them as test subjects, also revealing a more motherly bonding with the birds than she ever did with the "mushroom" bots. The fate of these birds remain unknown.}} | |||
==== Perpetual testing era ==== | |||
{{spoiler|As the Perpetual Testing Initiative offers a wide range of alternate universes for the player that is going through community test chambers - dubbed the "multiverse", Aperture CEO [[Cave Johnson]] still lives and is as healthy as he was before being struck by exposure to moon rock poisoning in the main reality. However, all of the universes which form multiverse have the same outcome in which all development on GLaDOS has been abolished after her first activation when she went rogue.}} | |||
{{spoiler|In addition to her being abolished, Cave's loyal assistant [[Caroline]] has been replaced with [[Greg]]. It is unexplained on exactly what did happen to Caroline, although serving as a hint that she may have merged with GLaDOS, thus explaining her absence from this era. In this same universe after she was abolished, Cave also tries pushing the scientists into making a Cave-Bot instead. In one universe Cave successfully becomes an AI (known as "CaveDOS") and it's unknown what happened to Caroline.}} | |||
== Abilities and traits == | |||
As the overseer and operator of the facility, GLaDOS is seemingly omnipotent, able to reconfigure rooms and carry out actions at her will. She monitors the facility and its test chambers through cameras mounted on walls. {{spoiler|She also mentions that she cannot resist thinking of paradoxes if one would happen to be brought up.}} GLaDOS had displayed little to no emotion within her voice tone in the first half of ''Portal'', due to being bound by the consciousness of other [[Cores#Personality Cores|personality cores]] attached to her for the sole purpose of restricting her true thoughts. She then becomes increasingly more agitated and is portrayed as a narcissist during Chell's escape attempts. {{spoiler|In ''Portal 2'', she grows bitter after the events of ''Portal'', and is no longer bound by the restraints of her cores. She frequently insults Chell until the very end - until she briefly realizes that Chell was "all along [her] best friend".}} | |||
GLaDOS' consciousness had been controlled by [[Cores#Personality Cores|personality cores]] throughout the events of ''Portal''. {{Spoiler|If the cores are removed, the traits and morals which the cores contain would be permanently detached from GLaDOS as well, causing her to fall back to her more human and intimidating voice tone, resembling that of her Genetic Lifeform component Caroline.}} | |||
GLaDOS' status as the central core allows her to have various controls over the Enrichment Center. Apart from being able to build, reconstruct or deface test chambers, GLaDOS can provide the pneumatic pressures serving as the vacuum inside the [[Tubes|tube networks]] across the facility - a power which the Announcer could only handle the elevator tube shafts in the [[chamberlock]]s. In ''Portal'', GLaDOS was able to steer away the vacuum directions inside the tubes and managed to pull Chell back into [[Portal Test Chamber 09|Test Chamber 09]] after the latter attempted to travel inside a burst tube. | |||
{{spoiler|It was eventually revealed in ''Portal 2'' that GLaDOS was also able to reconstruct the components on her own body as well, now without the cores restricting her thoughts. She had replaced most of the broken and or missing components on her body since her reawakening in the chapter, ''[[Portal 2 Chapter 1 Her Chamber|The Courtesy Call]]''. Her newer components spotted on her body since the chapter ''[[Portal 2 Chapter 5 GLaDOS' Lair|The Escape]]'' is sleek and black, and is of little resemblance to the original ones from her body during the reawakening and ''Portal''.}} | |||
== Development and acting == | |||
[[File:GLaDOS concept art.jpg|thumb|130px|right|Earliest known concept art of GLaDOS.]] | |||
During Anime Midwest 2011, voice actress {{W|Ellen McLain}} revealed that the premise of GLaDOS had always been a robotic voice that would guide the protagonist and often intimidates them. Early on development, [[Valve Corporation|Valve]] had used copyrighted voice samples as a {{W|placeholder}} for GLaDOS. As Ellen McLain previously voiced the radio communications dispatcher of the [[hl2:Combine Overwatch|Combine Overwatch]] throughout the [[hl2:Half-Life 2|''Half-Life 2'']] saga, the developers had chosen her for the role of GLaDOS. During this time, developers had kept the development quiet, leaving Ellen unaware of what game it is that she is doing voice work for. Ellen was later made aware of her work and success when ''[[Portal]]'' was finally released. | |||
In ''Portal 2'', GLaDOS' dialogue shortly after her awakening was originally much more insulting. As playtesters grew uncomfortable with her insults, it was then decided that GLaDOS continues her passive-aggressive behavior which she began from the ''Portal'' credits song, [[Still Alive]]. {{spoiler|When it was decided that GLaDOS and Chell needed to work together to face [[Wheatley]], Valve opts for GLaDOS to be uploaded into a potato battery. Writer Jay Pinkerton describes the transformation as "a very stark difference between this imperious, all-powerful GLaDOS talking to you, and this powerless GLaDOS talking to you on your gun", and that potato GLaDOS was initially needling towards playtesters. To counteract this, she was made into a more sidekick type of character.<ref>[http://www.rockpapershotgun.com/2011/04/27/valve-on-portal-2-spoiler-interview-part-one/ Valve On Portal 2: Spoiler Interview] on Rock, Paper, Shotgun</ref>}} | |||
Appearance-wise in ''Portal'', GLaDOS' initial designs before the game's release varied greatly. The earliest known design of GLaDOS was a large disc with a red eyeball in the center, with the disc surrounding it and welded onto the eyeball. This concept of GLaDOS appears to be the most favorable version towards several community members and was then recreated for use on a character entirely for the community-made machinima series,'' [http://www.youtube.com/user/22CaliburArmadillo The Underground]''. Later on in development, the design of the large eyeball was then scrapped into a robotic body hanging upsidedown from the ceiling, with four discs surrounding above it this time. This concept has since been kept for the release of ''Portal'', with minor adjustments such as the addition of [[Cores#Personality Cores|personality cores]]. | |||
In the game's commentary mode, Jeremy Bennett (art director) describes GLaDOS's design: "[...] we settled on a huge mechanical device with a delicate robotic figure dangling out of it, which successfully conveys both [her] raw power and her femininity." Originally, according to Bennett, she resembled an upside-down version of [[w:The Birth of Venus (Botticelli)|Botticelli's "Rise of Venus"]]. | |||
The earliest known concept art of GLaDOS' design for ''[[Portal 2]]'' was through one of the many concept box arts; demonstrating that her body's plating was completely torn and scrapped, leaving only her head the most intact - nearing the design of her spherical-cylinder shaped head in the game's release. She had also been given a red-eye color in this concept rather than the trademark yellow that was given to her in ''Portal''. Not much else is known of her design changes during the sequel, except that the developers established that the current design of GLaDOS in ''Portal 2'' was to signify a more antagonistic appearance and shape. | |||
In addition, an unused reskin of GLaDOS' design from ''Portal'' can be found in the game files of ''Portal 2'', presenting rust stains and scratches possibly to be used for her components scattered around in her chamber. | |||
== Gallery == | == Gallery == | ||
=== ''Portal'' === | |||
File:GLaDOS P1.png|GLaDOS in ''Portal'' | {{Gallery | ||
File:Glados.png|{{ | |title = Screenshots | ||
File:Portal2 GLaDOS Potato.png|{{Spoiler|GLaDOS | |lines = 4 | ||
|height = 200 | |||
|width = 150 | |||
|File:GLaDOS P1.png|alt1=G|GLaDOS in the Central AI Chamber, as she appeared in ''[[Portal]]'' | |||
|File:Still_Alive_ASCII_GLaDOS.jpg|alt1=G|GLaDOS ASCII image from the Portal credits | |||
|File:MoralityCore.png|alt1=G|GLaDOS' Morality core | |||
|File:CuriousityCore.png|alt1=G|GLaDOS' Curiosity core | |||
|File:LogicCore.png|alt1=G|GLaDOS' Cake mix core | |||
|File:AngerCore.png|alt1=G|GLaDOS' Anger core | |||
}} | |||
{{Gallery | |||
|title = Media | |||
|lines = 4 | |||
|height = 200 | |||
|width = 150 | |||
|File:GLaDOS concept art.jpg|alt1=G|Earliest known concept art of GLaDOS | |||
|File:GLaDOS Lithograph.jpg|Lithograph of GLaDOS | |||
|File:GLaDOS and Anger Core Shirt.png|alt1=G|GLaDOS and the Anger core on a shirt | |||
|File:Curiosity Core from GLaDOS Shirt.png|alt1=G|The Curiosity core on a shirt | |||
|File:GLaDOS Mousepad.png|alt1=G|GLaDOS on a mousepad | |||
}} | |||
=== ''Portal 2'' === | |||
{{Gallery | |||
|title = Pre-release | |||
|lines = 4 | |||
|height = 200 | |||
|width = 150 | |||
|File:Early GLaDOS.png|alt1=G|Early version of GLaDOS. | |||
|File:Early GLaDOS 2.png|alt1=G|Ditto. | |||
|File:Early GLaDOS 3.png|alt1=G|Ditto. | |||
|File:Gorilla GLaDOS.png|alt1=G|Early version of GLaDOS resembling a gorilla sat down. | |||
}} | |||
{{Gallery | |||
|title = Screenshots | |||
|lines = 4 | |||
|height = 200 | |||
|width = 150 | |||
|File:Chell and Dead GLaDOS Size Comparison.png|alt1=G|GLaDOS' remains in comparison to Chell. | |||
|File:Sp a1 wakeup0027.jpg|alt1=G|Reawakened by [[Wheatley]]. | |||
|File:Glados.png|alt1=G|After her reawakening. | |||
|File:P2 glados body intro.jpg|alt1=G|GLaDOS' body after her awakening, slightly resembling her ''Portal'' model. | |||
|File:P2 glados body.jpg|alt1=G|{{spoiler|GLaDOS, redesigned with newer components and losing ''Portal'' resemblance.}}|spoiler5=yes | |||
|File:Glados2.png|alt1=G|{{Spoiler|Ditto, another view}}|spoiler6=yes | |||
|File:Chell and GLaDOS Size Comparison.png|alt1=G|{{spoiler|GLaDOS in comparison to Chell.}}|spoiler7=yes | |||
|File:GLaDOS P2 chamber.jpg|alt1=G|{{spoiler|GLaDOS in her redesigned Central AI Chamber.}}|spoiler8=yes | |||
|File:Sp a2 core0008.jpg|alt1=G|{{spoiler|Another view of GLaDOS in her redesigned AI chamber.}}|spoiler9=yes | |||
|File:Glados side awakening.jpg|alt1=G|Side view of GLaDOS after her reawakening. | |||
|File:Glados P2 sideview.jpg|alt1=G|{{spoiler|Side view of GLaDOS in her upgraded body.}}|spoiler10=yes | |||
|File:Sp a2 core0476.jpg|alt1=G|{{spoiler|GLaDOS lowering a neurotoxin tube, with [[Wheatley]] rolling inside.}}|spoiler11=yes | |||
|File:Portal2 GLaDOS.png|alt1=G|{{Spoiler|A cropped view of GLaDOS on another perspective}}|spoiler12=yes | |||
|File:Glados core transfer.jpg|alt1=G|{{spoiler|GLaDOS during her forced core transfer.}}|spoiler13=yes | |||
|File:Core transfer inside.jpg|alt1=G|{{spoiler|Centered view of GLaDOS during her core transfer.}}|spoiler14=yes | |||
|File:Glados head dragged.jpg|alt1=G|{{spoiler|GLaDOS, dragged by [[Wheatley]] for an extraction process.}}|spoiler15=yes | |||
|File:Wheatley extract potatos.jpg|alt1=G|{{spoiler|Power-mad Wheatley having extracted GLaDOS into a potato battery.}}|spoiler16=yes | |||
|File:Portal2 GLaDOS Potato.png|alt1=G|{{Spoiler|GLaDOS, uploaded to a potato battery by Wheatley.}}|spoiler17=yes | |||
|File:Portal 2 Potato Viewmodel.png|alt1=G|{{Spoiler|GLaDOS after being attached to [[Chell]]'s [[Handheld Portal Device|Portal Gun]].}}|spoiler18=yes | |||
|File:Potato battery.png|alt1=G|{{Spoiler|A view of PotatOS}}|spoiler19=yes | |||
|File:Glados core retransfer.jpg|alt1=G|{{spoiler|GLaDOS regains her head while being dragged back into the central core.}}|spoiler20=yes | |||
|File:Glados ending monologue.jpg|alt1=G|{{spoiler|GLaDOS during the single-player ending monologue.}}|spoiler21=yes | |||
|File:Glados arttherapy birds.jpg|alt1=G|{{spoiler|GLaDOS and the baby birds in the co-op course, ''Art Therapy''.}}|spoiler22=yes | |||
|File:Glados body.jpg|alt1=G|{{spoiler|GLaDOS' body texture.}}|spoiler23=yes | |||
}} | |||
{{Gallery | |||
|title = Media | |||
|lines = 4 | |||
|height = 200 | |||
|width = 150 | |||
|File:GLaDOS from Personality Test.jpg|alt1=G|GLaDOS' portrait from the [http://www.thinkwithportals.com/coop_survey.php official Aperture Science Collaborative Disposition Test]. | |||
|File:GLaDOS Valentine.png|alt1=G|GLaDOS' [http://tinyurl.com/3pt4d34 Valentine card] from Valve's official ''Portal 2'' blog. | |||
|File:Portal 2 Soundtrack Cover - Volume 1.jpg|alt1=G|The [[Portal 2 soundtrack|''Portal 2'' Soundtrack]] cover. | |||
|File:GLaDOS Lithograph Aperture's Requiem.png|alt1=G|GLaDOS and [[Chell]] on the "Aperture's Requiem" lithograph. | |||
|File:GLaDOSConcept2.jpg|alt1=G|GLaDOS Concept Art. | |||
|File:GLaDOSConcept.png|alt1=G|GLaDOS Concept Art 2. | |||
|File:DestrGladdyConcept.png|Destroyed GLaDOS Concept Art. | |||
|File:Destroyed GLaDOS Lithograph.png|alt1=G|The "Destroyed GLaDOS" lithograph. | |||
|File:Chell and GLaDOS Gelaskin.png|alt1=G|GLaDOS and Chell on an iPad gelaskin. | |||
|File:CoreTransferConcept.jpg|alt1=G|{{spoiler|Concept art of GLaDOS' core transfer.}}|spoiler7=yes | |||
|File:Red-Nosed_P03.jpg|alt1=G|GLaDOS and Randolph the Red-Nosed Turret. | |||
}} | |||
=== ''Other'' === | |||
{{Gallery | |||
|title = Screenshots | |||
|lines = 4 | |||
|height = 200 | |||
|width = 150 | |||
|File:LEGO Dimensions GLaDOS.png|alt1=G|GLaDOS' as seen in [[LEGO Dimensions]]. | |||
|File:GLaDOSApertureVR.png|alt1=G|GLaDOS' modified appearance in the [[The Lab#Robot Repair|Robot Repair]] experiment. | |||
}} | |||
== Trivia == | == Trivia == | ||
* GLaDOS is voiced by | * GLaDOS is voiced by opera singer and voice actress {{W|Ellen McLain}}. | ||
* The acronym "GLaDOS" is a pun of the name "Gladdys" and the term DOS (Disc Operating System). | |||
* Ellen McLain, the actress that voices GLaDOS, also provides the voice for the [[tf:Administrator|Administrator]] in [[tf:Team Fortress 2|''Team Fortress 2'']] and the [[hl2:Combine Overwatch|Combine Overwatch]] in the [[hl2:Half-Life 2|''Half-Life'']] series. This makes Ellen McLain the only voice present in every game included in the ''[[The Orange Box]]''. | |||
* The most favored character that Ellen McLain has voiced is none other than GLaDOS. She reveals that despite the hard effort in pulling off the voice of the [[tf:Administrator|Administrator]] from ''Team Fortress 2'' and her unique way of ordering things, GLaDOS' character had a greater impact on her through her popular passive-aggressive behavior and subtle insults. | |||
* GLaDOS makes a cameo appearance in the Telltale game ''[https://www.telltalegames.com/pokernight2/ Poker Night 2]'', where she plays the role of the dealer and occasionally banters with the other players. She also appears as one of the many minor antagonists in ''[[Wikipedia:Lego Dimensions|LEGO Dimensions]]''. | |||
* During the development of ''[[Portal 2]]'', playtesters were uncomfortable with GLaDOS as she was far too vindictive in the single-player campaign, and the developers concluded that some of her dialogue was too extreme. Due to this, elements of her dialogue were reworked, which resulted in the creation of a more amicable, passive-aggressive personality for GLaDOS. | |||
* In the single-player campaign of ''Portal 2'', Wheatley would only refer to GLaDOS as "her" or "she". | |||
* {{spoiler|When in her potato battery form, she is commonly referred to by the community as "PotatOS;" this nickname is derived from the word "potato" and her name, GLaDOS. Valve favored this nickname and placed it as her official name when in her potato battery form, as shown in the Portal 2 Soundtrack "PotatOS Lament".}} | |||
* On the 2011 Video Game Awards, ''Portal 2'' had won the award for "Best Performance by a Human Female" for Ellen McLain's role as GLaDOS.<ref>[http://www.spike.com/events/video-game-awards-2011-nominees/voting/best-performance-by-a-human-female Best Performance by a Human Female] on Spike</ref> | |||
* On April 8th, 2015. John Patrick Lowrie and Ellen released a non official song simply called [https://www.youtube.com/watch?v=hgiNKEXtx7I ''GLaDOS' Song''], it is intended to play on an easter egg in Portal 2 somewhere in the development, but was cut due to not fitting GLaDOS' dark tone. | |||
== Appearances == | |||
* ''[[Portal]]'' | |||
* ''[[Portal: Still Alive]]'' | |||
* ''[[Portal: The First Slice]]'' | |||
* ''[[Portal 2: Lab Rat]]'' | |||
* ''[[Portal 2]]'' | |||
* ''[[Randolph the Red-Nosed Turret]]'' | |||
== References == | |||
<references /> | |||
== See also == | |||
* [[GLaDOS voice lines]] | |||
* [[Chell]] | |||
* [[Aperture Science]] | |||
* [[Wheatley]] | |||
* [[Collaborative Disposition Test#GLaDOS|Collaborative Disposition Test]] | |||
* {{Spoiler|[[Caroline]]}} | |||
* [[Betty]] (GLAaDOS) | |||
<br /> | |||
{{CharactersNav}} | {{CharactersNav}} | ||
Latest revision as of 13:18, 6 April 2025
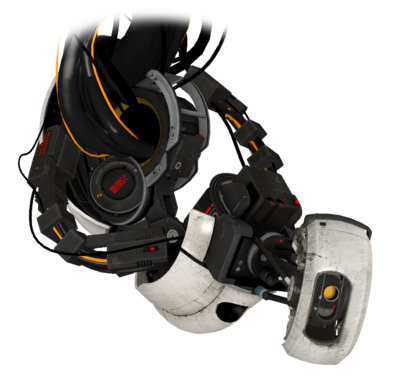
| “ | Okay, look: We both said a lot of things that you're going to regret, but I think we can put our differences behind us; for science... you monster.
— GLaDOS
|
” |
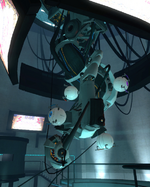
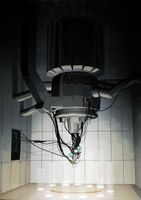
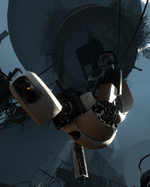
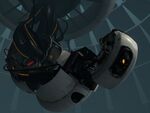
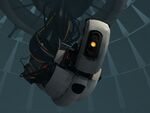
GLaDOS (Genetic Lifeform and Disk Operating System) is the central core designed to control, guide, and oversee the Aperture Science computer-aided Enrichment Center. With the ability to shift and move facilities and various chambers, GLaDOS is able to achieve a seamless and almost infinite testing design whilst residing in the Central AI Chamber.
In possession of a feminine programming, she is the antagonist of Portal and the first half of the single-player campaign in Portal 2. During the later half, she becomes the game's tritagonist. In the game's cooperative campaign, GLaDOS is the testing supervisor of Atlas and P-body.
Background
GLaDOS was a creation of Aperture Science, a personality core designed exactly to be fitted as a central computer mainframe. The project began under the oversight of Cave Johnson over the company and was an attempt to create a fully functional, advanced artificial intelligence which was originally intended to be occupied by Johnson as one of his attempts to cheat death. After it became apparent to Johnson that he may die of moon rock poisoning before development on GLaDOS would be completed, Johnson motioned for the scientists to insert Caroline instead.
After a decade's worth of hard work, GLaDOS was officially activated as part of one of the many events during the company's "Bring Your Daughter to Work" day. Since she was able to take control of half of the facility's features, GLaDOS began killing most of its inhabitants by flooding the Enrichment Center with neurotoxin. However, only a few if not only one of the staff such as Doug Rattman had survived her attacks along with the series' main protagonist, Chell. The destruction of the company also coincided with an invasion of Earth, which had occurred two days after at Aperture's rival company, Black Mesa. This ultimately led to the negligence of the outside world from realizing's fate, as all attention had been diverted to Black Mesa and the aforementioned invasion.
Since the attack, she has managed the company to her limits. Her first test subject and the series' main protagonist, Chell, was given a warning of GLaDOS' true colors with the help of Rattmann. She confronts GLaDOS in her chamber at the end of Portal, which allowed GLaDOS to develop an even deeper hatred for her after she was awakened at the beginning of Portal 2.
Overview
Portal
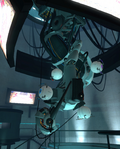
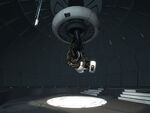
Before the events of Portal, one of Aperture's technicians, Doug Rattman, successfully evaded GLaDOS' attempts to flood the Enrichment Center with neurotoxin. He then took refuge in several departments throughout the facility and began tampering with the initial test subject roster, rearranging Chell to the top of the list as Test Subject #1 instead. Since GLaDOS initiated a lockdown, Rattman was forced to live his whole life hiding between the backstages of Test Chambers in the Enrichment Center. He then left various warnings of GLaDOS through graffiti that could only be found behind several corrupted wall panels in Test Chambers, in hopes that Chell would later stumble upon them. GLaDOS was able to operate the company all while residing in her Central AI Chamber, despite lacking full control over the facility.
She then awakens Chell for her mandatory testing of the Handheld Portal Device, which began the events of Portal. During these periods, she constantly intimidated Chell during her performances and gave bitter yet innocent sarcastic notions by simply acting out like conveniently placed pre-recorded messages. Several tests later, Chell would later discover the various graffiti left behind by Rattmann and immediately became aware that this was not the case, but was forced to play along with GLaDOS' plans.
After Chell completed the final test chamber, GLaDOS immediately revealed her true colors as she attempts to lower her into a pit of fire. Chell was able to escape her attempt to incinerate her and from there, Chell makes her way throughout the facility in an attempt to escape, to GLaDOS' horror. As she traverses the facility, she realizes the only way to escape from it is to confront GLaDOS in her chamber, a conflict which Chell won by incinerating all of her personality cores. After the conflict, GLaDOS was heavily damaged and thrown into the parking lot, where she remained dormant for an unspecified amount of time as the facility degraded over the years.
Portal 2
Reawakening era

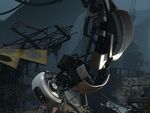
Beginning the major events of Portal 2, GLaDOS is reactivated in her backup body through the accidental efforts of both Wheatley and Chell having tried to access an escape lift to the surface in the Central AI Chamber, as both of them were previously trapped in the building following GLaDOS' destruction. She immediately realizes the presence of Chell and Wheatley standing before her upon awakening. Despite her newly profound hatred for Chell having destroyed her, she uses Wheatley as an object for relieving her anger by crushing him.
GLaDOS then decides to return Chell to the facility's science experiments to further her cause of science, but now have a lot of resentment against Chell for her previous destruction (she claims at one point that she had to relive the last moments of her fight with Chell over and over which, if true, would be a long time indeed), she constantly makes various taunts and snarky remarks at Chell while testing her, and plans to try to kill her again.

However, Wheatley later resurfaces and was still alive despite the critical damage inflicted onto him by GLaDOS. With his help, Chell was able to escape from GLaDOS' testing tracks and went through the facility to sabotage her vital strategy components, such as the production of neurotoxin. Finally reaching her newly redesigned chamber, they were then able to defeat GLaDOS together, replacing her with Wheatley as the facility's overseer. Wheatley, intimidated by GLaDOS' response to how useless he is, traps GLaDOS in a potato battery and throws her into the depths of the Enrichment Center alongside Chell.
After Wheatley became corrupted by his new position and power, GLaDOS and Chell worked together, initially as unwilling partners, to restore control over the facility (which further degraded and corrupted under the influence of Wheatley, to the point where the facility's reactor core will undergo a meltdown). During this time, the duo try to find their way out of the depths of the Enrichment Center where they approach several vintage Test Chambers previously managed by Aperture CEO, Cave Johnson and his secretary Caroline.
As Chell and GLaDOS continue to journey through the pasts of Aperture Science located in the salt mine deep beneath the Enrichment Center, GLaDOS slowly becomes familiar to Johnson and Caroline. As they are finally ready to leave the salt mine, GLaDOS spots a poster on the wall, showing what to do in the case of a rogue AI, a paradox. GLaDOS also has an epiphany on who Caroline is but remains silent on the matter.
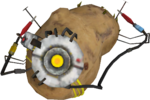
The duo then have made their way back to the modern Enrichment Center, where Chell and GLaDOS use the paradox on Wheatley, but ultimately fail because Wheatley is too unintelligent to understand it. They are put through Wheatley's testing tracks. When Wheatley later realizes that GLaDOS had built two robot test subjects prior to Chell and Wheatley's sabotage over the facility early on in the game, he finally attempts to dispose both GLaDOS and Chell. When the duo manages to escape from his grasp, they head to the Central AI Chamber to confront him. GLaDOS proposes that Chell is to attach her back into her body to resume her control over the facility. The conflict was then resolved by their conjoint efforts, resulting in the exile of Wheatley to outer space and reconciliation between each other.
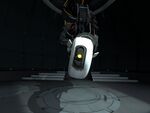
After repairing the entire facility to its state before Wheatley's control, GLaDOS begins to become even more affected by her recently acquired morality, emotions and gained her consciousness after discovering who Caroline was. She realizes that Chell was not an enemy, but could be considered a close friend. Part of her "rogue AI" nature disagreed with this change of heart. GLaDOS was then able to trace Caroline's consciousness in her system, moments before the Announcer reveals that GLaDOS has deleted Caroline from her system. She then expels Chell from the facility to avoid further trouble beyond her control. However, Chell is then comforted through her elevated ride to the surface by a Turret Opera which remains unknown as to why the event occurred.
Before Chell could leave the Enrichment Center for good, GLaDOS decides to return Chell's Companion Cube from her tests in Portal by ejecting it from the lift.
From then on, she conducts tests on the two robot test subjects; Atlas and P-body.
Cooperative testing era
Sometime after Chell is freed from the Enrichment Center, GLaDOS has been primarily focusing on her two new android test subjects Atlas and P-body, as part of the Cooperative Testing Initiative. Typical of her nature, she would constantly find a way to crush their spirits via sarcasm and expressing herself to be having little hope for them.
At the end of the first testing course, Team Building, she deploys the bots outside the official testing track, announcing that "this next test is so outside the box that I can't- I mean WON'T even tell you what you're looking for". She leaves the bots to use common sense to figure out what they should be looking for by themselves, as they find a large disc and bring it into a projector room. Despite the clear warning "DO NOT TRUST HER" written on a whiteboard in the room, the bots place the disc into the projector - in which she begins scanning for files and documents she refuses to disclose. After she was done, she initiated a self-destruct on the bots and reassembled them back at the Hub.
This topic remains untouched through the entirety of their second testing track, Mass and Velocity. However, at the end of this course, it became clear that she would continually send them outside the testing tracks again to handle her secret full takeover on the facility. As Atlas and P-body work together to get each other past the air circulation maintenance section, they find another disc and install it into the projector. GLaDOS again scans through and proceeds to tell them that she did not need them to do this, and pretends their mission did not matter after self-destructing them again.
When the bots reach the third course, Hard-Light Surfaces, GLaDOS' utter disappointment in the duo becomes more clear. Their "deaths" never bring the satisfaction she had with the death of humans, as the bots can just easily be rebuilt again each time they are destroyed. Meanwhile, she is secretly working on an attempt to replace Atlas and P-body. At the end of this course, the bots install a disc that contains the Enrichment Center's current overall security code, which she tries to block out from their range of hearing by uttering "blah blah blah" repeatedly as the Announcer relays the codes.
In the fourth course, Excursion Funnels, GLaDOS builds slight hope in keeping Atlas and P-body still as predicted by her sudden change of mood from the previous course. She now wants the bots to feel conflicted against each other - hoping to enhance a more "competitive" and bitter testing run, simply by manipulating them into thinking that one of them has been "reporting" to her behind the others' back, or how P-body is "not [Atlas'] first cooperative testing partner". The bots still carry on regardless, where GLaDOS' disappointment in the two reprises in her tone of voice. On the last test, she gets them to install the final disc to her full control over the facility - assuring them it was a clerical error by humans on how it was not done any earlier before they died. As the bots install it, overview maps of every section of the facility begin projecting onto the screen, followed by her mischievous yet anticipated tone of voice when revealing that "[she] can see everything now".

Reassembled back at the hub, GLaDOS tells the bots that they have just one more testing course to complete - Mobility Gels. She deploys the entrance to this course into the hub and sends them deep beneath the Enrichment Center to the Aperture Science Innovators era, a bottom section of the salt mine. GLaDOS convinces them to rescue the "dying, trapped, crying" live human test subjects preserved in a cryogenic vault that were preserved since the 20th century. Once they finally reach this vault at the end of the course, GLaDOS reveals a great deal of anticipation and obsession over "rescuing" them. In an attempt to unlock the vault, the bots had to perform gestures like any human would - as the vault was an anti-robot section. Despite how sinister she sounded after the bots observed the hundreds of humans in cryogenic stasis, they disregarded it and began dancing in triumph. Now extracting all of the human test subjects, she begins processing their files - which apparently turned out to be only one person's file.
As she no longer needs Atlas and P-body as her test subjects, she began testing the humans in an attempt to develop them into her cold minions. Her plan fails as the humans are unable to withstand her extreme testing courses and all of the hundreds of test subjects that were found began dying within just a week of testing. It became apparent that she needed Atlas and P-body back as her facility began to malfunction all of a sudden, in addition to her lack of test subjects.
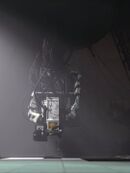
When the bots are rebuilt again, she deploys the additional testing course; Art Therapy. As the bots begin testing, she treats the course as if it were an art museum despite the obvious malfunctioning environment such as her lack of control in putting the test chambers together properly, and a flood arising around a section of the facility during testing. Eventually, the reassembly machines have begin malfunctioning - causing her to wait three days before the robots could be reassembled to deliver the duo to their next test chamber. GLaDOS then gives in and confesses that she is in need of their help and that someone has been tampering with the facility via control of an old prototype chassis of the central core. To resolve this, she trains the bots into becoming her "killing machines" by deploying them into more challenging tests during their course. GLaDOS then sends them closer to the chamber housing the chassis, and later jokingly calls them as her "Special Team Falling Into Acid Force". When the bots reach the chamber, they discover it was never a person, but even worse - a bird nesting above the keyboard on the machine. GLaDOS, thanks to her ornitophobia back when she was a potato, panics and instructs them abort the mission, before P-body closes a hatch that the bird flew out from. As the bots stare at the chassis, GLaDOS panics that the bird had been "gestating clones" on the keyboard and forces them to destroy the eggs. With the bots hesitant, she conjures a better idea and houses the birds in the Central AI Chamber, where she could nurture them directly.
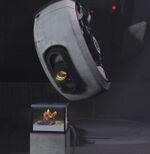
GLaDOS begins to show compassion toward the birds as she realizes their ability to use their beaks and considers them as test subjects, also revealing a more motherly bonding with the birds than she ever did with the "mushroom" bots. The fate of these birds remain unknown.
Perpetual testing era
As the Perpetual Testing Initiative offers a wide range of alternate universes for the player that is going through community test chambers - dubbed the "multiverse", Aperture CEO Cave Johnson still lives and is as healthy as he was before being struck by exposure to moon rock poisoning in the main reality. However, all of the universes which form multiverse have the same outcome in which all development on GLaDOS has been abolished after her first activation when she went rogue.
In addition to her being abolished, Cave's loyal assistant Caroline has been replaced with Greg. It is unexplained on exactly what did happen to Caroline, although serving as a hint that she may have merged with GLaDOS, thus explaining her absence from this era. In this same universe after she was abolished, Cave also tries pushing the scientists into making a Cave-Bot instead. In one universe Cave successfully becomes an AI (known as "CaveDOS") and it's unknown what happened to Caroline.
Abilities and traits
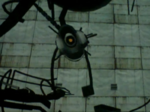
As the overseer and operator of the facility, GLaDOS is seemingly omnipotent, able to reconfigure rooms and carry out actions at her will. She monitors the facility and its test chambers through cameras mounted on walls. She also mentions that she cannot resist thinking of paradoxes if one would happen to be brought up. GLaDOS had displayed little to no emotion within her voice tone in the first half of Portal, due to being bound by the consciousness of other personality cores attached to her for the sole purpose of restricting her true thoughts. She then becomes increasingly more agitated and is portrayed as a narcissist during Chell's escape attempts. In Portal 2, she grows bitter after the events of Portal, and is no longer bound by the restraints of her cores. She frequently insults Chell until the very end - until she briefly realizes that Chell was "all along [her] best friend".
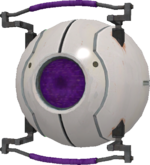
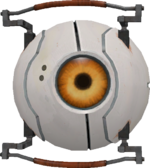
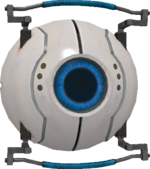
GLaDOS' consciousness had been controlled by personality cores throughout the events of Portal. If the cores are removed, the traits and morals which the cores contain would be permanently detached from GLaDOS as well, causing her to fall back to her more human and intimidating voice tone, resembling that of her Genetic Lifeform component Caroline.
GLaDOS' status as the central core allows her to have various controls over the Enrichment Center. Apart from being able to build, reconstruct or deface test chambers, GLaDOS can provide the pneumatic pressures serving as the vacuum inside the tube networks across the facility - a power which the Announcer could only handle the elevator tube shafts in the chamberlocks. In Portal, GLaDOS was able to steer away the vacuum directions inside the tubes and managed to pull Chell back into Test Chamber 09 after the latter attempted to travel inside a burst tube.
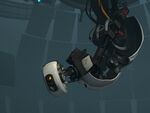
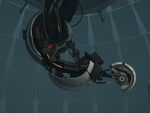
It was eventually revealed in Portal 2 that GLaDOS was also able to reconstruct the components on her own body as well, now without the cores restricting her thoughts. She had replaced most of the broken and or missing components on her body since her reawakening in the chapter, The Courtesy Call. Her newer components spotted on her body since the chapter The Escape is sleek and black, and is of little resemblance to the original ones from her body during the reawakening and Portal.
Development and acting

During Anime Midwest 2011, voice actress Ellen McLain revealed that the premise of GLaDOS had always been a robotic voice that would guide the protagonist and often intimidates them. Early on development, Valve had used copyrighted voice samples as a placeholder for GLaDOS. As Ellen McLain previously voiced the radio communications dispatcher of the Combine Overwatch throughout the Half-Life 2 saga, the developers had chosen her for the role of GLaDOS. During this time, developers had kept the development quiet, leaving Ellen unaware of what game it is that she is doing voice work for. Ellen was later made aware of her work and success when Portal was finally released.
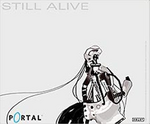
In Portal 2, GLaDOS' dialogue shortly after her awakening was originally much more insulting. As playtesters grew uncomfortable with her insults, it was then decided that GLaDOS continues her passive-aggressive behavior which she began from the Portal credits song, Still Alive. When it was decided that GLaDOS and Chell needed to work together to face Wheatley, Valve opts for GLaDOS to be uploaded into a potato battery. Writer Jay Pinkerton describes the transformation as "a very stark difference between this imperious, all-powerful GLaDOS talking to you, and this powerless GLaDOS talking to you on your gun", and that potato GLaDOS was initially needling towards playtesters. To counteract this, she was made into a more sidekick type of character.[1]
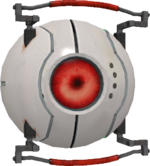
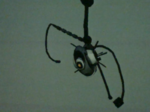
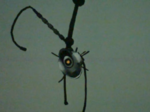
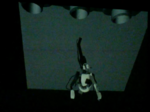
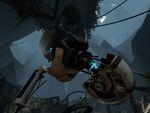
Appearance-wise in Portal, GLaDOS' initial designs before the game's release varied greatly. The earliest known design of GLaDOS was a large disc with a red eyeball in the center, with the disc surrounding it and welded onto the eyeball. This concept of GLaDOS appears to be the most favorable version towards several community members and was then recreated for use on a character entirely for the community-made machinima series, The Underground. Later on in development, the design of the large eyeball was then scrapped into a robotic body hanging upsidedown from the ceiling, with four discs surrounding above it this time. This concept has since been kept for the release of Portal, with minor adjustments such as the addition of personality cores.
In the game's commentary mode, Jeremy Bennett (art director) describes GLaDOS's design: "[...] we settled on a huge mechanical device with a delicate robotic figure dangling out of it, which successfully conveys both [her] raw power and her femininity." Originally, according to Bennett, she resembled an upside-down version of Botticelli's "Rise of Venus".
The earliest known concept art of GLaDOS' design for Portal 2 was through one of the many concept box arts; demonstrating that her body's plating was completely torn and scrapped, leaving only her head the most intact - nearing the design of her spherical-cylinder shaped head in the game's release. She had also been given a red-eye color in this concept rather than the trademark yellow that was given to her in Portal. Not much else is known of her design changes during the sequel, except that the developers established that the current design of GLaDOS in Portal 2 was to signify a more antagonistic appearance and shape.
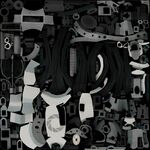
In addition, an unused reskin of GLaDOS' design from Portal can be found in the game files of Portal 2, presenting rust stains and scratches possibly to be used for her components scattered around in her chamber.
Gallery
Portal
| Screenshots | ||||||||||||
| ||||||||||||
Portal 2
| Pre-release | |||||||||
| |||||||||
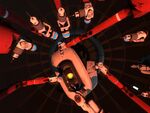
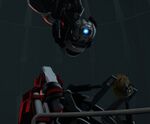
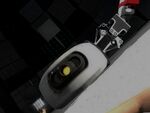
| Screenshots | ||||||||||||||||||||||||||||||||||||||||||||||||
| ||||||||||||||||||||||||||||||||||||||||||||||||
| Media | ||||||||||||||||||||||
| ||||||||||||||||||||||
Other
| Screenshots | |||||||||
| |||||||||
Trivia
- GLaDOS is voiced by opera singer and voice actress Ellen McLain.
- The acronym "GLaDOS" is a pun of the name "Gladdys" and the term DOS (Disc Operating System).
- Ellen McLain, the actress that voices GLaDOS, also provides the voice for the Administrator in Team Fortress 2 and the Combine Overwatch in the Half-Life series. This makes Ellen McLain the only voice present in every game included in the The Orange Box.
- The most favored character that Ellen McLain has voiced is none other than GLaDOS. She reveals that despite the hard effort in pulling off the voice of the Administrator from Team Fortress 2 and her unique way of ordering things, GLaDOS' character had a greater impact on her through her popular passive-aggressive behavior and subtle insults.
- GLaDOS makes a cameo appearance in the Telltale game Poker Night 2, where she plays the role of the dealer and occasionally banters with the other players. She also appears as one of the many minor antagonists in LEGO Dimensions.
- During the development of Portal 2, playtesters were uncomfortable with GLaDOS as she was far too vindictive in the single-player campaign, and the developers concluded that some of her dialogue was too extreme. Due to this, elements of her dialogue were reworked, which resulted in the creation of a more amicable, passive-aggressive personality for GLaDOS.
- In the single-player campaign of Portal 2, Wheatley would only refer to GLaDOS as "her" or "she".
- When in her potato battery form, she is commonly referred to by the community as "PotatOS;" this nickname is derived from the word "potato" and her name, GLaDOS. Valve favored this nickname and placed it as her official name when in her potato battery form, as shown in the Portal 2 Soundtrack "PotatOS Lament".
- On the 2011 Video Game Awards, Portal 2 had won the award for "Best Performance by a Human Female" for Ellen McLain's role as GLaDOS.[2]
- On April 8th, 2015. John Patrick Lowrie and Ellen released a non official song simply called GLaDOS' Song, it is intended to play on an easter egg in Portal 2 somewhere in the development, but was cut due to not fitting GLaDOS' dark tone.
Appearances
- Portal
- Portal: Still Alive
- Portal: The First Slice
- Portal 2: Lab Rat
- Portal 2
- Randolph the Red-Nosed Turret
References
- ↑ Valve On Portal 2: Spoiler Interview on Rock, Paper, Shotgun
- ↑ Best Performance by a Human Female on Spike
See also
- GLaDOS voice lines
- Chell
- Aperture Science
- Wheatley
- Collaborative Disposition Test
- Caroline
- Betty (GLAaDOS)
| ||||||||||||||
