Chell/ko: Difference between revisions
No edit summary |
m Reverting vandalism |
||
| (22 intermediate revisions by 2 users not shown) | |||
| Line 2: | Line 2: | ||
{{Trans}} | {{Trans}} | ||
{{SpoilerHeavy}} | {{SpoilerHeavy}} | ||
[[File:Chell.png|right | [[File:Chell.png|right|150px|''포털 2''에서의 첼]] | ||
'''피실험자 #1''' (이전에는 '''#1498''')로 기록됬었던 '''첼'''은 [[Aperture Science/ko|애퍼처 사이언스]] 컴퓨터 보조 강화 센터의 피실험자였으며, 회사의 [[Handheld Portal Device/ko|휴대용 포털 장치]] (흔히 '포털건'으로 알려짐)를 사용하는 실험에 참여했습니다. | |||
'''피실험자 #1''' (이전에는 '''#1498''')로 기록됬었던 '''첼'''은 [[Aperture Science/ko|애퍼처 사이언스]] 컴퓨터 보조 강화 센터의 | |||
그녀는 [[Portal/ko|''포털'']]과 [[Portal 2/ko|''포털 2'']]의 과묵한 주인공이자 캠페인의 싱글 플레이어입니다. 과거에 대해서 알려진 바가 거의 없는 그녀는 출생 당시 버려졌으며, | 그녀는 [[Portal/ko|''포털'']]과 [[Portal 2/ko|''포털 2'']]의 과묵한 주인공이자 캠페인의 싱글 플레이어입니다. 과거에 대해서 알려진 바가 거의 없는 그녀는 출생 당시 버려졌으며, 살아남기 위해 완강히 노력합니다. | ||
게임 시리즈 전체를 통틀어, 첼은 실험 코스에서 {{Spoiler|AI들과 시설 감독관인 [[GLaDOS/ko|GLaDOS]]에게 대항합니다.}} {{Spoiler|시설 탈출이 목표인 그녀는 휴대용 포털 장치만을 사용하며 적들과 시설의 구역을 피해 다닙니다.}} | |||
== | == 개요 == | ||
첼의 과거 대부분은 수수께끼로 남아 있습니다. {{Spoiler|''[[Portal/ko|포털]]''의 마지막 단계에서, [[GLaDOS/ko|GLaDOS]]는 첼에 대해 수차례 언급하는데, 그녀가 태어나자마자 버려졌을 뿐만 아니라 입양되었다고 합니다. 그리고 이러한 언급들은 ''[[Portal 2/ko|포털 2]]''에서도 계속 되지만 GLaDOS의 말이 신뢰성을 띄지 못하는 점이 있었습니다. ''포털''의 마지막 단계에서 GLaDOS가 첼에 대해 언급했던 것들은 그녀가 목표를 달성하는 것을 방해하는 데 주목적이 있었으며, 입양이든 고아 상태이든 그 당시로서는 논쟁거리가 되지 못했습니다.}} | |||
''포털'' 2를 진행하다 보면, {{Spoiler|첼은 애퍼처 사이언스에서 일하던 과학자의 딸이었을 것이라는 암시가 나옵니다.}} | |||
=== ''포털'' === | |||
{{Spoiler|Some time after GLaDOS' takeover of Aperture Science, Chell is awakened in a [[Relaxation Vault]] after being unconsciously placed into it. Curious, she explores the Vault, and within only ten seconds of awakening, Chell is greeted by a robotic and seemingly automated female voice who informs her that she is a test subject. A voice, (later to be revealed as GLaDOS) then states that Chell will be undergoing testing for the benefit of Aperture Science's research program.}} | |||
GLaDOS then generates two oval-shaped teleportation fabrics ([[portals]]) on a solid flat surface, with an entrance portal in the Relaxation Vault and an exit just in front of the exterior of the Vault. Chell exits from the Vault, however {{Spoiler|she notices empty observation rooms which lack the staff that should be recording her performance.}} After completing her first test and acquiring an understanding the [[Cubes|cube]]-and-[[Heavy Duty Super-Colliding Super Button|button]] based mechanic, she is put through a series of tests to further explore and understand the use of portals. | |||
[[File:Portal Chell.png|thumb|right|100px|''포털''에서의 첼]] | |||
{{Spoiler|Having completed two tests, Chell reaches a test chamber in which she acquires the [[Handheld Portal Device|Portal Gun]]. Later on during the testing course, she is put through a series of more dangerous tests including hazards such as [[Goo]] and [[High Energy Pellet]]s, among others. Skillfully avoiding these hazards, Chell is assisted by the [[Companion Cube]] and by the Aperture Science [[Advanced Knee Replacement]] components applied to the back of her lower legs to her ankles, which allow Chell to avoid injury when falling from great heights. Eventually, the single-portal variant of her Portal Gun is upgraded to create a set of linked portals. As an incentive to complete the tests, [[GLaDOS]] promises Chell that [[cake]] will be served once all tests chambers have been completed.}} | |||
As the testing progresses, Chell {{Spoiler|stumbles across various areas with defunct [[Panels|wall panels]], and manages to sneak into them. As she enters these maintenance areas, she finds refuge areas commonly known as the [[Doug Rattmann|Rat Man]]'s Dens, previously used as hiding places by Aperture technician Doug Rattmann. The scribblings on the walls in these Dens appear to be warnings for Chell, telling her that "the cake is a lie" and that "she's watching you". Chell, now made more aware of her situation, is forced to continue testing and play along with GLaDOS' plans. The Rat Man's warnings are eventually revealed to be correct, as GLaDOS attempts to murder Chell upon her completion of the final test chamber, despite earlier promises of cake.}} | |||
{{Spoiler|Chell successfully escapes the dramatically slow death trap, and is informed by GLaDOS that pretending to kill Chell is simply part of the test. Dubious as to the veracity of this claim, Chell escapes the testing course, and travels through the Aperture Science Facility in an attempt to reach the surface and escape. Eventually however, Chell realizes there there is no chance of escape as long as GLaDOS is in control of the Facility, and is forced to confront GLaDOS in the [[Central AI Chamber]].}} | |||
{{Spoiler|Upon entry to the chamber, Chell is greeted by the passive-aggressive rogue AI. GLaDOS claims that she will provide Chell with a surprise, however a [[Cores#Morality Core|Morality Core]] unexpectedly detaches from GLaDOS' chassis. Chell destroys it using a nearby [[Emergency Intelligence Incinerator]], however the Core is revealed to be a safeguard designed to inhibit GLaDOS' homicidal tendencies. With the Core destroyed, GLaDOS releases [[neurotoxin]] into the chamber in an attempt to kill Chell. At the same time, a [[Turrets#Rocket Turret|Rocket Turret]] emerges from a core hatch beside GLaDOS and begins to target Chell. Using the Portal Gun, Chell redirects the projectiles through linked portals, causing the rockets to strike GLaDOS, each of which detaches more Personality Cores from the chassis. Although inflicting damage, the loss of the Cores merely increases GLaDOS's desire to kill Chell. After destroying each detached Core one-by-one, Chell destroys the final Core (the [[Cores#Anger Core|Anger Core]]), and GLaDOS is sent literally spiraling into her demise, as the destruction of her generators triggers a gravitational vortex, which deposits Chell on the surface.}} | |||
{{Spoiler|Chell slowly regains consciousness in the parking lot of the Enrichment Center, with with a lifeless GLaDOS beside her. As Chell's vision clears, the [[Party Escort Bot]] thanks her for "assuming the party escort submission position", and begins dragging her back into the now-ruined Aperture Science Facility. As Chell is dragged away, it is revealed that the destruction of the Central Core (GLaDOS) resulted in the automatic activation of other Personality Cores, tasked with the management of the Enrichment Center while GLaDOS is offline. The final scene depicts the Companion Cube and a cake deep within the bowels Facility, waiting for Chell to claim them.}} | |||
=== ''[[Portal 2: Lab Rat/ko|Lab Rat]]'' === | |||
During the course of the comic, we are introduced to former Aperture scientist, Doug Rattman. {{Spoiler|He witnesses the apparent destruction of GLaDOS, and later, {{Spoiler| after escaping from the facility himself,}} witnesses the recapturing of Chell by the Party Escort Robot. Following the robot, he finds that Chell has been placed into an [[Aperture Science Extended Relaxation Center| Extended Relaxation Vault]]. However, as a result of the explosion {{Spoiler|at the conclusion of Portal}}, all of the relaxation vaults' life support systems are offline. Doug patches Chell's vault onto a reserve grid (as he was unable to open the vault), allowing Chell to survive the years prior to her reawakening in Portal 2.}} | |||
=== ''포털 2'' === | |||
{{Spoiler|Many years after the events of the original games, Chell is revived by [[Wheatley]], a [[Personality Core]]. After a brief introduction, he convinces Chell to escape with him from the ruined facility. The pair eventually find themselves in the remains of GLaDOS' chamber. Wheatley then inadvertently reawakens GLaDOS, who immediately recognizes Chell. Discarding Wheatley, GLaDOS plunges Chell back into the depths of Aperture, to resume testing.}} | |||
{{Spoiler|Chell finds herself testing in the ruined facility with GLaDOS, but after a several chambers, Wheatley rescues Chell to help him sabotage GLaDOS' weaponry, allowing for a coup to take place later. GLaDOS eventually manages to trap Chell and bring her into her lair. After finding that her preferred methods of murder are unusable, Chell and GLaDOS find themselves at a standstill. Wheatley reappears, and after Chell initiates a core transfer, replaces GLaDOS as the Central AI of Aperture. However, he goes mad with power, dismantles the remains of GLaDOS' head and reconfigures it into a potato battery, and accidentally sends both GLaDOS and Chell to the decomposing underbelly of the facility, "Old Aperture," which had been sealed off for many decades.}} | |||
{{Spoiler|In Old Aperture, Chell is introduced to [[Cave Johnson]], the now-deceased founder and CEO of Aperture and his assistant [[Caroline]]. Throughout the tests, Chell finds and re-activates the [[Repulsion Gel|Repulsion]], [[Propulsion Gel|Propulsion]] and [[Conversion Gel|Conversion Gels]]. She is reunited with GLaDOS during her travel through Old Aperture, and the two forge a plot to overthrow Wheatley in exchange for Chell's freedom.}} | |||
{{Spoiler|After departing from Old Aperture, the duo locate a test chamber that Wheatley is overseeing and attempt to disable him via a logical paradox. This fails, however, and they quickly find themselves solving Wheatley's own cobbled-together tests. Much like in the first game, Wheatley tries to kill Chell and GLaDOS, saying that he had found the [[Cooperative Testing Initiative| perfect replacements]] for Chell. After a lengthy chase through the upper facility, Chell and GLaDOS are again in the Central AI Chamber with Wheatley. Chell furthers Wheatley's "corruption" by attaching corrupted cores to his frame, allowing for a second core transfer. Before Chell can do this, however, Wheatley detonates bombs that he had "booby-trapped the stalemate button" with in a last ditch effort to maintain control. However, Chell fires one last set of portals above and below Wheatley. These portals link together the Moon and the Central AI Chamber, and both Chell and Wheatley are sucked through into outer space. Seconds afterward, GLaDOS regains control of her chassis, rescues Chell, and closes the portals, leaving Wheatley to be lost in space. After a monologue, GLaDOS (supposedly) makes good on her promise, and delivers Chell, via high-speed elevator, to the surface above Aperture Science. As the elevator ascends, it enters an ampitheatre-like space, where a [[Turret Opera|choir of turrets]] sing [[Cara Mia|a farewell song]] to Chell. Chell's elevator emerges in a shed in a large field of wheat. Chell's [[Weighted Companion Cube|Companion Cube]] is also sent up moments afterword, presumably as a token of "thank you" from GLaDOS. After expelling the Companion Cube, the elevator door slams violently, probably to indicate that GLaDOS does not want Chell to return to the Enrichment Center again.}} | |||
== 갤러리 == | |||
{{Gallery | |||
|lines=5 | |||
|title=첼 | |||
|height=150 | |||
|width=150 | |||
|File:Alésia Glidewell Chell reference pose.jpg|alt3=[[wikipedia:Alésia Glidewell|:Alésia Glidewell]] posing for a Chell reference shot.|[[wikipedia::Alésia Glidewell|Alésia Glidewell]] posing for a Chell reference shot. | |||
|File:Chell_from_Personality_Test.jpg|alt4=Chell image from the official Aperture Science Collaborative Disposition Test.|Chell image from the [http://www.thinkwithportals.com/coop_survey.php official Aperture Science Collaborative Disposition Test]. | |||
|File:Chell_-_Audiosurf.png|alt5=Chell from the Audiosurf part of the Valve Potato Fool's Day ARG.|Chell from the Audiosurf part of the Valve Potato Fool's Day ARG. | |||
|File:Chell_Valentine.png|alt6=Chell Valentine from Valve's official Portal 2 blog.|Chell Valentine from [http://thinkwithportals.com official Portal 2 blog]. | |||
|File:Chell Icon.jpg|alt7=Avatar of Chell from the official Steam Portal 2 group.|Avatar of Chell from the [http://steamcommunity.com/games/portal2/Avatar/List official Steam Portal 2 group]. | |||
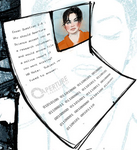
|File:Lab Rat - A Page From Chell's File.png|alt8=One of the pages from Chell's file in Lab Rat.|One of the pages from Chell's file in the comic, ''[[Portal 2: Lab Rat]]''. | |||
|File:Lab Rat - Ratman With Chell's File.png|alt9=Doug Rattmann holding Chell's file in Lab Rat.|[[Doug Rattmann]] holding Chell's file in ''Lab Rat''. | |||
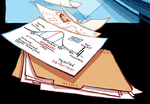
|File:Lab Rat - Chell's File - Stubborn.png|alt10=Chell's file showing her high level of tenacity from the ''Lab Rat'' comic.|Chell's file showing her high level of tenacity from the ''Lab Rat'' comic. | |||
|File:Lab Rat - Chell's Name on the List.png|alt11=Chell on the test subject list when Rattmann sabotages the list from ''Lab Rat''.|Chell on the test subject list when Rattmann sabotages the list from ''Lab Rat''. | |||
|File:Chell on the Cover of The Sacrifice.png|alt12=The cover of "The Sacrifice" featuring various Valve characters, including Chell.|The cover of "The Sacrifice" featuring various Valve characters, including Chell. | |||
|File:Full Zoom of Chell on the Cover of The Sacrifice.png|alt13=Full zoom of Chell on the cover of "The Sacrifice".|Full zoom of Chell on the cover of "The Sacrifice". | |||
|File:The_Sacrifice_Concept_Art.jpg|alt14=Concept art for "The Sacrifice".|Concept art for "The Sacrifice".<ref>http://www.destructoid.com/dark-horse-publishing-valve-steam-powered-comic-205623.phtml</ref> | |||
|File:Chell and GLaDOS Gelaskin.png|alt15=Artwork of Chell and GLaDOS on an iPad gelaskin.|Artwork of Chell and [[GLaDOS]] on an iPad gelaskin. | |||
|File:GLaDOS Lithograph Aperture's Requiem.png|alt16=Chell and GLaDOS on the "Aperture's Requiem" lithograph.|Chell and [[GLaDOS]] on the "Aperture's Requiem" lithograph. | |||
|File:Red-Nosed P02.jpg|alt17=Chell in the "Randolph the Red-Nosed Turret" comic.|Chell in the "[[Randolph the Red-Nosed Turret]]" comic. | |||
|File:LEGO Minifig Chell.jpg|alt18=LEGO Chell minifig|LEGO Chell minifig. | |||
|File:LEGO Dimensions Chell.png|alt19=Chell in LEGO Dimensions|Chell in [[LEGO Dimensions]]. | |||
}} | |||
== 사소한 이야기 == | |||
* {{Spoiler|One of the ''Bring Your Daughter to Work Day'' science-fair entries within ''Portal 2'' is signed, "by Chell"; indicating Chell was the daughter of an Aperture Science employee. The entry seemingly began as a potato, interacting with "an element from daddy's work" and has now grown massively out of control and taken up roots in the structure.This is also hinted at by GLaDOS in Portal Chamber 03 "Well done, remember, the Aperture Science Bring Your Daughter to Work Day is the perfect time to have her tested." and in Portal Test Chamber 06 in which she states "Unbelievable. You, SUBJECT NAME HERE must be the pride of SUBJECT HOMETOWN HERE."}} | |||
* {{Spoiler|The [[turret]] opera at the end of ''Portal 2'' mentions Chell by name, calling her "cara mia" {{N}} "my dear" in Italian. This implies a deeper connection between Chell and GLaDOS than was previously let on.<ref>http://www.youtube.com/watch?v=mtAXSyFCWXY</ref>}} | |||
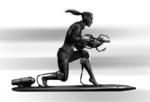
* Chell is modeled after actress {{W|Alésia Glidewell}}, and appears to be of mixed-race white European and East or Southeast Asian background, with dark hair and blue eyes. | |||
* In ''[[Portal]]'', Chell may sometimes emit small screams when hurt. However, these voice clips are simply archive recordings from [[Half-Life 2]]'s female citizens, who were voiced by Mary Kae Irvin. This was then one of many things that received a retroactive continuity in ''[[Portal 2]]'', as Chell no longer emits any pain groans whatsoever. | |||
* Chell used to be the second partner seen in Co-Op. She was replaced by [[P-Body]] early in development. | |||
* In the original ending sequence, {{Spoiler|the Stalemate Resolution Button was to be destroyed by Wheatley, in which the Announcer would say the stalemate would be resolved if the Stalemate Resolution Associate would say "Yes." This led to a blackout in which, upon pressing a button, Chell would say "Yes." This was cut due to playtesters finding it hard to find out who was actually saying yes. <ref>http://www.youtube.com/watch?v=vboI7UUziHk</ref>}} | |||
* Chell appears alongside several other ''Portal 2'' characters in the ''Portal 2 Level Pack'' for [[LEGO Dimensions]]. | |||
== 함께 보기 == | |||
*[[Portal 2: Lab Rat/ko|포털 2: Lab Rat]] | *[[Portal 2: Lab Rat/ko|포털 2: Lab Rat]] | ||
*[[Collaborative Disposition Test# | *[[Collaborative Disposition Test/ko#첼|협력 성향 테스트]] | ||
*[[Audiosurf Flag]] | *[[Audiosurf Flag]] | ||
== 각주 == | |||
<references/> | |||
{{CharactersNav}} | {{CharactersNav}} | ||
[[Category:Characters]] | [[Category:Spoiler/lang]] | ||
[[Category:Characters/ko]] | |||
Latest revision as of 05:03, 13 June 2023
| “당신은 잘못된 번역 소프트웨어를 사용하고 있습니다. 사용 설명서를 참고해 주시기 바랍니다. - 휘틀리” 이 페이지는 Korean 어로 번역 중에 있습니다. Korean어로 번역을 도와주실 수 있다면, 토론 페이지를 이용하여 함께 번역을 끝내주십시오. (마지막으로 수정한 사람을 보려면 문서 역사 페이지에서 확인하십시오.) |
 | “이건 단지 사고 능력에 대한 실험일 뿐이야. 쓸모없는 문서에 얼마나 시간을 소비하는지를 알아보기 위한 것이지. 따라서 가장 이상적인 시간은 0초라고.” 이 페이지는 스포일러가 많습니다. 당신은 페이지의 상단에있는 '스포일러' 탭에서 스포일러를 제외하고 볼 수 있습니다. 또는 스포일러를 강조하여 볼 수 있습니다. |
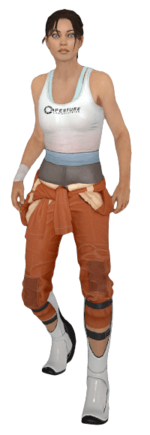
피실험자 #1 (이전에는 #1498)로 기록됬었던 첼은 애퍼처 사이언스 컴퓨터 보조 강화 센터의 피실험자였으며, 회사의 휴대용 포털 장치 (흔히 '포털건'으로 알려짐)를 사용하는 실험에 참여했습니다.
그녀는 포털과 포털 2의 과묵한 주인공이자 캠페인의 싱글 플레이어입니다. 과거에 대해서 알려진 바가 거의 없는 그녀는 출생 당시 버려졌으며, 살아남기 위해 완강히 노력합니다.
게임 시리즈 전체를 통틀어, 첼은 실험 코스에서 AI들과 시설 감독관인 GLaDOS에게 대항합니다. 시설 탈출이 목표인 그녀는 휴대용 포털 장치만을 사용하며 적들과 시설의 구역을 피해 다닙니다.
개요
첼의 과거 대부분은 수수께끼로 남아 있습니다. 포털의 마지막 단계에서, GLaDOS는 첼에 대해 수차례 언급하는데, 그녀가 태어나자마자 버려졌을 뿐만 아니라 입양되었다고 합니다. 그리고 이러한 언급들은 포털 2에서도 계속 되지만 GLaDOS의 말이 신뢰성을 띄지 못하는 점이 있었습니다. 포털의 마지막 단계에서 GLaDOS가 첼에 대해 언급했던 것들은 그녀가 목표를 달성하는 것을 방해하는 데 주목적이 있었으며, 입양이든 고아 상태이든 그 당시로서는 논쟁거리가 되지 못했습니다.
포털 2를 진행하다 보면, 첼은 애퍼처 사이언스에서 일하던 과학자의 딸이었을 것이라는 암시가 나옵니다.
포털
Some time after GLaDOS' takeover of Aperture Science, Chell is awakened in a Relaxation Vault after being unconsciously placed into it. Curious, she explores the Vault, and within only ten seconds of awakening, Chell is greeted by a robotic and seemingly automated female voice who informs her that she is a test subject. A voice, (later to be revealed as GLaDOS) then states that Chell will be undergoing testing for the benefit of Aperture Science's research program.
GLaDOS then generates two oval-shaped teleportation fabrics (portals) on a solid flat surface, with an entrance portal in the Relaxation Vault and an exit just in front of the exterior of the Vault. Chell exits from the Vault, however she notices empty observation rooms which lack the staff that should be recording her performance. After completing her first test and acquiring an understanding the cube-and-button based mechanic, she is put through a series of tests to further explore and understand the use of portals.

Having completed two tests, Chell reaches a test chamber in which she acquires the Portal Gun. Later on during the testing course, she is put through a series of more dangerous tests including hazards such as Goo and High Energy Pellets, among others. Skillfully avoiding these hazards, Chell is assisted by the Companion Cube and by the Aperture Science Advanced Knee Replacement components applied to the back of her lower legs to her ankles, which allow Chell to avoid injury when falling from great heights. Eventually, the single-portal variant of her Portal Gun is upgraded to create a set of linked portals. As an incentive to complete the tests, GLaDOS promises Chell that cake will be served once all tests chambers have been completed.
As the testing progresses, Chell stumbles across various areas with defunct wall panels, and manages to sneak into them. As she enters these maintenance areas, she finds refuge areas commonly known as the Rat Man's Dens, previously used as hiding places by Aperture technician Doug Rattmann. The scribblings on the walls in these Dens appear to be warnings for Chell, telling her that "the cake is a lie" and that "she's watching you". Chell, now made more aware of her situation, is forced to continue testing and play along with GLaDOS' plans. The Rat Man's warnings are eventually revealed to be correct, as GLaDOS attempts to murder Chell upon her completion of the final test chamber, despite earlier promises of cake.
Chell successfully escapes the dramatically slow death trap, and is informed by GLaDOS that pretending to kill Chell is simply part of the test. Dubious as to the veracity of this claim, Chell escapes the testing course, and travels through the Aperture Science Facility in an attempt to reach the surface and escape. Eventually however, Chell realizes there there is no chance of escape as long as GLaDOS is in control of the Facility, and is forced to confront GLaDOS in the Central AI Chamber.
Upon entry to the chamber, Chell is greeted by the passive-aggressive rogue AI. GLaDOS claims that she will provide Chell with a surprise, however a Morality Core unexpectedly detaches from GLaDOS' chassis. Chell destroys it using a nearby Emergency Intelligence Incinerator, however the Core is revealed to be a safeguard designed to inhibit GLaDOS' homicidal tendencies. With the Core destroyed, GLaDOS releases neurotoxin into the chamber in an attempt to kill Chell. At the same time, a Rocket Turret emerges from a core hatch beside GLaDOS and begins to target Chell. Using the Portal Gun, Chell redirects the projectiles through linked portals, causing the rockets to strike GLaDOS, each of which detaches more Personality Cores from the chassis. Although inflicting damage, the loss of the Cores merely increases GLaDOS's desire to kill Chell. After destroying each detached Core one-by-one, Chell destroys the final Core (the Anger Core), and GLaDOS is sent literally spiraling into her demise, as the destruction of her generators triggers a gravitational vortex, which deposits Chell on the surface.
Chell slowly regains consciousness in the parking lot of the Enrichment Center, with with a lifeless GLaDOS beside her. As Chell's vision clears, the Party Escort Bot thanks her for "assuming the party escort submission position", and begins dragging her back into the now-ruined Aperture Science Facility. As Chell is dragged away, it is revealed that the destruction of the Central Core (GLaDOS) resulted in the automatic activation of other Personality Cores, tasked with the management of the Enrichment Center while GLaDOS is offline. The final scene depicts the Companion Cube and a cake deep within the bowels Facility, waiting for Chell to claim them.
During the course of the comic, we are introduced to former Aperture scientist, Doug Rattman. He witnesses the apparent destruction of GLaDOS, and later, after escaping from the facility himself, witnesses the recapturing of Chell by the Party Escort Robot. Following the robot, he finds that Chell has been placed into an Extended Relaxation Vault. However, as a result of the explosion at the conclusion of Portal, all of the relaxation vaults' life support systems are offline. Doug patches Chell's vault onto a reserve grid (as he was unable to open the vault), allowing Chell to survive the years prior to her reawakening in Portal 2.
포털 2
Many years after the events of the original games, Chell is revived by Wheatley, a Personality Core. After a brief introduction, he convinces Chell to escape with him from the ruined facility. The pair eventually find themselves in the remains of GLaDOS' chamber. Wheatley then inadvertently reawakens GLaDOS, who immediately recognizes Chell. Discarding Wheatley, GLaDOS plunges Chell back into the depths of Aperture, to resume testing.
Chell finds herself testing in the ruined facility with GLaDOS, but after a several chambers, Wheatley rescues Chell to help him sabotage GLaDOS' weaponry, allowing for a coup to take place later. GLaDOS eventually manages to trap Chell and bring her into her lair. After finding that her preferred methods of murder are unusable, Chell and GLaDOS find themselves at a standstill. Wheatley reappears, and after Chell initiates a core transfer, replaces GLaDOS as the Central AI of Aperture. However, he goes mad with power, dismantles the remains of GLaDOS' head and reconfigures it into a potato battery, and accidentally sends both GLaDOS and Chell to the decomposing underbelly of the facility, "Old Aperture," which had been sealed off for many decades.
In Old Aperture, Chell is introduced to Cave Johnson, the now-deceased founder and CEO of Aperture and his assistant Caroline. Throughout the tests, Chell finds and re-activates the Repulsion, Propulsion and Conversion Gels. She is reunited with GLaDOS during her travel through Old Aperture, and the two forge a plot to overthrow Wheatley in exchange for Chell's freedom.
After departing from Old Aperture, the duo locate a test chamber that Wheatley is overseeing and attempt to disable him via a logical paradox. This fails, however, and they quickly find themselves solving Wheatley's own cobbled-together tests. Much like in the first game, Wheatley tries to kill Chell and GLaDOS, saying that he had found the perfect replacements for Chell. After a lengthy chase through the upper facility, Chell and GLaDOS are again in the Central AI Chamber with Wheatley. Chell furthers Wheatley's "corruption" by attaching corrupted cores to his frame, allowing for a second core transfer. Before Chell can do this, however, Wheatley detonates bombs that he had "booby-trapped the stalemate button" with in a last ditch effort to maintain control. However, Chell fires one last set of portals above and below Wheatley. These portals link together the Moon and the Central AI Chamber, and both Chell and Wheatley are sucked through into outer space. Seconds afterward, GLaDOS regains control of her chassis, rescues Chell, and closes the portals, leaving Wheatley to be lost in space. After a monologue, GLaDOS (supposedly) makes good on her promise, and delivers Chell, via high-speed elevator, to the surface above Aperture Science. As the elevator ascends, it enters an ampitheatre-like space, where a choir of turrets sing a farewell song to Chell. Chell's elevator emerges in a shed in a large field of wheat. Chell's Companion Cube is also sent up moments afterword, presumably as a token of "thank you" from GLaDOS. After expelling the Companion Cube, the elevator door slams violently, probably to indicate that GLaDOS does not want Chell to return to the Enrichment Center again.
갤러리
| 첼 | ||||||||||||||||||||||||||||||||||
| ||||||||||||||||||||||||||||||||||
사소한 이야기
- One of the Bring Your Daughter to Work Day science-fair entries within Portal 2 is signed, "by Chell"; indicating Chell was the daughter of an Aperture Science employee. The entry seemingly began as a potato, interacting with "an element from daddy's work" and has now grown massively out of control and taken up roots in the structure.This is also hinted at by GLaDOS in Portal Chamber 03 "Well done, remember, the Aperture Science Bring Your Daughter to Work Day is the perfect time to have her tested." and in Portal Test Chamber 06 in which she states "Unbelievable. You, SUBJECT NAME HERE must be the pride of SUBJECT HOMETOWN HERE."
- The turret opera at the end of Portal 2 mentions Chell by name, calling her "cara mia" – "my dear" in Italian. This implies a deeper connection between Chell and GLaDOS than was previously let on.[2]
- Chell is modeled after actress Alésia Glidewell, and appears to be of mixed-race white European and East or Southeast Asian background, with dark hair and blue eyes.
- In Portal, Chell may sometimes emit small screams when hurt. However, these voice clips are simply archive recordings from Half-Life 2's female citizens, who were voiced by Mary Kae Irvin. This was then one of many things that received a retroactive continuity in Portal 2, as Chell no longer emits any pain groans whatsoever.
- Chell used to be the second partner seen in Co-Op. She was replaced by P-Body early in development.
- In the original ending sequence, the Stalemate Resolution Button was to be destroyed by Wheatley, in which the Announcer would say the stalemate would be resolved if the Stalemate Resolution Associate would say "Yes." This led to a blackout in which, upon pressing a button, Chell would say "Yes." This was cut due to playtesters finding it hard to find out who was actually saying yes. [3]
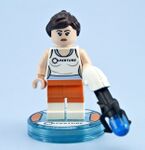
- Chell appears alongside several other Portal 2 characters in the Portal 2 Level Pack for LEGO Dimensions.
함께 보기
각주
| ||||||||||||||


