Portal 2 Chapter 1 Introduction: Difference between revisions
No edit summary |
m (→Hazards) |
||
| (43 intermediate revisions by 11 users not shown) | |||
| Line 1: | Line 1: | ||
{{Chamber infobox | {{Chamber infobox | ||
| title = | | title = Container Ride | ||
| valve-title= Container Ride | | valve-title= Container Ride | ||
| map = sp_a1_intro1.bsp | | map = sp_a1_intro1.bsp | ||
| dirty = 1 | | dirty = 1 | ||
| screenshot = Portal 2 Chapter 1 Introduction | | screenshot = Portal 2 Chapter 1 Introduction cube button.jpg | ||
| noprogress = true | | noprogress = true | ||
| total = 19 | | total = 19 | ||
| Line 23: | Line 21: | ||
}} | }} | ||
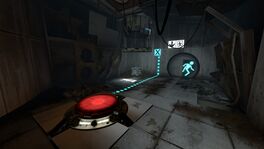
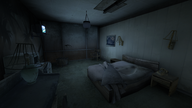
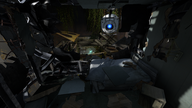
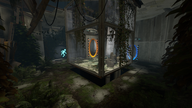
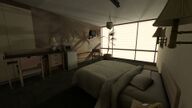
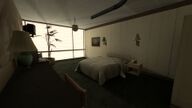
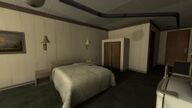
This is the first level of the game and serves as both a tutorial and introduction. The first part of the level takes place within the interior of an [[Aperture Science]] | This is the first level of the game and serves as both a tutorial and introduction. The first part of the level takes place within the interior of an [[Aperture Science Extended Relaxation Center]], and introduces the player to gameplay fundamentals such as looking with the mouse, moving and activating objects. {{Spoiler|The player is also introduced to both the [[Announcer]] and [[Wheatley]] at this time}}. The second part of the level provides a more detailed look at the Aperture Science facility while the player is transported to the [[Portal Test Chamber 00|first Test Chamber]]. The final part of the level takes place within a dilapidated Test Chamber, and introduces the player to [[Portals]], as well as the [[Weighted Storage Cube]] and the way in which it interacts with [[Heavy Duty Super-Colliding Super Button]]. When the first Test Chamber has been completed, the player will encounter the [[Emancipation Grill]] and exit through the [[Chamberlock]]. | ||
== | == Mechanics == | ||
* [[Heavy Duty Super-Colliding Super Button]]. | |||
* [[Weighted Storage Cube]]. | |||
*[[Vital Apparatus Vent]]. | |||
*[[Emancipation Grill]]. | |||
*[[Chamberlock]]. | |||
*[[Portal Spawner]] ''(blue & orange)''. | |||
*[[Portal]]s ''(blue & orange)''. | |||
== | == Characters == | ||
* [[ | {{Spoiler|block=yes| | ||
* [[ | *[[Announcer]]. | ||
*[[ | *[[Chell]]. | ||
*[[Wheatley]]. | |||
}} | |||
== Objective == | |||
* Complete the decayed test shaft (Test Chamber 00) | * Complete the decayed test shaft (Test Chamber 00) | ||
== Hazards == | |||
None.<!--Doble check for [[doors]]--> | |||
=== Chamber | == Locations == | ||
* ''Aperture Science Enrichment Center''. | |||
* ''Aperture Science Relaxation Chamber''. | |||
* ''Aperture Science Extended Relaxation Center''. | |||
* ''Aperture Science Relaxation Vault''. | |||
* ''Test Chamber 00 (Dilapidated)''. | |||
== Asethetics == | |||
* [[Overgrown]]. | |||
== Walkthrough == | == Walkthrough == | ||
| Line 86: | Line 68: | ||
{{walkthrough}} | {{walkthrough}} | ||
== | ==Notes== | ||
{{ | {{Spoiler|block=yes| | ||
* It's unclear how exactly a trigger for ''Look up'' works but it's hard to trigger it with [[sensitivity]] 0.01. It's quite easy to trigger it with sensitivity 0.1! | |||
}} | |||
== Gallery == | == Gallery == | ||
{{Spoiler|block=yes| | |||
{{Gallery | {{Gallery | ||
|width=192 | |width=192 | ||
| Line 100: | Line 81: | ||
|File:Portal 2 Chapter 1 Introduction deteriorated room.png|alt1=The relaxation vault after degradation|The relaxation vault after degradation. | |File:Portal 2 Chapter 1 Introduction deteriorated room.png|alt1=The relaxation vault after degradation|The relaxation vault after degradation. | ||
|File:Portal 2 Chapter 1 Introduction post transport.png|alt2=Passage into the main facility|Passage into the main facility | |File:Portal 2 Chapter 1 Introduction post transport.png|alt2=Passage into the main facility|Passage into the main facility | ||
|File:Portal 2 Chapter 1 Introduction | |File:Portal 2 Chapter 1 Introduction test chamber.png|alt3=The Relaxation Vault in Portal 2|The Relaxation vault in Portal 2. | ||
|File:Portal 2 Chapter 1 Introduction Early.png|alt4=Early version of the relaxation vault|Early version of the relaxation vault. | |File:Portal 2 Chapter 1 Introduction Early.png|alt4=Early version of the relaxation vault|Early version of the relaxation vault. | ||
|File: | |File:Sp a1 intro10001.jpg|alt5=[[Chell]]'s Relaxation Chamber un-dilapidated.|The [[Aperture Science Extended Relaxation Center]] before degradation (1/3). | ||
|File:Sp a1 intro10002.jpg|alt5=[[Chell]]'s Relaxation Chamber un-dilapidated.|The [[Aperture Science Extended Relaxation Center]] before degradation (2/3). | |||
|File:Sp a1 intro10004.jpg|alt5=[[Chell]]'s Relaxation Chamber un-dilapidated.|The [[Aperture Science Extended Relaxation Center]] before degradation (3/3). | |||
}} | |||
}} | }} | ||
== Music == | |||
{{main|Portal 2 soundtrack}} | |||
{{Track|The Courtesy Call}}<br>{{Track|Technical Difficulties}} | |||
==Trivia== | ==Trivia== | ||
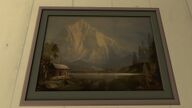
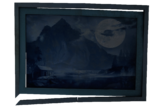
* The painting Chell is instructed to observe changes<ref> | * The painting Chell is instructed to observe changes<ref>https://www.reddit.com/r/Portal/comments/gydjz</ref> between her first and second wakeup. Additionally, it bears a striking resemblance to Lakeside Hideaway by Thomas Kinkade.<ref>http://freepages.family.rootsweb.ancestry.com/~ja7smith/TKlakesidehideaway.jpg Lakeside Hideaway by Thomas Kinkade</ref> | ||
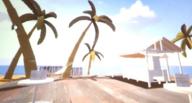
* During the early phases of ''Portal 2'''s development, the Relaxation Vault was to resemble an island, as seen above. | * During the early phases of ''Portal 2'''s development, the Relaxation Vault was to resemble an island, as seen above. | ||
{{Spoiler|block=yes| | |||
{{Gallery | {{Gallery | ||
|width=200 | |width=200 | ||
|height=108 | |height=108 | ||
|lines=1 | |lines=1 | ||
|File: | |File:Sp a1 intro10003.jpg|alt1=Painting after first wakeup|Painting after first wakeup. | ||
|File:Portal 2 Hotel Painting Moon.png|alt2=Painting | |File:Portal 2 Hotel Painting Moon.png|alt2=Painting after second wakeup|Painting after second wakeup. | ||
}} | |||
}} | }} | ||
| Line 119: | Line 109: | ||
<references/> | <references/> | ||
== | == Related achievements == | ||
{{Show achievement|Portal 2|Wake Up Call|width=50%}} | |||
}} | |||
{{stub}} | |||
[[Category:Portal 2 single-player Test Chambers]] | |||
[[Category:Portal 2 | |||
Latest revision as of 06:37, 25 April 2024
This is the first level of the game and serves as both a tutorial and introduction. The first part of the level takes place within the interior of an Aperture Science Extended Relaxation Center, and introduces the player to gameplay fundamentals such as looking with the mouse, moving and activating objects. The player is also introduced to both the Announcer and Wheatley at this time. The second part of the level provides a more detailed look at the Aperture Science facility while the player is transported to the first Test Chamber. The final part of the level takes place within a dilapidated Test Chamber, and introduces the player to Portals, as well as the Weighted Storage Cube and the way in which it interacts with Heavy Duty Super-Colliding Super Button. When the first Test Chamber has been completed, the player will encounter the Emancipation Grill and exit through the Chamberlock.
Mechanics
- Heavy Duty Super-Colliding Super Button.
- Weighted Storage Cube.
- Vital Apparatus Vent.
- Emancipation Grill.
- Chamberlock.
- Portal Spawner (blue & orange).
- Portals (blue & orange).
Characters
Objective
- Complete the decayed test shaft (Test Chamber 00)
Hazards
None.
Locations
- Aperture Science Enrichment Center.
- Aperture Science Relaxation Chamber.
- Aperture Science Extended Relaxation Center.
- Aperture Science Relaxation Vault.
- Test Chamber 00 (Dilapidated).
Asethetics
Walkthrough
- The Announcer will tell you to look up, look down, look at art, and return to your bed. Do these things.
- When awoken by the Announcer for the second time, walk towards the door to allow Wheatley to enter.
- Follow Wheatley's instructions and wait for him to transport the room to the 'Docking Station'.
- Jump down into the relaxation vault; wait for the Announcer to open the portal and then walk through it.
- Walk through the door, then place the Weighted Storage Cube onto the Heavy Duty Super-Colliding Super Button in order to open the exit door.
- Proceed through the Chamberlock and into the elevator.
Video walkthrough
Notes
- It's unclear how exactly a trigger for Look up works but it's hard to trigger it with sensitivity 0.01. It's quite easy to trigger it with sensitivity 0.1!
Gallery
|
Music
The Courtesy Call by Aperture Science Psychoacoustics Laboratory [3:37] | ![]() Download |
Download | ![]() Play
Play
Technical Difficulties by Aperture Science Psychoacoustics Laboratory [3:21] | ![]() Download |
Download | ![]() Play
Play
Trivia
- The painting Chell is instructed to observe changes[1] between her first and second wakeup. Additionally, it bears a striking resemblance to Lakeside Hideaway by Thomas Kinkade.[2]
- During the early phases of Portal 2's development, the Relaxation Vault was to resemble an island, as seen above.
References
- ↑ https://www.reddit.com/r/Portal/comments/gydjz
- ↑ http://freepages.family.rootsweb.ancestry.com/~ja7smith/TKlakesidehideaway.jpg Lakeside Hideaway by Thomas Kinkade
Related achievements
| Wake Up Call Survive the manual override |
 | “I can't get over how small you are!” This article is a stub. As such, it is not complete. You can help Portal wiki by expanding it. |

