Portal 2 Chapter 2 Test Chamber 2: Difference between revisions
Moussekateer (talk | contribs) mNo edit summary |
No edit summary |
||
| Line 7: | Line 7: | ||
| total = 22 | | total = 22 | ||
| screenshot = Portal 2 Chapter 2 Test Chamber 02.png | | screenshot = Portal 2 Chapter 2 Test Chamber 02.png | ||
| icon1 | | icon1 = cube dispenser on | ||
| | | icon2 = cube button on | ||
| | | icon3 = cube hazard on | ||
| | | icon4 = player button | ||
| | | icon5 = water hazard | ||
| icon6 = laser sensor on | |||
| icon7 = laser redirection on | |||
| icon8 = turret hazard | |||
| icon9 = laser hazard | |||
| icon10 = dirty water | |||
| previous = Portal 2 Chapter 2 Test Chamber 01 | | previous = Portal 2 Chapter 2 Test Chamber 01 | ||
| next = Portal 2 Chapter 2 Test Chamber 03 | | next = Portal 2 Chapter 2 Test Chamber 03 | ||
Revision as of 13:40, 4 May 2011
 | “I can't get over how small you are!” This article is a stub. As such, it is not complete. You can help Portal wiki by expanding it. |
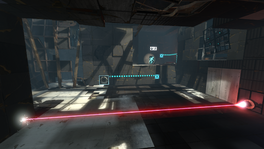
This chamber introduces the Discouragement Redirection Cube to the player.
Threats faced
Walkthrough
Upon entering the room head to the left to a small cut off alcove which contains a Discouragement Redirection Cube. Shoot a portal through the grating on the floor inside and place one somewhere on your side. Enter through and pick up the Discouragement Redirection Cube. Return back through your portal to the main room and to the Thermal Discouragement Beam. Place the Discouragement Redirection Cube such that it intercepts the Thermal Discouragement Beam and redirects it into the receptacle. Upon successfully doing this a staircase will appear to the exit. Proceed to the top of the staircase and place a portal on the floor next to you. Place the second portal underneath the Thermal Discouragement Beam you left behind and catch it as it falls through the portal. Place it on the Heavy Duty Super-Colliding Super Button and exit through the doors.


