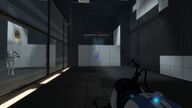
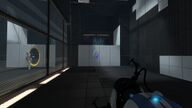
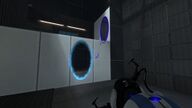
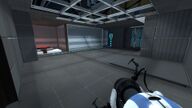
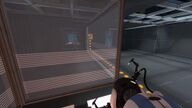
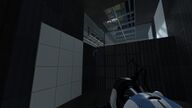
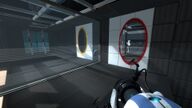
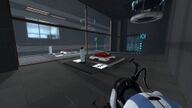
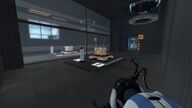
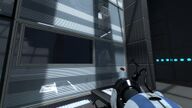
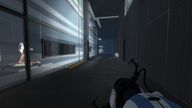
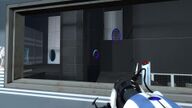
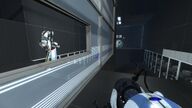
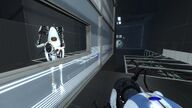
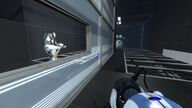
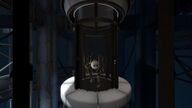
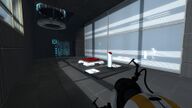
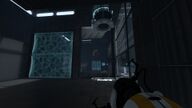
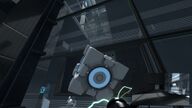
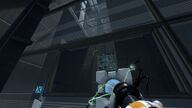
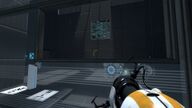
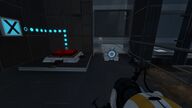
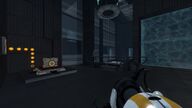
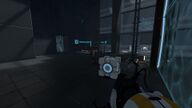
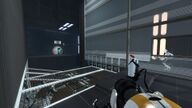
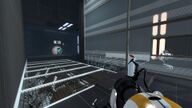
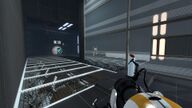
Cooperative Testing Initiative/Calibration Course: Difference between revisions
No edit summary |
mNo edit summary |
||
| (108 intermediate revisions by 16 users not shown) | |||
| Line 1: | Line 1: | ||
{{ | {{Needimage}} | ||
{{Chamber infobox | {{Chamber infobox | ||
| title = Calibration Course | | title = Calibration Course | ||
| map = mp_coop_start.bsp | | map = mp_coop_start.bsp | ||
| screenshot = | | screenshot = Mp coop start0102.jpg | ||
| icon1 = water hazard on | | icon1 = water hazard on | ||
| icon2 = player button on | | icon2 = player button on | ||
| Line 18: | Line 17: | ||
| noprogress = Yes | | noprogress = Yes | ||
}} | }} | ||
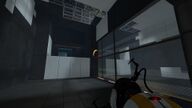
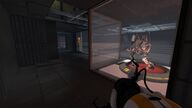
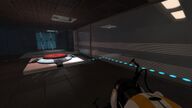
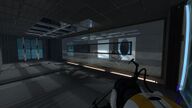
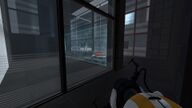
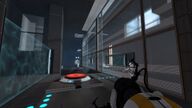
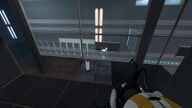
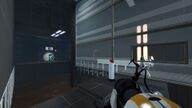
Most beginners (or players who made a [[Cooperative_Testing_Initiative#Reset_progress|reset]] recently) start from {{:Cooperative Testing Initiative/Calibration Course/link with introduction}} Its purpose is to teach player the basics of Cooperative testing, like the [[Ping Tool]], thinking with four [[portals|portal]]s, etc. | |||
== Mechanics == | |||
* [[Door]]s. | |||
* [[Portals|Portal]]ble surfaces. | |||
* 3 [[1500 Megawatt Aperture Science Heavy Duty Super-Colliding Super Button]]s. | |||
* 3 [[Heavy Duty Super-Colliding Super Button#Weighted Storage Cube Receptacle|Weighted Storage Cube Receptacle]]s. | |||
* 3 [[Vital Apparatus Vent]]s. | |||
* 4 [[Pedestal Button]]s. | |||
* 13 or 14 [[Material Emancipation Grill]]s... | |||
* Collapsed [[panel]]s which form doors and floors. | |||
== Hazards == | == Hazards == | ||
*Goo | * Being crushed by the [[door]]. | ||
* [[Goo]]. | |||
{{clear}} | |||
== | == Walkthroughs == | ||
{{ | === Naive === | ||
{{youtube|wcKfEeL6FH0}} | |||
{|class="wikitable sortable" | |||
|- | |||
! | Characters | |||
! | | |||
! | When | |||
! | Notes | |||
! | Link | |||
|- | |||
| {{GLaDOS's style}} | [[GLaDOS]] | |||
| {{Spoiler|block=yes| | |||
{{Voice line|GLaDOS|coop_vault_intro01}}<br /> | |||
{{Voice line|GLaDOS|coop_vault_intro02}}<br /> | |||
{{Voice line|GLaDOS|botcoop_intro01}} | |||
}} | |||
| Always | |||
| | |||
| style="vertical-align: top;" | {{VisibleAnchor|Tube01}} | |||
|- | |||
| {{Combined style}} | [[Atlas]] and [[P-body]] | |||
| {{Spoiler|block=yes|Use a Gesture menu ({{Key|Q}} [[Default keybinds|by default]]).}} | |||
| Always | |||
| Waving preemptively may not work with some version...<ref>[[March 25, 2023 Patch]] or [[version]] "Protocol version 2001, Exe version 2.0.0.1 (portal2), Exe build: 19:15:46 Mar 3 2023 (8873) (620)"</ref> | |||
| style="vertical-align: top;" | {{VisibleAnchor|Tube02}} | |||
|- | |||
| {{GLaDOS's style}} | [[GLaDOS]] | |||
| {{Spoiler|block=yes| | |||
{{Voice line|GLaDOS|botcoop_intro02}}<br /> | |||
{{Voice line|GLaDOS|botcoop_intro03}}<br /> | |||
{{Voice line|GLaDOS|botcoop_intro04}} | |||
}} | |||
| Always | |||
| | |||
| style="vertical-align: top;" | {{VisibleAnchor|Tube03}} | |||
|- | |||
| {{Atlas's style}} | [[Atlas]] | |||
| {{Spoiler|block=yes| | |||
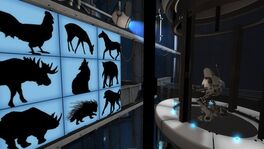
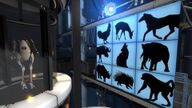
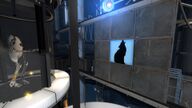
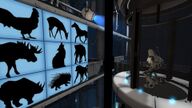
[[Ping Tool|Ping]] ({{Key|F}} [[Default keybinds|by default]]) your favourite animal (choices: horse, deer, rooster, elephant, wolf, moose, baboon, porcupine, rhinoceros). | |||
}} | |||
| Always | |||
| | |||
| style="vertical-align: top;" | {{VisibleAnchor|Tube04}} | |||
|- | |||
| {{GLaDOS's style}} | [[GLaDOS]] | |||
| {{Spoiler|block=yes| | |||
{{Voice line|GLaDOS|botcoop_intro05}}<br /> | |||
{{Voice line|GLaDOS|botcoop_intro06}}<br /> | |||
{{Voice line|GLaDOS|botcoop_intro07}}<br /> | |||
{{Voice line|GLaDOS|botcoop_intro08}} | |||
}} | |||
| Always | |||
| | |||
| style="vertical-align: top;" | {{VisibleAnchor|Tube05}} | |||
|- | |||
| {{P-body's style}} | [[P-body]] | |||
| {{Spoiler|block=yes| | |||
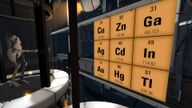
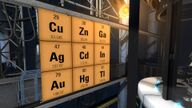
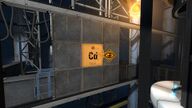
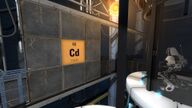
Ping your favourite Periodic element (choices: copper, zinc, gallium, silver, cadmium, indium, gold, mercury, thallium). | |||
}} | |||
| Always | |||
| | |||
| style="vertical-align: top;" | {{VisibleAnchor|Tube06}} | |||
|- | |||
| {{GLaDOS's style}} | [[GLaDOS]] | |||
| {{Spoiler|block=yes| | |||
{{Voice line|GLaDOS|botcoop_intro09}}<br /> | |||
{{Voice line|GLaDOS|botcoop_intro10}} | |||
}} | |||
| Always | |||
| | |||
| style="vertical-align: top;" | {{VisibleAnchor|Tube07}} | |||
|- | |||
| {{GLaDOS's style}} | [[GLaDOS]] | |||
| {{Spoiler|block=yes| | |||
{{Voice line|GLaDOS|botcoop_intro12}}<br /> | |||
{{Voice line|GLaDOS|botcoop_intro13}}<br /> | |||
{{Voice line|GLaDOS|mp_coop_pingtool01}} | |||
}} | |||
| Always | |||
| | |||
| style="vertical-align: top;" | {{VisibleAnchor|1st01}} | |||
|- | |||
| {{Combined style}} | [[Atlas]] and [[P-body]] | |||
| {{Spoiler|block=yes| | |||
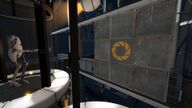
Use the [[Ping tool]] to place one [[portal]] over [[Handheld Portal Device]] and second next to you with the help of [[GLaDOS]], then jump into the portal to get over the [[Goo]] and take the portal gun. | |||
}} | |||
| | |||
| | |||
| style="vertical-align: top;" | {{VisibleAnchor|1st02}} | |||
|- | |||
| {{GLaDOS's style}} | [[GLaDOS]] | |||
| {{Spoiler|block=yes| | |||
{{Voice line|GLaDOS|mp_coop_startdeath04}} when [[P-body]] dies to the [[Goo]] for the 1st time.<br /> | |||
{{Voice line|GLaDOS|mp_coop_startdeath05}} when [[Atlas]] dies to the [[Goo]] for the 1st time.<br /> | |||
{{Voice line|GLaDOS|mp_coop_startdeath01}} when someone<!--tested with [[P-body]]--> dies to the [[Goo]] 2nd time.<br /> | |||
{{Voice line|GLaDOS|mp_coop_startdeath02}} when someone dies to the [[Goo]] 3rd time.<br /> | |||
{{Voice line|GLaDOS|mp_coop_startdeath03}} when someone dies to the [[Goo]] 4th time.<br /> | |||
{{Voice line|GLaDOS|mp_coop_pingtool02}} when pinging to request a portal from GLaDOS on a non-white surface. | |||
}} | |||
| Optional | |||
| | |||
| style="vertical-align: top;" | {{VisibleAnchor|1st03}} | |||
|- | |||
| {{GLaDOS's style}} | [[GLaDOS]] | |||
| {{Spoiler|block=yes| | |||
{{Voice line|GLaDOS|coop_get_gun02}}<br /> | |||
{{Voice line|GLaDOS|coop_get_gun03}} | |||
or | |||
{{Voice line|GLaDOS|coop_get_gun01}}<br /> | |||
{{Voice line|GLaDOS|coop_get_gun04}} | |||
}} | |||
| Always | |||
| The exact order may vary from time to time. | |||
| style="vertical-align: top;" | {{VisibleAnchor|1st04}} | |||
|- | |||
| {{GLaDOS's style}} | [[GLaDOS]] | |||
| {{Spoiler|block=yes| | |||
{{Voice line|GLaDOS|mp_coop_pingtool06}}<br /> | |||
{{Voice line|GLaDOS|mp_coop_pingtool07}} | |||
}} | |||
| | |||
| | |||
| style="vertical-align: top;" | {{VisibleAnchor|2nd01}} | |||
|- | |||
| {{Combined style}} | [[Atlas]] and [[P-body]] | |||
| {{Spoiler|block=yes| | |||
Place [[portal]]s to reach the higher ledge. | |||
}} | |||
| | |||
| | |||
| style="vertical-align: top;" | {{VisibleAnchor|2nd02}} | |||
|- | |||
| {{Atlas's style}} | [[Atlas]] | |||
| {{Spoiler|block=yes| | |||
Stand on [[1500 Megawatt Aperture Science Heavy Duty Super-Colliding Super Button|the red round button]] so that P-Body can proceed. Wait for P-Body to get to the next room. | |||
}} | |||
| | |||
| | |||
| style="vertical-align: top;" | {{VisibleAnchor|3rd01}} | |||
|- | |||
| {{GLaDOS's style}} | [[GLaDOS]] | |||
| {{Spoiler|block=yes| | |||
{{Voice line|GLaDOS|mp_coop_calibration01}} | |||
}} | |||
| | |||
| | |||
| style="vertical-align: top;" | {{VisibleAnchor|3rd02}} | |||
|- | |||
| {{P-body's style}} | [[P-body]] | |||
| {{Spoiler|block=yes| | |||
Stand on [[1500 Megawatt Aperture Science Heavy Duty Super-Colliding Super Button|the red round button]] so that Atlas can proceed. Wait for Atlas to get to the next room. | |||
}} | |||
| | |||
| | |||
| style="vertical-align: top;" | {{VisibleAnchor|3rd03}} | |||
|- | |||
| {{GLaDOS's style}} | [[GLaDOS]] | |||
| {{Spoiler|block=yes| | |||
{{Voice line|GLaDOS|mp_coop_calibration02}}<br /> | |||
{{Voice line|GLaDOS|mp_coop_calibration06}} | |||
}} | |||
| | |||
| | |||
| style="vertical-align: top;" | {{VisibleAnchor|3rd04}} | |||
|- | |||
| {{Atlas's style}} | [[Atlas]] | |||
| {{Spoiler|block=yes| | |||
Reach the top level with two [[portal]]s then wait for P-body to place two portals for you. | |||
}} | |||
| | |||
| | |||
| style="vertical-align: top;" | {{VisibleAnchor|4th01}} | |||
|- | |||
| {{GLaDOS's style}} | [[GLaDOS]] | |||
| {{Spoiler|block=yes| | |||
{{Voice line|GLaDOS|botcoop_intro17}} | |||
}} | |||
| | |||
| | |||
| style="vertical-align: top;" | {{VisibleAnchor|4th02}} | |||
|- | |||
| {{P-body's style}} | [[P-body]] | |||
| {{Spoiler|block=yes| | |||
Wait for the Atlas to reach the top level then place two [[portal]]s so that Atlas can overcome the transparent wall. | |||
}} | |||
| | |||
| | |||
| style="vertical-align: top;" | {{VisibleAnchor|4th03}} | |||
|- | |||
| {{Combined style}} | [[Atlas]] and [[P-body]] | |||
| {{Spoiler|block=yes| | |||
Summon a [[cube]] from [[Vital Apparatus Vent]] by pressing [[Pedestal Button]] then place the cube on [[Weighted Storage Cube Receptacle|the red square button]]. Wait for other if needed. | |||
}} | }} | ||
| | |||
| | |||
| style="vertical-align: top;" | {{VisibleAnchor|5th01}} | |||
|- | |||
| {{GLaDOS's style}} | [[GLaDOS]] | |||
| {{Spoiler|block=yes| | |||
{{Voice line|GLaDOS|mp_coop_calibration03}}<br /> | |||
{{Voice line|GLaDOS|mp_coop_calibration06}} | |||
}} | |||
| | |||
| | |||
| style="vertical-align: top;" | {{VisibleAnchor|5th02}} | |||
|- | |||
| {{Atlas's style}} | [[Atlas]] | |||
| {{Spoiler|block=yes| | |||
Summon a [[cube]] from [[Vital Apparatus Vent]] by pressing [[Pedestal Button]] until P-body manages to grab it by using it ({{Key|E}} [[Default keybinds|by default]]). | |||
}} | |||
| | |||
| | |||
| style="vertical-align: top;" | {{VisibleAnchor|6th01}} | |||
|- | |||
| {{P-body's style}} | [[P-body]] | |||
| {{Spoiler|block=yes| | |||
Grab the [[cube]] by using it ({{Key|E}} [[Default keybinds|by default]]). Move with the [[cube]] to the window on the right, where the cube won't disintegrate. Release the [[cube]] on Atlas's side. Move via [[Material Emancipation Grill]] without a cube toward [[Weighted Storage Cube Receptacle|the red square button]]. Wait for other if needed. | |||
}} | |||
| | |||
| | |||
| style="vertical-align: top;" | {{VisibleAnchor|6th02}} | |||
|- | |||
| {{Atlas's style}} | [[Atlas]] | |||
| {{Spoiler|block=yes| | |||
Wait for a [[cube]] from the other side then grab it by using it ({{Key|E}} [[Default keybinds|by default]]). Bring it to next window with [[Weighted Storage Cube Receptacle|the red square button]]. Release the [[cube]] on P-body's side. Move to the exit if everything worked out, otherwise [[#6th01|repeat]]. | |||
}} | |||
| | |||
| | |||
| style="vertical-align: top;" | {{VisibleAnchor|6th03}} | |||
|- | |||
| {{P-body's style}} | [[P-body]] | |||
| {{Spoiler|block=yes| | |||
Grab the [[cube]] by using it ({{Key|E}} [[Default keybinds|by default]]). Move with the [[cube]] to [[Weighted Storage Cube Receptacle|the red square button]]. Release the [[cube]] on [[Weighted Storage Cube Receptacle|the red square button]]. Move to the exit if everything worked out, otherwise [[#6th01|repeat]]. | |||
}} | |||
| | |||
| | |||
| style="vertical-align: top;" | {{VisibleAnchor|6th04}} | |||
|- | |||
| {{P-body's style}} | [[P-body]] | |||
| {{Spoiler|block=yes| | |||
Move to the right after entering the room and stand on [[1500 Megawatt Aperture Science Heavy Duty Super-Colliding Super Button|the red round button]]. Wait for Atlas to place one [[portal]] close to you and other close to the [[Pedestal Button]]. Move towards [[Pedestal Button]] and press it. Move towards exit. | |||
}} | |||
| | |||
| | |||
| style="vertical-align: top;" | {{VisibleAnchor|7th01}} | |||
|- | |||
| {{Atlas's style}} | [[Atlas]] | |||
| {{Spoiler|block=yes| | |||
Wait for P-body to stand on [[1500 Megawatt Aperture Science Heavy Duty Super-Colliding Super Button|the red round button]]. Shoot one [[portal]] close to the P-body, and shoot the second close to the [[Pedestal Button]]. Wait for P-body to press the [[Pedestal Button]]. Repeat 7th part if needed. | |||
}} | |||
| | |||
| | |||
| style="vertical-align: top;" | {{VisibleAnchor|7th02}} | |||
|- | |||
| {{Combined style}} | [[Atlas]] and [[P-body]] | |||
| {{Spoiler|block=yes| | |||
Move towards exit. | |||
}} | |||
| | |||
| | |||
| style="vertical-align: top;" | {{VisibleAnchor|7th03}} | |||
|- | |||
| {{GLaDOS's style}} | [[GLaDOS]] | |||
| {{Spoiler|block=yes| | |||
{{Voice line|GLaDOS|mp_coop_callibrationcomplete01}}<br /> | |||
{{Voice line|GLaDOS|mp_coop_callibrationcomplete02}} | |||
}} | |||
| | |||
| | |||
| style="vertical-align: top;" | {{VisibleAnchor|7th04}} | |||
|- | |||
| {{GLaDOS's style}} | [[GLaDOS]] | |||
| {{Spoiler|block=yes| | |||
{{Voice line|GLaDOS|anti_taunt01}}<br /> | |||
{{Voice line|GLaDOS|mp_coop_startend01}}<br /> | |||
{{Voice line|GLaDOS|mp_coop_startend02}} | |||
}} | |||
| | |||
| | |||
| style="vertical-align: top;" | {{VisibleAnchor|7th05}} | |||
|} | |||
=== Speedrunning === | |||
==== Best time ==== | |||
==== Fewest portals ==== | |||
== Notes == | |||
* {{spoiler|In the 6th room, [[P-body]] can bring the [[cube]] over [[Goo]] and bypass the [[Material Emancipation Grill]] alone.}} | |||
== Gallery == | |||
=== Atlas's POV === | |||
==== Inside the tubes (Atlas's POV) ==== | |||
{{Spoiler| | |||
{{Gallery | |||
|width=192 | |||
|height=108 | |||
|lines=1 | |||
|File:Mp coop start0002.jpg|alt1=Atlas have to choose an animal.|[[Atlas]] have to choose an animal. | |||
|File:Mp coop start0003.jpg|alt2=| | |||
|File:Mp coop start0004.jpg|alt3=| | |||
|File:Mp coop start0006.jpg|alt4=| | |||
|File:Mp coop start0008.jpg|alt5=| | |||
|File:Mp coop start0009.jpg|alt6=| | |||
}} | |||
|block=yes | |||
}} | |||
==== Rooms (Atlas's POV) ==== | |||
{{Spoiler| | |||
{{Gallery | |||
|width=192 | |||
|height=108 | |||
|lines=1 | |||
|File:Mp coop start0012.jpg|alt7=|1st pair of rooms (Atlas's POV). | |||
|File:Mp coop start0015.jpg|alt8=|2nd pair of rooms (Atlas's POV). | |||
|File:Mp coop start0016.jpg|alt9=| | |||
|File:Mp coop start0017.jpg|alt10=| | |||
|File:Mp coop start0018.jpg|alt11=|3rd pair of rooms (Atlas's POV). | |||
|File:Mp coop start0019.jpg|alt12=| | |||
|File:Mp coop start0020.jpg|alt13=|4th pair of rooms (Atlas's POV). | |||
|File:Mp coop start0022.jpg|alt14=| | |||
|File:Mp coop start0023.jpg|alt15=|5th pair of rooms (Atlas's POV). | |||
|File:Mp coop start0025.jpg|alt16=| | |||
|File:Mp coop start0028.jpg|alt17=|6th pair of rooms (Atlas's POV). | |||
|File:Mp coop start0031.jpg|alt18=|7th pair of rooms (Atlas's POV). | |||
|File:Mp coop start0032.jpg|alt19=| | |||
|File:Mp coop start0033.jpg|alt20=| | |||
|File:Mp coop start0034.jpg|alt21=| | |||
|File:Mp coop start0035.jpg|alt22=| | |||
}} | |||
|block=yes | |||
}} | |||
=== P-body's POV === | |||
==== Inside the tubes (P-body's POV) ==== | |||
{{Spoiler| | |||
{{Gallery | |||
|width=192 | |||
|height=108 | |||
|lines=1 | |||
|File:Mp coop start0101.jpg|alt1=| | |||
|File:Mp coop start0102.jpg|alt2=| | |||
|File:Mp coop start0103.jpg|alt3=| | |||
|File:Mp coop start0104.jpg|alt4=| | |||
|File:Mp coop start0105.jpg|alt5=| | |||
|File:Mp coop start0106.jpg|alt6=| | |||
|File:Mp coop start0107.jpg|alt7=| | |||
}} | |||
|block=yes | |||
}} | |||
==== 1st pair of rooms (P-body's POV) ==== | |||
{{Spoiler| | |||
{{Gallery | |||
|width=192 | |||
|height=108 | |||
|lines=1 | |||
|File:Mp coop start0110.jpg|alt1=| | |||
|File:Mp coop start0111.jpg|alt2=| | |||
}} | |||
|block=yes | |||
}} | |||
==== 2nd pair of rooms (P-body's POV) ==== | |||
{{Spoiler| | |||
{{Gallery | |||
|width=192 | |||
|height=108 | |||
|lines=1 | |||
|File:Mp coop start0120.jpg|alt1=| | |||
}} | |||
|block=yes | |||
}} | |||
==== 3rd pair of rooms (P-body's POV) ==== | |||
{{Spoiler| | |||
{{Gallery | |||
|width=192 | |||
|height=108 | |||
|lines=1 | |||
|File:Mp coop start0130.jpg|alt1=| | |||
|File:Mp coop start0131.jpg|alt2=| | |||
}} | |||
|block=yes | |||
}} | |||
==== 4th pair of rooms (P-body's POV) ==== | |||
{{Spoiler| | |||
{{Gallery | |||
|width=192 | |||
|height=108 | |||
|lines=1 | |||
|File:Mp coop start0140.jpg|alt1=| | |||
}} | |||
|block=yes | |||
}} | |||
==== 5th pair of rooms (P-body's POV) ==== | |||
{{Spoiler| | |||
{{Gallery | |||
|width=192 | |||
|height=108 | |||
|lines=1 | |||
|File:Mp coop start0150.jpg|alt1=| | |||
}} | |||
|block=yes | |||
}} | |||
==== 6th pair of rooms (P-body's POV) ==== | |||
{{Spoiler| | |||
{{Gallery | |||
|width=192 | |||
|height=108 | |||
|lines=1 | |||
|File:Mp coop start0160.jpg|alt1=| | |||
|File:Mp coop start0161.jpg|alt2=| | |||
|File:Mp coop start0162.jpg|alt3=| | |||
|File:Mp coop start0163.jpg|alt4=| | |||
|File:Mp coop start0164new.jpg|alt5=| | |||
|File:Mp coop start0165.jpg|alt6=| | |||
|File:Mp coop start0560.jpg|alt7=|Skip over the [[Goo]] by jumping. | |||
}} | |||
|block=yes | |||
}} | |||
==== 7th pair of rooms (P-body's POV) ==== | |||
{{Spoiler| | |||
{{Gallery | |||
|width=192 | |||
|height=108 | |||
|lines=1 | |||
|File:Mp coop start0170.jpg|alt1=| | |||
|File:Mp coop start0171.jpg|alt2=| | |||
|File:Mp coop start0172.jpg|alt3=| | |||
|File:Mp coop start0173.jpg|alt4=| | |||
|File:Mp coop start0174.jpg|alt5=| | |||
|File:Mp coop start0175.jpg|alt6=| | |||
|File:Mp coop start0177.jpg|alt7=| | |||
}} | |||
|block=yes | |||
}} | |||
== Achievements == | |||
=== High Five === | |||
{{Show achievement|Portal 2|High Five|Story-related | |||
| {{spoiler|Simply complete the calibration course in [[co-op]] to get this achievement.}} | |||
}} | |||
=== Professor Portal === | |||
{{Show achievement|Portal 2|Professor Portal|N/A | |||
| {{spoiler|Find random partners online, and immediately leave the game if you do not see the opening film. When you find a beginner, exit the game, friend them, and invite them. This will take a long time depending on how lucky you are. Alternatively, this achievement can be very easy if you already have friends on Steam who have ''Portal 2'', but haven't done co-op mode yet.}} | |||
}} | |||
== Closed Captions == | |||
* Party Whistle<!--Case like in the game.--> | |||
== Trivia == | |||
* Players can use the console command [[say]] while the movie is playing... | |||
== [[GLaDOS]]' voice lines == | |||
{{cleanup}} | |||
* {{Voice line|GLaDOS|botcoop_intro15}}{{cite}} | |||
* {{Voice line|GLaDOS|botcoop_intro16}}{{cite}} | |||
* {{Voice line|GLaDOS|mp_coop_pingtool03}}{{cite}} | |||
* {{Voice line|GLaDOS|coop_get_gun10}}{{cite}} | |||
* {{Voice line|GLaDOS|coop_get_gun11}}{{cite}} | |||
* {{Voice line|GLaDOS|coop_get_gun13}}{{cite}} | |||
* {{Voice line|GLaDOS|mp_coop_calibration04}} | |||
* {{Voice line|GLaDOS|mp_coop_calibration05}} | |||
==References== | |||
<references/> | |||
== | == External links == | ||
# [https://wiki.portal2.sr/Calibration https://wiki.portal2.sr/Calibration] | |||
[[Category:Portal 2 Co-op chambers]] | [[Category:Portal 2 Co-op chambers]] | ||
Latest revision as of 21:48, 22 April 2024
 | “Nope, still can't see!” This page would benefit from the addition of one or more images. Please add a suitable image, then remove this notice. |
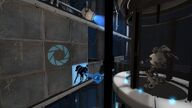
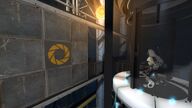
Most beginners (or players who made a reset recently) start from Cooperative Testing Initiative/Calibration Course/link with introduction Its purpose is to teach player the basics of Cooperative testing, like the Ping Tool, thinking with four portals, etc.
Mechanics
- Doors.
- Portalble surfaces.
- 3 1500 Megawatt Aperture Science Heavy Duty Super-Colliding Super Buttons.
- 3 Weighted Storage Cube Receptacles.
- 3 Vital Apparatus Vents.
- 4 Pedestal Buttons.
- 13 or 14 Material Emancipation Grills...
- Collapsed panels which form doors and floors.
Hazards
Walkthroughs
Naive
| Characters | When | Notes | Link | |
|---|---|---|---|---|
| GLaDOS | Always | Tube01 | ||
| Atlas and P-body | Use a Gesture menu (Q by default).
|
Always | Waving preemptively may not work with some version...[1] | Tube02 |
| GLaDOS | Always | Tube03 | ||
| Atlas | Ping (F by default) your favourite animal (choices: horse, deer, rooster, elephant, wolf, moose, baboon, porcupine, rhinoceros). |
Always | Tube04 | |
| GLaDOS | Always | Tube05 | ||
| P-body | Ping your favourite Periodic element (choices: copper, zinc, gallium, silver, cadmium, indium, gold, mercury, thallium). |
Always | Tube06 | |
| GLaDOS | Always | Tube07 | ||
| GLaDOS | "Your ping tool can also be used to indicate to your partner where you would like them to place their portal." | |
Always | 1st01 | |
| Atlas and P-body | Use the Ping tool to place one portal over Handheld Portal Device and second next to you with the help of GLaDOS, then jump into the portal to get over the Goo and take the portal gun. |
1st02 | ||
| GLaDOS | "Oh... can someone reassemble Orange?" | |
Optional | 1st03
| |
| GLaDOS | Always | The exact order may vary from time to time. | 1st04 | |
| GLaDOS | 2nd01 | |||
| Atlas and P-body | Place portals to reach the higher ledge. |
2nd02 | ||
| Atlas | Stand on the red round button so that P-Body can proceed. Wait for P-Body to get to the next room. |
3rd01 | ||
| GLaDOS | 3rd02 | |||
| P-body | Stand on the red round button so that Atlas can proceed. Wait for Atlas to get to the next room. |
3rd03 | ||
| GLaDOS | 3rd04 | |||
| Atlas | Reach the top level with two portals then wait for P-body to place two portals for you. |
4th01 | ||
| GLaDOS | 4th02 | |||
| P-body | Wait for the Atlas to reach the top level then place two portals so that Atlas can overcome the transparent wall. |
4th03 | ||
| Atlas and P-body | Summon a cube from Vital Apparatus Vent by pressing Pedestal Button then place the cube on the red square button. Wait for other if needed. |
5th01 | ||
| GLaDOS | 5th02 | |||
| Atlas | Summon a cube from Vital Apparatus Vent by pressing Pedestal Button until P-body manages to grab it by using it (E by default). |
6th01 | ||
| P-body | Grab the cube by using it (E by default). Move with the cube to the window on the right, where the cube won't disintegrate. Release the cube on Atlas's side. Move via Material Emancipation Grill without a cube toward the red square button. Wait for other if needed. |
6th02 | ||
| Atlas | Wait for a cube from the other side then grab it by using it (E by default). Bring it to next window with the red square button. Release the cube on P-body's side. Move to the exit if everything worked out, otherwise repeat. |
6th03 | ||
| P-body | Grab the cube by using it (E by default). Move with the cube to the red square button. Release the cube on the red square button. Move to the exit if everything worked out, otherwise repeat. |
6th04 | ||
| P-body | Move to the right after entering the room and stand on the red round button. Wait for Atlas to place one portal close to you and other close to the Pedestal Button. Move towards Pedestal Button and press it. Move towards exit. |
7th01 | ||
| Atlas | Wait for P-body to stand on the red round button. Shoot one portal close to the P-body, and shoot the second close to the Pedestal Button. Wait for P-body to press the Pedestal Button. Repeat 7th part if needed. |
7th02 | ||
| Atlas and P-body | Move towards exit. |
7th03 | ||
| GLaDOS | 7th04 | |||
| GLaDOS | 7th05 |
Speedrunning
Best time
Fewest portals
Notes
- In the 6th room, P-body can bring the cube over Goo and bypass the Material Emancipation Grill alone.
Gallery
Atlas's POV
Inside the tubes (Atlas's POV)
Rooms (Atlas's POV)
P-body's POV
Inside the tubes (P-body's POV)
1st pair of rooms (P-body's POV)
2nd pair of rooms (P-body's POV)
3rd pair of rooms (P-body's POV)
4th pair of rooms (P-body's POV)
5th pair of rooms (P-body's POV)
6th pair of rooms (P-body's POV)
7th pair of rooms (P-body's POV)
Achievements
High Five
 |
High Five Celebrate your cooperative calibration success Difficulty: Story-related How to obtain: Simply complete the calibration course in co-op to get this achievement. |
Professor Portal
 |
Professor Portal After completing co-op, complete Calibration Course online with a friend who hasn’t played before Difficulty: N/A How to obtain: Find random partners online, and immediately leave the game if you do not see the opening film. When you find a beginner, exit the game, friend them, and invite them. This will take a long time depending on how lucky you are. Alternatively, this achievement can be very easy if you already have friends on Steam who have Portal 2, but haven't done co-op mode yet. |
Closed Captions
- Party Whistle
Trivia
- Players can use the console command say while the movie is playing...
GLaDOS' voice lines
 | “You just have to look at things objectively, see what you don't need anymore, and trim out the fat.” This page has been marked for general cleanup. Reason: unspecified. Please see Portal Wiki style guide for information on how to improve this article. |
- "ORANGE, please show me where you would like me to place a portal." |
 Download |
  Play[citation needed]
 - "BLUE, please show me where you would like me to place a portal." |
 Download |
  Play[citation needed]
 - "Please ping a white portalable surface." |
 Download |
  Play[citation needed]
 - "Orange is awarded five points!" |
 Download |
  Play[citation needed]
 - "Blue is awarded five points!" |
 Download |
  Play[citation needed]
 - "Again, those are science collaboration points, which you should not confuse with points from competitions such as Who-Gets-To-Live-At-The-End-And-Who-Doesn’t. I mean basketball." |
 Download |
  Play[citation needed]
 - "Did you know humans frown on weight variances?" |
 Download |
  Play
Play - "If you want to upset a human, just say their weight variance is above or below the norm." |
 Download |
  Play
Play
References
- ↑ March 25, 2023 Patch or version "Protocol version 2001, Exe version 2.0.0.1 (portal2), Exe build: 19:15:46 Mar 3 2023 (8873) (620)"


