Doug Rattmann: Difference between revisions
Dougrattmann (talk | contribs) |
GrampaSwood (talk | contribs) Corrected some missing instances from Rattman to Rattmann. Also added a sic to the track title to indicate it's intentional. Archived the two Twitter posts, considering how many people delete/get off of Twitter these days it may be safer to have the still-available one archived too |
||
| (30 intermediate revisions by 9 users not shown) | |||
| Line 1: | Line 1: | ||
{{SpoilerHeavy}} | {{SpoilerHeavy}} | ||
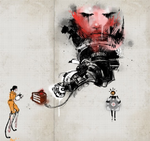
[[File:Doug Rattmann.jpg|right|thumb| | [[File:Doug Rattmann.jpg|right|thumb|250px|Doug Rattmann after the events of ''[[Portal]]'', as seen in the ''[[Portal 2: Lab Rat|Lab Rat]]'' comic.]] | ||
{{Quotation|'''Doug Rattmann'''|Reality is a story the mind tells itself. An artificial structure conjured into being by the calcium ion exchange of a million synaptic firings. A truth so strange it can only be lied into existence. And our minds '''can''' lie. Never doubt it...}} | {{Quotation|'''Doug Rattmann'''|Reality is a story the mind tells itself. An artificial structure conjured into being by the calcium ion exchange of a million synaptic firings. A truth so strange it can only be lied into existence. And our minds '''can''' lie. Never doubt it...}} | ||
'''Doug Rattmann''', also nicknamed as simply the '''Rat Man''', was a scientist at the [[Aperture Science]] Enrichment Center. Prior to the events of ''[[Portal]]'' while [[GLaDOS]] began flooding the entire facility with [[neurotoxin]], Rattmann is the only known employee to have survived. He is stated to be a {{W|schizophrenic}}, and shown to take anti-psychotic medication to ease his delusions and hallucinations. | |||
'''Doug Rattmann''' | |||
Rattmann does not appear in-game in any form, instead leaving behind paintings and murals which can be found throughout the backstage of various testing chambers in ''Portal'' and the single-player campaign of ''[[Portal 2]]''. | Rattmann does not appear in-game in any form, instead leaving behind paintings and murals which can be found throughout the backstage of various testing chambers in ''Portal'' and the single-player campaign of ''[[Portal 2]]''. | ||
| Line 14: | Line 12: | ||
=== ''Portal 2: Lab Rat'' === | === ''Portal 2: Lab Rat'' === | ||
{{See also|Portal 2: Lab Rat}} | {{See also|Portal 2: Lab Rat}} | ||
[[File:Doug Rattmann sane.jpg|thumb|right|Rattmann as he appears in the ''[[Portal 2: Lab Rat|Lab Rat]]'' comic, holding his | [[File:Doug Rattmann sane.jpg|thumb|right|Rattmann as he appears in the ''[[Portal 2: Lab Rat|Lab Rat]]'' comic, holding his anti-psychotic medicine, prior to the events of the ''Portal'' series.]] | ||
In the ''[[Portal 2: Lab Rat]]'' comic, he is revealed to be an Aperture Science employee who worked on the [[Handheld Portal Device]].<ref name="portal device work">''Portal 2: Lab Rat'' comic, [[:File:Lab Rat P13.jpg|page 13]]</ref> {{spoiler|He expresses doubts about GLaDOS and the effectiveness of a morality core, remarking "You can always ignore your conscience".<ref name="conscience quote">''Portal 2: Lab Rat'' comic, [[:File:Lab Rat P14.jpg|page 14]]</ref> His fears turn out to be justified when she poisons all the staff in the Enrichment Center with [[neurotoxin]] upon activation during the company's Bring-Your-Daughter-To-Work Day.}} | In the ''[[Portal 2: Lab Rat]]'' comic, he is revealed to be an Aperture Science employee who worked on the [[Handheld Portal Device]].<ref name="portal device work">''Portal 2: Lab Rat'' comic, [[:File:Lab Rat P13.jpg|page 13]]</ref> {{spoiler|He expresses doubts about GLaDOS and the effectiveness of a morality core, remarking "You can always ignore your conscience".<ref name="conscience quote">''Portal 2: Lab Rat'' comic, [[:File:Lab Rat P14.jpg|page 14]]</ref> His fears turn out to be justified when she poisons all the staff in the Enrichment Center with [[neurotoxin]] upon activation during the company's Bring-Your-Daughter-To-Work Day.}} | ||
| Line 25: | Line 23: | ||
[[File:Portal RatmanBed.png|thumb|left|120px|Crude bed that can be found in most of Rattmann's dens.]] | [[File:Portal RatmanBed.png|thumb|left|120px|Crude bed that can be found in most of Rattmann's dens.]] | ||
Delusional, running low on medication and | Delusional, running low on medication and traveling with what appears to be a talking [[Weighted Companion Cube]], he watches from the shadows as [[Chell]] is put through [[GLaDOS]]' testing course. Although he is never spotted in-game in any of the playable ''Portal'' series, his refuge areas (referred to as dens) can be found by Chell, containing crude bedding, empty cans of beans and scribblings and dioramas on the walls. It is in one of these dens that the warning phrase "The cake is a lie" can be found scribbled on a wall; as GLaDOS continually promises that there would be cake at the end of testing. | ||
{{spoiler|Following Chell's conflict with GLaDOS after her escape from the testing tracks, the ''Lab Rat'' comic details Rattmann's point of view after the events of ''Portal'' in which he follows the sound of the explosion and finds a route to the outside world after the destruction of GLaDOS. His joy is short-lived as he witnesses an unconscious Chell being dragged back into the facility by the [[Party Escort Bot]]. Feeling guilt, as it was his actions that resulted in her being the first test subject, he once again enters the facility and finds Chell has been put in long-term cryogenic relaxation.<ref name="chell relaxation">''Portal 2: Lab Rat'' comic, [[:File:Lab Rat P15.jpg|page 15]]</ref> Finding out that | {{spoiler|Following Chell's conflict with GLaDOS after her escape from the testing tracks, the ''Lab Rat'' comic details Rattmann's point of view after the events of ''Portal'' in which he follows the sound of the explosion and finds a route to the outside world after the destruction of GLaDOS. His joy is short-lived as he witnesses an unconscious Chell being dragged back into the facility by the [[Party Escort Bot]]. Feeling guilt, as it was his actions that resulted in her being the first test subject, he once again enters the facility and finds Chell has been put in long-term cryogenic relaxation.<ref name="chell relaxation">''Portal 2: Lab Rat'' comic, [[:File:Lab Rat P15.jpg|page 15]]</ref> Finding out that all of [[Relaxation Chamber]] beds are offline due to the explosion compromising the power grid, he proceeds to save Chell's life by patching hers into the reserve power grid. He is injured in the process when he is shot by [[Turret]]s that are still left in nearby test chambers.<ref name="ratmann shot">''Portal 2: Lab Rat'' comic, [[:File:Lab Rat P17.jpg|page 17]]</ref> He then submits himself into Chell's cryogenic stasis bed found in the [[Relaxation Vault]] previously used in the events of ''Portal'', and falls asleep in it.}} | ||
{{spoiler|His fate is left unknown as the entire bed with him is nowhere to be found when Chell later revisits this Relaxation Vault at the beginning of the single-player campaign in ''[[Portal 2]]''.}} | {{spoiler|His fate is left unknown as the entire bed with him is nowhere to be found when Chell later revisits this Relaxation Vault at the beginning of the single-player campaign in ''[[Portal 2]]''.}} | ||
| Line 35: | Line 33: | ||
{{See also|Portal 2}} | {{See also|Portal 2}} | ||
During the events of the single-player campaign of ''Portal 2'', Rattmann's fate is left unknown. Whether or not he is dead is left up to debate, as [[Chell]]'s cryogenic stasis bed that she used before the events of ''[[Portal]]'' he took refuge in, had disappeared entirely. One piece of evidence for his death is the song called "Ghost of | During the events of the single-player campaign of ''Portal 2'', Rattmann's fate is left unknown. Whether or not he is dead is left up to debate, as [[Chell]]'s cryogenic stasis bed that she used before the events of ''[[Portal]]'' he took refuge in, had disappeared entirely. One piece of evidence for his death is the song called "Ghost of Rattman". Some speculate that Rattmann may have made it to the moon, as shown in a hidden picture encrypted into the game's audio file. You can find the audio file by bringing a radio into Rattmann's den in Portal 2 Chapter 2 Test Chamber 6. | ||
[[File:Portal_2_Chapter_2_Test_Chamber_6_rat_man_den.png|thumb|right|170px|A Rattmann den during ''[[Portal 2]]'s'' single-player.]] | [[File:Portal_2_Chapter_2_Test_Chamber_6_rat_man_den.png|thumb|right|170px|A Rattmann den during ''[[Portal 2]]'s'' single-player.]] | ||
| Line 43: | Line 41: | ||
Rattmann's graffiti work makes no appearances whatsoever during the game's [[Cooperative Testing Initiative]]. {{spoiler|However, a [[Weighted Companion Cube]] can be spotted by [[Atlas]] and [[P-body]] in the last test of ''[[Cooperative Testing Initiative#Course Four: Excursion Funnels|Course Four: Excursion Funnels]]''. The cube is apparently attached to a Core Receptacle, indicating that it may in fact be as sentient as any other [[Cores]] in the series.}} | Rattmann's graffiti work makes no appearances whatsoever during the game's [[Cooperative Testing Initiative]]. {{spoiler|However, a [[Weighted Companion Cube]] can be spotted by [[Atlas]] and [[P-body]] in the last test of ''[[Cooperative Testing Initiative#Course Four: Excursion Funnels|Course Four: Excursion Funnels]]''. The cube is apparently attached to a Core Receptacle, indicating that it may in fact be as sentient as any other [[Cores]] in the series.}} | ||
{{spoiler|At some point in the events of the [[Portal 2#Perpetual Testing Initiative|Perpetual Testing Initiative]], in which the player takes role of stick figure [[Bendy]] - is shifted into a variety of alternate universes at the Enrichment Center as a means of still having [[Cave Johnson]] as ongoing CEO. There is a universe in which | {{spoiler|At some point in the events of the [[Portal 2#Perpetual Testing Initiative|Perpetual Testing Initiative]], in which the player takes role of stick figure [[Bendy]] - is shifted into a variety of alternate universes at the Enrichment Center as a means of still having [[Cave Johnson]] as ongoing CEO. There is a universe in which Rattmann is CEO of the Aperture company. Cave (now former junior claims representative of Aperture) hijacks the intercoms to yell out and warn everyone that Rattmann (the current CEO) is embezzling from the staffs' paychecks.}} | ||
== Ghost of Rattman == | |||
{{See also|Songs to Test By}} | |||
Ghost of Rattman{{sic}} is the 7th track on the Portal 2 soundtrack "Portal 2: Songs to Test By." {{spoiler|It includes what is speculated to be Rattmann speaking to himself, his Companion Cube, or even Cave Johnson. The ramblings draw parallels with the [[Borealis]] as well as multiple events in the 2011 comic [[Lab Rat]]. You can access this recording in Den #7 in Portal 2, located in test chamber 17.<br />}} | |||
''(Unintelligible)''<br /> | :''(Unintelligible)''<br /> | ||
''I had no choice, help me, Uncle Johnson,''<br /> | :''I had no choice, help me, Uncle Johnson,''<br /> | ||
''Help me chose my desire!''<br /> | :''Help me chose my desire!''<br /> | ||
''(Unintelligible)''<br /> | :''(Unintelligible)''<br /> | ||
''They took me to Mesa (unintelligible) mutilation''<br /> | :''They took me to Mesa (unintelligible) mutilation''<br /> | ||
''It was coming soon!''<br /> | :''It was coming soon!''<br /> | ||
''It's gone, sir, it's been stolen!''<br /> | :''It's gone, sir, it's been stolen!''<br /> | ||
''The ship is stolen!''<br /> | :''The ship is stolen!''<br /> | ||
''(Unintelligible)''<br /> | :''(Unintelligible)''<br /> | ||
''He's dead. Everyone, dead!''<br /> | :''He's dead. Everyone, dead!''<br /> | ||
''But she lives! Please, help me, Chell!''<br /> | :''But she lives! Please, help me, Chell!''<br /> | ||
''I can touch it!''<br /> | :''I can touch it!''<br /> | ||
''Johnson? (Unintelligible)''<br /> | :''Johnson? (Unintelligible)''<br /> | ||
''The ship is gone, they're moving it to Mesa Hill!''<br /> | :''The ship is gone, they're moving it to Mesa Hill!''<br /> | ||
''That's where it all started.''<br /> | :''That's where it all started.''<br /> | ||
''(Unintelligible)''<br /> | :''(Unintelligible)''<br /> | ||
''Little girl, it's ok.''<br /> | :''Little girl, it's ok.''<br /> | ||
''Your pain is ignored by a little pill.''<br /> | :''Your pain is ignored by a little pill.''<br /> | ||
===Connections to the Borealis=== | ===Connections to {{spoiler|the Borealis}}=== | ||
''It's gone, sir, it's been stolen!''<br /> | :''It's gone, sir, it's been stolen!''<br /> | ||
''The ship is stolen!''<br /> | :''The ship is stolen!''<br /> | ||
''The ship is gone, they're moving it to Mesa Hill!''<br /> | :''The ship is gone, they're moving it to Mesa Hill!''<br /> | ||
By "the ship," Rattmann is referring to the [[Borealis]]. | By "the ship," Rattmann is referring to the [[Borealis]]. | ||
===Connections to events in Lab Rat=== | ===Connections to events in Lab Rat=== | ||
''He's dead. Everyone, dead!''<br /> | :''He's dead. Everyone, dead!''<br /> | ||
''But she lives! Please, help me, Chell!''<br /> | :''But she lives! Please, help me, Chell!''<br /> | ||
''I can touch it!''<br /> | :''I can touch it!''<br /> | ||
This could refer to two incidents, both described in Portal 2: Lab Rat.<br /> | This could refer to two incidents, both described in Portal 2: Lab Rat.<br /> | ||
The first incident is the infamous Bring Your Daughter to Work Day. ''He's dead. Everyone, dead!'' could refer to the people killed by [[GLaDOS]] during this incident, with ''But she lives!'' referring to GLaDOS herself.<br /> | The first incident {{spoiler|is the infamous Bring Your Daughter to Work Day. ''He's dead. Everyone, dead!'' could refer to the people killed by [[GLaDOS]] during this incident, with ''But she lives!'' referring to GLaDOS herself.<br />}} | ||
However, these lines could alternatively be referring to the dead bodies in the cryo-chambers. As shown on page 17 of Portal 2: Lab Rat, all of the chambers were offline, however Rattmann was able to save Chell by resetting her life support and putting her in "the long sleep." This would also align with the next line ''I can touch it,'' referring to page 25, where Rattmann had to reach to push a button to save Chell.<br /> | However, these lines could alternatively be referring to {{spoiler|the dead bodies in the cryo-chambers. As shown on page 17 of Portal 2: Lab Rat, all of the chambers were offline, however Rattmann was able to save Chell by resetting her life support and putting her in "the long sleep." This would also align with the next line ''I can touch it,'' referring to page 25, where Rattmann had to reach to push a button to save Chell.<br />}} | ||
:''Little girl, it's ok.''<br /> | |||
:''Your pain is ignored by a little pill.''<br /> | |||
As shown in [[Portal 2: Lab Rat]], Rattmann is dependent on anti-psychotics to treat his paranoid delusions. <br/> | |||
As shown in Portal 2: Lab Rat, Rattmann is dependent on | |||
== Known dens == | == Known dens == | ||
| Line 172: | Line 174: | ||
|File:Ratman Diorama 4.png|Depicting [[Chell]] and her behavioral statistic. | |File:Ratman Diorama 4.png|Depicting [[Chell]] and her behavioral statistic. | ||
|File:Ratman Diorama 5.png|One of Rattmann's less intelligible dioramas. Possibly a reference to "Smooth jazz will be deployed in 3, 2, 1..." said in a test chamber in Portal. | |File:Ratman Diorama 5.png|One of Rattmann's less intelligible dioramas. Possibly a reference to "Smooth jazz will be deployed in 3, 2, 1..." said in a test chamber in Portal. | ||
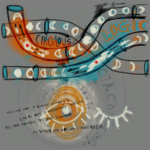
|File:Ratman Diorama 6.png| | |File:Ratman Diorama 6.png|A cut diorama with the [[Tubes]] drawn with what appears to be early versions of [[Atlas]] and [[P-Body]], implying that originally Rattmann was still alive after [[Portal 2: Lab Rat]]. | ||
|File:Ratman Wall Art 1.png|Rattmann trying to express himself. | |File:Ratman Wall Art 1.png|Rattmann trying to express himself. | ||
|File:Ratman Wall Art 2.png|Ditto. | |File:Ratman Wall Art 2.png|Ditto. | ||
| Line 188: | Line 190: | ||
== Trivia == | == Trivia == | ||
[[File:Lego Dimensions Ratmanden.jpg|thumb|right|300px| | [[File:Lego Dimensions Ratmanden.jpg|thumb|right|300px|Rattmann's hidden den in ''Lego Dimensions''.]] | ||
* Doug Rattmann was behind the Aperture Image Format, used in the [[Portal ARG]]. | * Doug Rattmann was behind the Aperture Image Format, used in the [[Portal ARG]]. | ||
* Doug Rattmann's [[Media:Doug_Rattmann_Sp_a2_pull_the_rug_r2.ogg|voice]] can be heard in certain Rat-Man dens in ''Portal 2'', and during the [[Portal 2 OST]] track ''"Ghost of Rattman"''. These are both voiced by former Valve writer Marc Laidlaw.<ref>https://twitter.com/marc_laidlaw/status/1387546992927068161</ref> | * Doug Rattmann's [[Media:Doug_Rattmann_Sp_a2_pull_the_rug_r2.ogg|voice]] can be heard in certain Rat-Man dens in ''Portal 2'', and during the [[Portal 2 OST]] track ''"Ghost of Rattman"''. These are both voiced by former Valve writer Marc Laidlaw.<ref>[https://web.archive.org/web/20210428231934/https://twitter.com/marc_laidlaw/status/1387546992927068161 Twitter post] by Marc Laidlaw (archived)</ref> | ||
* The medication Doug takes in Lab Rat is called ziaprazidone, a version of a real anti-psychotic, ziprasidone. | |||
* The “Armstrong Cube” artwork references his transmission in [[Portal 2 Chapter 2 Test Chamber 6]]. If one follows the actions to achieve Final Transmission, the radio emits a Morse-code like sound. When translated, the noise leads to a staticky image of a Weighted Companion Cube on the lunar surface. | * The “Armstrong Cube” artwork references his transmission in [[Portal 2 Chapter 2 Test Chamber 6]]. If one follows the actions to achieve Final Transmission, the radio emits a Morse-code like sound. When translated, the noise leads to a staticky image of a Weighted Companion Cube on the lunar surface. | ||
* Various wall art by Rattmann can be found in the Portal 2 Adventure World in [[Lego Dimensions]], along with a hidden Den. The infamous "cake is a lie" scribblings can also be found on walls, though instead of trailing off, it ends with "the cake is in the kitchen on the second floor." | * Various wall art by Rattmann can be found in the Portal 2 Adventure World in [[Lego Dimensions]], along with a hidden Den. The infamous "cake is a lie" scribblings can also be found on walls, though instead of trailing off, it ends with "the cake is in the kitchen on the second floor." | ||
** Over a year later, the game's developers teased that there were still undiscovered secrets within Lego Dimensions<ref>https://twitter.com/doa1984/status/781878793778724865 | ** Over a year later, the game's developers teased that there were still undiscovered secrets within Lego Dimensions<ref>[https://web.archive.org/web/20220420042536/https://twitter.com/doa1984/status/781878793778724865 Twitter post] by Mark Warburton (archived)</ref>, one of which was related to ''Portal''. In November of 2016, players finally discovered that Doug Rattmann himself was hidden throughout various parts of the level "GLaD to Meet You".<ref>[https://web.archive.org/web/20161119092408/http://www.brickstolife.com/found-doug-rattmann-in-lego-dimensions/ Bricks to life] article</ref> | ||
== References == | == References == | ||
Latest revision as of 15:19, 11 January 2026
| “ | Reality is a story the mind tells itself. An artificial structure conjured into being by the calcium ion exchange of a million synaptic firings. A truth so strange it can only be lied into existence. And our minds can lie. Never doubt it...
— Doug Rattmann
|
” |
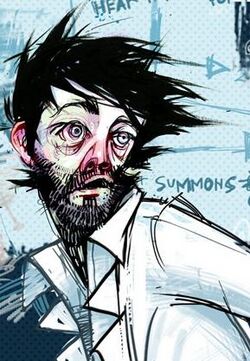
Doug Rattmann, also nicknamed as simply the Rat Man, was a scientist at the Aperture Science Enrichment Center. Prior to the events of Portal while GLaDOS began flooding the entire facility with neurotoxin, Rattmann is the only known employee to have survived. He is stated to be a schizophrenic, and shown to take anti-psychotic medication to ease his delusions and hallucinations.
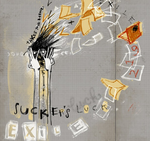
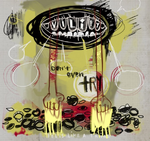
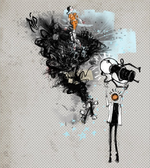
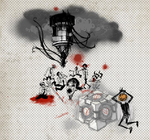
Rattmann does not appear in-game in any form, instead leaving behind paintings and murals which can be found throughout the backstage of various testing chambers in Portal and the single-player campaign of Portal 2.
Overview
Portal 2: Lab Rat
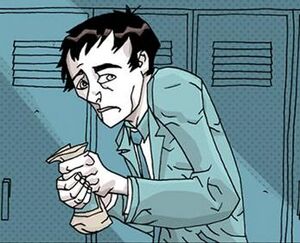
In the Portal 2: Lab Rat comic, he is revealed to be an Aperture Science employee who worked on the Handheld Portal Device.[1] He expresses doubts about GLaDOS and the effectiveness of a morality core, remarking "You can always ignore your conscience".[2] His fears turn out to be justified when she poisons all the staff in the Enrichment Center with neurotoxin upon activation during the company's Bring-Your-Daughter-To-Work Day.
Prepared for the outcome, he survives the initial attempts to kill him and proceeds to sneak through parts of the facility, avoiding GLaDOS who is actively hunting him. Acting on a 'hunch', he breaks into the test subjects' filing room and arranges Chell's name to the top of the test subject roster,[3] leading to the events in Portal.
Portal

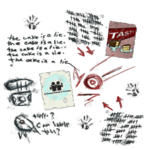
Delusional, running low on medication and traveling with what appears to be a talking Weighted Companion Cube, he watches from the shadows as Chell is put through GLaDOS' testing course. Although he is never spotted in-game in any of the playable Portal series, his refuge areas (referred to as dens) can be found by Chell, containing crude bedding, empty cans of beans and scribblings and dioramas on the walls. It is in one of these dens that the warning phrase "The cake is a lie" can be found scribbled on a wall; as GLaDOS continually promises that there would be cake at the end of testing.
Following Chell's conflict with GLaDOS after her escape from the testing tracks, the Lab Rat comic details Rattmann's point of view after the events of Portal in which he follows the sound of the explosion and finds a route to the outside world after the destruction of GLaDOS. His joy is short-lived as he witnesses an unconscious Chell being dragged back into the facility by the Party Escort Bot. Feeling guilt, as it was his actions that resulted in her being the first test subject, he once again enters the facility and finds Chell has been put in long-term cryogenic relaxation.[4] Finding out that all of Relaxation Chamber beds are offline due to the explosion compromising the power grid, he proceeds to save Chell's life by patching hers into the reserve power grid. He is injured in the process when he is shot by Turrets that are still left in nearby test chambers.[5] He then submits himself into Chell's cryogenic stasis bed found in the Relaxation Vault previously used in the events of Portal, and falls asleep in it.
His fate is left unknown as the entire bed with him is nowhere to be found when Chell later revisits this Relaxation Vault at the beginning of the single-player campaign in Portal 2.
Portal 2
During the events of the single-player campaign of Portal 2, Rattmann's fate is left unknown. Whether or not he is dead is left up to debate, as Chell's cryogenic stasis bed that she used before the events of Portal he took refuge in, had disappeared entirely. One piece of evidence for his death is the song called "Ghost of Rattman". Some speculate that Rattmann may have made it to the moon, as shown in a hidden picture encrypted into the game's audio file. You can find the audio file by bringing a radio into Rattmann's den in Portal 2 Chapter 2 Test Chamber 6.

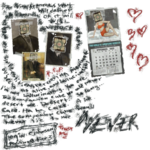
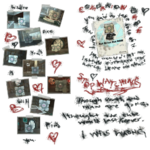
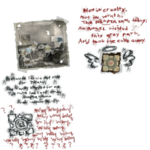
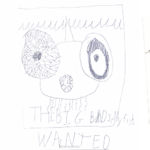
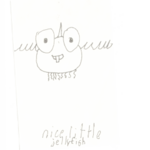
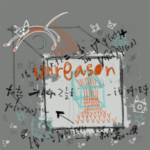
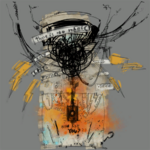
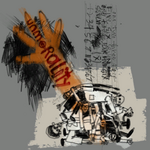
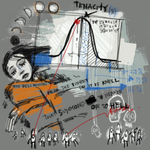
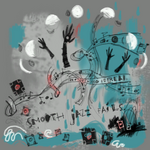
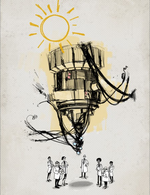
All that is left of him in Portal 2, like in the first game, are wall scribblings and various dioramas depicting either what he witnessed or simply what he feels like expressing.
Rattmann's graffiti work makes no appearances whatsoever during the game's Cooperative Testing Initiative. However, a Weighted Companion Cube can be spotted by Atlas and P-body in the last test of Course Four: Excursion Funnels. The cube is apparently attached to a Core Receptacle, indicating that it may in fact be as sentient as any other Cores in the series.
At some point in the events of the Perpetual Testing Initiative, in which the player takes role of stick figure Bendy - is shifted into a variety of alternate universes at the Enrichment Center as a means of still having Cave Johnson as ongoing CEO. There is a universe in which Rattmann is CEO of the Aperture company. Cave (now former junior claims representative of Aperture) hijacks the intercoms to yell out and warn everyone that Rattmann (the current CEO) is embezzling from the staffs' paychecks.
Ghost of Rattman
Ghost of Rattman(sic) is the 7th track on the Portal 2 soundtrack "Portal 2: Songs to Test By." It includes what is speculated to be Rattmann speaking to himself, his Companion Cube, or even Cave Johnson. The ramblings draw parallels with the Borealis as well as multiple events in the 2011 comic Lab Rat. You can access this recording in Den #7 in Portal 2, located in test chamber 17.
- (Unintelligible)
- I had no choice, help me, Uncle Johnson,
- Help me chose my desire!
- (Unintelligible)
- They took me to Mesa (unintelligible) mutilation
- It was coming soon!
- It's gone, sir, it's been stolen!
- The ship is stolen!
- (Unintelligible)
- He's dead. Everyone, dead!
- But she lives! Please, help me, Chell!
- I can touch it!
- Johnson? (Unintelligible)
- The ship is gone, they're moving it to Mesa Hill!
- That's where it all started.
- (Unintelligible)
- Little girl, it's ok.
- Your pain is ignored by a little pill.
Connections to the Borealis
- It's gone, sir, it's been stolen!
- The ship is stolen!
- The ship is gone, they're moving it to Mesa Hill!
By "the ship," Rattmann is referring to the Borealis.
Connections to events in Lab Rat
- He's dead. Everyone, dead!
- But she lives! Please, help me, Chell!
- I can touch it!
This could refer to two incidents, both described in Portal 2: Lab Rat.
The first incident is the infamous Bring Your Daughter to Work Day. He's dead. Everyone, dead! could refer to the people killed by GLaDOS during this incident, with But she lives! referring to GLaDOS herself.
However, these lines could alternatively be referring to the dead bodies in the cryo-chambers. As shown on page 17 of Portal 2: Lab Rat, all of the chambers were offline, however Rattmann was able to save Chell by resetting her life support and putting her in "the long sleep." This would also align with the next line I can touch it, referring to page 25, where Rattmann had to reach to push a button to save Chell.
- Little girl, it's ok.
- Your pain is ignored by a little pill.
As shown in Portal 2: Lab Rat, Rattmann is dependent on anti-psychotics to treat his paranoid delusions.
Known dens
Aside from leaving paintings, murals and messages behind, Doug Rattmann also discovered a number of hidden rooms in Aperture Science. He adorned these rooms with messages and artwork and primarily used them as refuges in order to escape GLaDOS' scrutiny. The hidden rooms are present in both Portal and Portal 2, and are known as the Ratman's Dens. A total of 13 have been discovered, 6 in Portal and 7 in Portal 2.
|
Den locations in Portal:
|
Den locations in Portal 2:
|
|
Gallery
| Known dens in Portal | ||||||||||||||
| ||||||||||||||
| Known dens in Portal 2 | ||||||||||||||
| ||||||||||||||
| Graffiti in Portal | ||||||||||||||||||||||||
| ||||||||||||||||||||||||
| Portal 2 | ||||||||||||||||||||||||||||||||||||
| ||||||||||||||||||||||||||||||||||||
Trivia
- Doug Rattmann was behind the Aperture Image Format, used in the Portal ARG.
- Doug Rattmann's voice can be heard in certain Rat-Man dens in Portal 2, and during the Portal 2 OST track "Ghost of Rattman". These are both voiced by former Valve writer Marc Laidlaw.[6]
- The medication Doug takes in Lab Rat is called ziaprazidone, a version of a real anti-psychotic, ziprasidone.
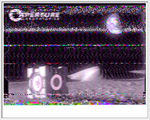
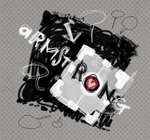
- The “Armstrong Cube” artwork references his transmission in Portal 2 Chapter 2 Test Chamber 6. If one follows the actions to achieve Final Transmission, the radio emits a Morse-code like sound. When translated, the noise leads to a staticky image of a Weighted Companion Cube on the lunar surface.
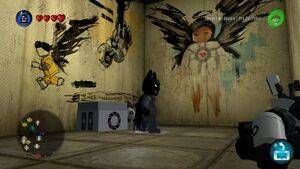
- Various wall art by Rattmann can be found in the Portal 2 Adventure World in Lego Dimensions, along with a hidden Den. The infamous "cake is a lie" scribblings can also be found on walls, though instead of trailing off, it ends with "the cake is in the kitchen on the second floor."
- Over a year later, the game's developers teased that there were still undiscovered secrets within Lego Dimensions[7], one of which was related to Portal. In November of 2016, players finally discovered that Doug Rattmann himself was hidden throughout various parts of the level "GLaD to Meet You".[8]
References
See also
| ||||||||||||||


