Portal 2 Chapter 3 Test Chamber 17: Difference between revisions
Jump to navigation
Jump to search
TheHellBell (talk | contribs) mNo edit summary |
m Auto: templateRenameMapping (Review RC#199457) |
||
| (9 intermediate revisions by 6 users not shown) | |||
| Line 1: | Line 1: | ||
{{stub}} | {{stub}} | ||
{{ | {{Chamber infobox | ||
| title = Portal 2 Chapter 3 Test Chamber 17 | |||
| valve-title = Pull the Rug | |||
| map = sp_a2_pull_the_rug.bsp | |||
| dirty = 1 | |||
| number = 17 | |||
| total = 22 | |||
| screenshot = Portal 2 Chapter 3 Test Chamber 17.png | |||
| icon1 = cube dispenser | |||
| icon2 = cube button on | |||
| icon3 = cube hazard | |||
| icon4 = player button | |||
| icon5 = water hazard | |||
| icon6 = light bridge on | |||
| icon7 = laser sensor on | |||
| icon8 = turret hazard | |||
| icon9 = bridge shield | |||
| icon10 = dirty water | |||
| previous = Portal 2 Chapter 3 Test Chamber 16 | |||
| next = Portal 2 Chapter 4 Test Chamber 18 | |||
}} | }} | ||
This is the twenty-sixth level of the game, and the final part of Chapter 3. It is set within a dilapidated Test Chamber, and requires the player to perfect advanced techniques using the [[Hard Light Bridge]] in order to access the [[Chamberlock]]. {{Spoiler|This level also contains a Rat Man [[Den]] where his voice can be heard near the painting of [[Chell]].}} | This is the twenty-sixth level of the game, and the final part of Chapter 3. It is set within a dilapidated Test Chamber, and requires the player to perfect advanced techniques using the [[Hard Light Bridge]] in order to access the [[Chamberlock]]. {{Spoiler|This level also contains a Rat Man [[Den]] where his voice can be heard near the painting of [[Chell]].}} | ||
== Hazards == | == Contents == | ||
=== Mechanics === | |||
* Laser Receptacle | |||
* [[Weighted Storage Cube]] | |||
* [[Heavy Duty Super-Colliding Super Button]] | |||
* [[Hard Light Bridge]] | |||
* Track Platform | |||
* Light Strip (blue, white, pink) | |||
=== Characters === | |||
* [[Chell]] | |||
* [[GLaDOS]] | |||
=== Objective === | |||
* Complete GLaDOS' Test Shaft (Test Chamber 17) | |||
=== Hazards === | |||
*[[Thermal Discouragement Beam]] | *[[Thermal Discouragement Beam]] | ||
== | === Locations === | ||
* ''Aperture Science Enrichment Center'' | |||
* ''Test Chamber 17 (GLaDOS)'' | |||
== How to access the View Platform Corridor == | |||
{{Spoiler|block=yes| | {{Spoiler|block=yes| | ||
| Line 41: | Line 62: | ||
}} | }} | ||
== How to access the Rattman Den == | |||
{{Spoiler|block=yes| | |||
*Fire a portal on the wall on the ground level near the [[Heavy Duty Super-Colliding Super Button|button]]. | |||
*Place the second portal on the end of the [[Hard Light Bridge]]. | |||
*Walk through the portal near the ground. | |||
*Fire the first portal again onto the wall with the camera on it | |||
*walk through the second portal | |||
*Adjust first portal alignment so it lines up with the open patch of wall | |||
*Walk through the open patch of wall | |||
}} | |||
== Walkthrough == | == Walkthrough == | ||
| Line 68: | Line 100: | ||
|File:Portal 2 Chapter 3 Test Chamber 17 den.png|alt3=A Rat Man Den in the Test Chamber|A [[Doug Rattmann|Rat Man]] den in the Test Chamber. | |File:Portal 2 Chapter 3 Test Chamber 17 den.png|alt3=A Rat Man Den in the Test Chamber|A [[Doug Rattmann|Rat Man]] den in the Test Chamber. | ||
|File:Portal 2 Chapter 3 Test Chamber 17 den 2.png|alt3=Another view of the den|Another view of the den. | |File:Portal 2 Chapter 3 Test Chamber 17 den 2.png|alt3=Another view of the den|Another view of the den. | ||
|File:Portal 2 Chapter 3 Test Chamber 17 overview.png|alt3=A view of the test chamber.|A view of the test chamber. | |||
}} | }} | ||
== Trivia == | == Trivia == | ||
*If you enter the [[Den]] located in the room, and then proceed to exit it, any portals you made inside it will vanish with no apparent reason and the wall that serves as entrance/exit will close, denying any later attempt to enter it. | *If you enter the [[Den]] located in the room, and then proceed to exit it, any portals you made inside it will vanish with no apparent reason and the wall that serves as entrance/exit will close, denying any later attempt to enter it. | ||
*The [[Den]]'s scrawlings are a reference to The Tragedie of Macbeth by William Shakespare. The scrawlings say, "The bell invites. Hear the turret for it is knell. That summons ### to heaven or to hell." In Act 2, Scene 1 of Macbeth, Macbeth says "I go and it is done; the bell invites me. / Hear it not, Duncan, for it is a knell / That summons thee to heaven or to hell." | |||
{{TestChambersNav}} | {{TestChambersNav}} | ||
[[Category:Portal_2_chambers]] | [[Category:Portal_2_chambers]] | ||
Latest revision as of 23:00, 19 October 2024
 | “I can't get over how small you are!” This article is a stub. As such, it is not complete. You can help Portal wiki by expanding it. |
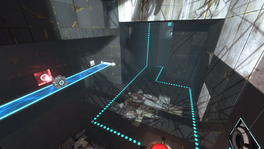
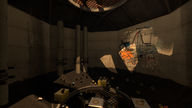
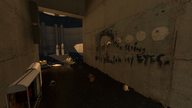
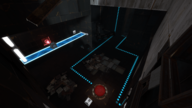
This is the twenty-sixth level of the game, and the final part of Chapter 3. It is set within a dilapidated Test Chamber, and requires the player to perfect advanced techniques using the Hard Light Bridge in order to access the Chamberlock. This level also contains a Rat Man Den where his voice can be heard near the painting of Chell.
Contents
Mechanics
- Laser Receptacle
- Weighted Storage Cube
- Heavy Duty Super-Colliding Super Button
- Hard Light Bridge
- Track Platform
- Light Strip (blue, white, pink)
Characters
Objective
- Complete GLaDOS' Test Shaft (Test Chamber 17)
Hazards
Locations
- Aperture Science Enrichment Center
- Test Chamber 17 (GLaDOS)
How to access the View Platform Corridor
- Fire a portal on the wall on the ground level near the button.
- Place the second portal on the end of the Hard Light Bridge.
- Walk through the portal near the ground.
- Fire the first portal again near the top of the wall toward the exit side, such that the Hard Light Bridge creates a path to the wall on the entrance side wall, with the broken window.
- Walk through the second portal, and then along the new Hard Light Bridge, onto the windowsill.
- Fire either portal through the broken window into the hallway beyond.
- Drop to the floor and fire the other on the wall near ground level.
- Enter the portal.
How to access the Rattman Den
- Fire a portal on the wall on the ground level near the button.
- Place the second portal on the end of the Hard Light Bridge.
- Walk through the portal near the ground.
- Fire the first portal again onto the wall with the camera on it
- walk through the second portal
- Adjust first portal alignment so it lines up with the open patch of wall
- Walk through the open patch of wall
Walkthrough
- Fire a portal on the wall on the ground level near the button.
- Place the second portal on the end of the Hard Light Bridge.
- Put the other portal on the wall next to the Beam receptacle.
- Pick up the Weighted Storage Cube and go through the portal.
- Place the Storage Cube in front of the Beam and drop down from the Bridge.
- Walk over to the Victory Lift in front of the exit.
- While you are standing on the Lift, fire the portal anywhere so the Storage Cube drops on the button.
- Go in the Chamberlock.
Video walkthrough
Music
Main article: Portal 2 soundtrack
Ghost of Rattman by Aperture Science Psychoacoustics Laboratory [4:06] | ![]() Download |
Download | ![]() Play
Play
Gallery
|
Trivia
- If you enter the Den located in the room, and then proceed to exit it, any portals you made inside it will vanish with no apparent reason and the wall that serves as entrance/exit will close, denying any later attempt to enter it.
- The Den's scrawlings are a reference to The Tragedie of Macbeth by William Shakespare. The scrawlings say, "The bell invites. Hear the turret for it is knell. That summons ### to heaven or to hell." In Act 2, Scene 1 of Macbeth, Macbeth says "I go and it is done; the bell invites me. / Hear it not, Duncan, for it is a knell / That summons thee to heaven or to hell."


