Portal 2 Chapter 3 Test Chamber 14: Difference between revisions
Jump to navigation
Jump to search
| (13 intermediate revisions by 6 users not shown) | |||
| Line 2: | Line 2: | ||
{{Test Chamber Infobox | {{Test Chamber Infobox | ||
| title = Chapter 3 | | title = Portal 2 Chapter 3 Test Chamber 14 | ||
| valve-title= Laser Relays | | valve-title= Laser Relays | ||
| map = sp_a2_laser_relays.bsp | | map = sp_a2_laser_relays.bsp | ||
| Line 23: | Line 23: | ||
}} | }} | ||
This is the twenty- | This is the twenty-third level of the game, and is set within a dilapidated Test Chamber. This level features the [[Thermal Discouragement Beam]] and introduces Relays, which act similarly to Receptacles and must be activated by the Beam in order to gain access to the [[Chamberlock]]. | ||
== Hazards == | == Contents == | ||
=== Mechanics === | |||
* [[Panels]] | |||
* [[Discouragement Redirection Cube]] | |||
* Laser Relays | |||
=== Characters === | |||
* [[Chell]] | |||
* [[GLaDOS]] | |||
=== Objective === | |||
* Complete GLaDOS' Test Shaft (Test Chamber 14) | |||
=== Hazards === | |||
*[[Thermal Discouragement Beam]] | *[[Thermal Discouragement Beam]] | ||
=== Locations === | |||
* ''Aperture Science Enrichment Center'' | |||
* ''Test Chamber 14 (GLaDOS)'' | |||
* ''Construction Area'' | |||
== Walkthrough == | == Walkthrough == | ||
{{Spoiler|block=yes| | {{Spoiler|block=yes| | ||
=== Construction Area - Part A=== | |||
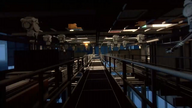
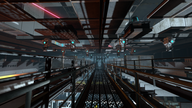
*Go through the door and then walk along the catwalk until you reach the end. | *Go through the door and then walk along the catwalk until you reach the end. | ||
*Wait for the machines to finish building the Chamber and then you will be lifted up to the chamber. | *Wait for the machines to finish building the Chamber and then you will be lifted up to the chamber. | ||
=== Chamber 14 - Part B === | |||
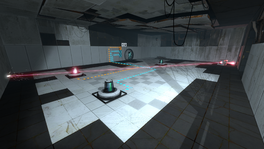
*Use the [[Discouragement Redirection Cube]] to redirect the [[Thermal Discouragement Beam]] to the two receptacles (the one in the front and the one in the far-right). | *Use the [[Discouragement Redirection Cube]] to redirect the [[Thermal Discouragement Beam]] to the two receptacles (the one in the front and the one in the far-right). | ||
*Shoot a portal on the wall at the end of the Beam and then fire the other portal on the wall nearest to the last remaining receptacle to activate it. | *Shoot a portal on the wall at the end of the Beam and then fire the other portal on the wall nearest to the last remaining receptacle to activate it. | ||
| Line 48: | Line 72: | ||
|width=192 | |width=192 | ||
|height=108 | |height=108 | ||
|lines= | |lines=2 | ||
|File:Portal 2 TC 14 - GameInformer article.png|Pre-release Test Chamber 14 | |File:Portal 2 TC 14 - GameInformer article.png|Pre-release Test Chamber 14 | ||
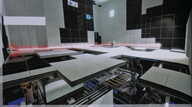
|File:Beta Floor Repair.png|Pre-release Test Chamber 14 being repaired | |File:Beta Floor Repair.png|Pre-release Test Chamber 14 being repaired | ||
| Line 54: | Line 78: | ||
}} | }} | ||
== Trivia == | |||
* This is the only chamber that starts "behind the scenes". | |||
{{TestChambersNav}} | {{TestChambersNav}} | ||
[[Category:Portal_2_chambers]] | [[Category:Portal_2_chambers]] | ||
Latest revision as of 22:45, 27 February 2026
 | “I can't get over how small you are!” This article is a stub. As such, it is not complete. You can help Portal wiki by expanding it. |
This is the twenty-third level of the game, and is set within a dilapidated Test Chamber. This level features the Thermal Discouragement Beam and introduces Relays, which act similarly to Receptacles and must be activated by the Beam in order to gain access to the Chamberlock.
Contents
Mechanics
- Panels
- Discouragement Redirection Cube
- Laser Relays
Characters
Objective
- Complete GLaDOS' Test Shaft (Test Chamber 14)
Hazards
Locations
- Aperture Science Enrichment Center
- Test Chamber 14 (GLaDOS)
- Construction Area
Walkthrough
Construction Area - Part A
- Go through the door and then walk along the catwalk until you reach the end.
- Wait for the machines to finish building the Chamber and then you will be lifted up to the chamber.
Chamber 14 - Part B
- Use the Discouragement Redirection Cube to redirect the Thermal Discouragement Beam to the two receptacles (the one in the front and the one in the far-right).
- Shoot a portal on the wall at the end of the Beam and then fire the other portal on the wall nearest to the last remaining receptacle to activate it.
- Go in the Chamberlock.
Video walkthrough
Music
Main article: Portal 2 soundtrack
Adrenal Vapor by Aperture Science Psychoacoustics Laboratory [2:36] | ![]() Download |
Download | ![]() Play
Play
Gallery
Trivia
- This is the only chamber that starts "behind the scenes".
| |||||||||||||||||||||||||||||||||||||||||||||||||||||||||||||||||||||||||||||||||||


