Thermal Discouragement Beam: Difference between revisions
Cupofspiders (talk | contribs) No edit summary |
No edit summary |
||
| Line 6: | Line 6: | ||
The Beam is fired in a straight line from an immovable device built into the wall or ceiling of a Test Chamber. Each Beam is usually coupled with one Receptacle, though multiple Beams and/or multiple Receptacles may be present within a single Test Chamber. Directing the Beam into the Receptacle will activate certain mechanics that are crucial in reaching the chamber exit. The Beam can also be used in conjunction with Relays, which are small nodes built into the floor of some Test Chambers. Relays are activated when the Thermal Discouragement Beam passes through them, and multiple Relays must often be activated using a single Beam. Once all Relays are activated, specific Test Chamber mechanics will be triggered, similarly to the activation of a Receptacle. | The Beam is fired in a straight line from an immovable device built into the wall or ceiling of a Test Chamber. Each Beam is usually coupled with one Receptacle, though multiple Beams and/or multiple Receptacles may be present within a single Test Chamber. Directing the Beam into the Receptacle will activate certain mechanics that are crucial in reaching the chamber exit. The Beam can also be used in conjunction with Relays, which are small nodes built into the floor of some Test Chambers. Relays are activated when the Thermal Discouragement Beam passes through them, and multiple Relays must often be activated using a single Beam. Once all Relays are activated, specific Test Chamber mechanics will be triggered, similarly to the activation of a Receptacle. | ||
Thermal Discouragement Beams can be angled in certain directions with the use of the [[Discouragement Redirection Cube]] and [[portals]]. Additionally, the beam holds the ability to travel through transparent objects such as glass. They can also be used as a weapon, as they cause [[Turret]]s to heat up and violently explode. | {{Spoiler|Thermal Discouragement Beams can be angled in certain directions with the use of the [[Discouragement Redirection Cube]] and [[portals]]. Additionally, the beam holds the ability to travel through transparent objects such as glass. They can also be used as a weapon, as they cause [[Turret]]s to heat up and violently explode.}} | ||
Touching the beam while on the ground will make a “sizzle” sound and push the player away, as well as deal a small amount of damage. Prolonged, repeated exposure to the Beam will result in death. | |||
== Videos == | == Videos == | ||
{{see also|Videos}} | {{see also|Videos}} | ||
| Line 27: | Line 27: | ||
{{Show achievement|Portal 2|Undiscouraged}} | {{Show achievement|Portal 2|Undiscouraged}} | ||
== | ==Trivia== | ||
* [[ | {{Spoiler|* The beam appears to be a replacement for the [[High Energy Pellet]] from [[Portal]] as in the first test chamber in which you see it (a copy of the original [[Portal Test Chamber 06]]) a destroyed pellet launcher is replaced by an emitter for the Beam. Additionally, the two can both destroy turrets, and activate dedicated receptacles.}} | ||
{{MechanicsNav}} | {{MechanicsNav}} | ||
[[Category:Mechanics]] | [[Category:Mechanics]] | ||
Revision as of 12:28, 27 March 2023
| “ | ” |
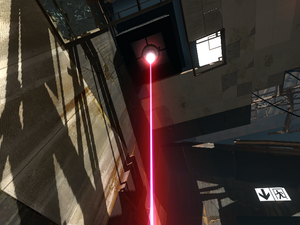
The Thermal Discouragement Beam (referred to as the "deadly laser" by GLaDOS,) is a Test Chamber mechanic introduced in Portal 2.
The Beam is fired in a straight line from an immovable device built into the wall or ceiling of a Test Chamber. Each Beam is usually coupled with one Receptacle, though multiple Beams and/or multiple Receptacles may be present within a single Test Chamber. Directing the Beam into the Receptacle will activate certain mechanics that are crucial in reaching the chamber exit. The Beam can also be used in conjunction with Relays, which are small nodes built into the floor of some Test Chambers. Relays are activated when the Thermal Discouragement Beam passes through them, and multiple Relays must often be activated using a single Beam. Once all Relays are activated, specific Test Chamber mechanics will be triggered, similarly to the activation of a Receptacle.
Thermal Discouragement Beams can be angled in certain directions with the use of the Discouragement Redirection Cube and portals. Additionally, the beam holds the ability to travel through transparent objects such as glass. They can also be used as a weapon, as they cause Turrets to heat up and violently explode.
Touching the beam while on the ground will make a “sizzle” sound and push the player away, as well as deal a small amount of damage. Prolonged, repeated exposure to the Beam will result in death.
Videos
Chamberlock video
The Thermal Discouragement Beam as it appears in Chamberlock informational videos.
Demonstration
A beta demonstration featuring the Discouragement Redirection Cube.
Related achievements
Portal 2
| Undiscouraged Complete the first Thermal Discouragement Beam test |
Trivia
* The beam appears to be a replacement for the High Energy Pellet from Portal as in the first test chamber in which you see it (a copy of the original Portal Test Chamber 06) a destroyed pellet launcher is replaced by an emitter for the Beam. Additionally, the two can both destroy turrets, and activate dedicated receptacles.

