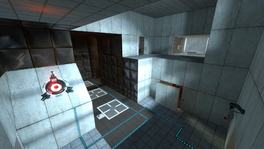
Portal Test Chamber 17 (Bonus): Difference between revisions
Jump to navigation
Jump to search
(Added an alternate solution for Least Steps) |
No edit summary |
||
| Line 48: | Line 48: | ||
* '''Alternative strategy for the lifts''' It's possible to raise only two of the lifts and then do a curved jump from the second platform to the escape corridor. The technique involves simultaneously moving forwards, strafing right and turning right. If executed correctly it will enable you to do a beautiful, hooking turn in mid-air, in open defiance of Newton's Laws. | * '''Alternative strategy for the lifts''' It's possible to raise only two of the lifts and then do a curved jump from the second platform to the escape corridor. The technique involves simultaneously moving forwards, strafing right and turning right. If executed correctly it will enable you to do a beautiful, hooking turn in mid-air, in open defiance of Newton's Laws. | ||
=== | ==== Alternative strategy using the "portal bump" glitch ==== | ||
* Follow the steps above until you reach the catwalk above the main chamber. However you can do this route and get under 130 steps, so the numbers above aren't really that relevant. | * Follow the steps above until you reach the catwalk above the main chamber. However you can do this route and get under 130 steps, so the numbers above aren't really that relevant. | ||
* Portal bump to the room with the button. | * [https://wiki.sourceruns.org/wiki/Portal_Bumping Portal bump] to the room with the button. Stand right beside the glass on your left, shoot your blue portal onto the floor then scan your sights around the left edge of the portal until the orange portal indicator lights up. You can then fire the orange portal and it will appear on the other side of the glass. [https://www.youtube.com/watch?v=Pnw2X3OU3as Demo video] (not mine). | ||
* Place the cube in the room with the portal and jump through. | * Place the cube in the room with the portal and jump through. | ||
* Place the cube on the button and bunny hop to the Pedestal Button and press it. | * Place the cube on the button and bunny hop to the Pedestal Button and press it. | ||
* Bunny hop to the cube and bunny hop to the incinerator. | * Bunny hop to the cube and bunny hop to the incinerator. | ||
* Bunny hop (or ABH) to the chamberlock. | * Bunny hop (or [https://wiki.sourceruns.org/wiki/Accelerated_Back_Hopping ABH]) to the chamberlock. | ||
=== Time === | === Time === | ||
Revision as of 21:17, 6 November 2019
 | “I can't get over how small you are!” This article is a stub. As such, it is not complete. You can help Portal wiki by expanding it. |
This is the fifth Bonus map of the game. It is unlocked when the original Test Chamber 17 has been completed.
Hazards
Strategy
Award requirements
| Portals | Steps | Time | ||||||
|---|---|---|---|---|---|---|---|---|
| Bronze | Silver | Gold | Bronze | Silver | Gold | Bronze | Silver | Gold |
| 4 Portals | 3 Portals | 2 Portals | 215 Steps | 175 Steps | 150 Steps | 160 Seconds | 105 Seconds | 87 Seconds |


