Portal Test Chamber 13: Difference between revisions
Jump to navigation
Jump to search


m (Added better bullet points to the Easter Eggs/Glitches addendum) |
Grande1900 (talk | contribs) m (→Gallery: Added note that the image is the Portal community background on Steam.) |
||
| Line 64: | Line 64: | ||
|File:Portal TC 13 - Leipzig GC 2006 09.jpg|Ditto | |File:Portal TC 13 - Leipzig GC 2006 09.jpg|Ditto | ||
|File:Portal TC 13 - Leipzig GC 2006 10.jpg|Ditto | |File:Portal TC 13 - Leipzig GC 2006 10.jpg|Ditto | ||
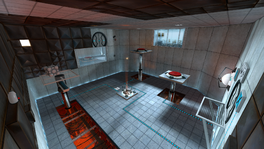
|File:Portal TC 13 - Leipzig GC 2006 06.jpg|Ditto | |File:Portal TC 13 - Leipzig GC 2006 06.jpg|Ditto, Also seen as the background of the Portal community on Steam. | ||
|File:Portal TC 13 - Leipzig GC 2006 11.jpg|Ditto | |File:Portal TC 13 - Leipzig GC 2006 11.jpg|Ditto | ||
|File:Portal TC 13 - Leipzig GC 2006 01.jpg|Ditto | |File:Portal TC 13 - Leipzig GC 2006 01.jpg|Ditto | ||
Revision as of 22:11, 18 August 2022
 | “I can't get over how small you are!” This article is a stub. As such, it is not complete. You can help Portal wiki by expanding it. |
Test Chamber 13
testchmb_a_08.bsp

This Test Chamber is the fourteenth level of the game, and includes multiple Weighted Storage Cubes as well as Buttons. The Chamber also requires the player to utilize High Energy Pellets and the Unstationary Scaffold in order to proceed.
Hazards
Walkthrough
- Walk to the button and look for the Weighted Storage Cube in the upper-level of the area.
- Shoot a portal on the wall near you and the other one behind the cube. Get the cube and place it on the button.
- Go through the portal and drop down through the door to the larger area of the chamber.
- Look up at the ceiling and try to find a red spot right above the High Energy Pellet Receptacle. Then fire a portal on the spot.
- Place the other portal on the wall where the High Energy Pellet is bouncing (there is a black spot on the wall).
- Wait for the Pellet to go through the portal and land on the receptacle.
- Place a portal on the ceiling which is right over the Unstationary Scaffolding.
- Shoot the other portal on a surface near you and wait for the cube to be almost under the portal.
- Go through the portal and take the cube and drop down from the platform.
- Place a portal on the ceiling facing one of the buttons and go through the portal. Put the Cube on the button.
- Fire the same portal over the other button and go through the portal. You should land on the button.
- Shoot a portal through the door that just opened. Put the other portal on some surface where you can enter through.
- Go in the Chamberlock.
Video walkthrough
Easter Eggs/Glitches
- If you stand on the Unstationary Scaffold when it's not active, and you press the interact key at the black wall, you can hear the door opening sound.
Follow the Alternate Portal route for the challenge mode for this chamber to get on the Unstationary Scaffold.
- It is possible to trap yourself within this test chamber. Firstly, complete the chamber using the intended solution. Shoot a blue portal through the exit door and an orange one on a nearby wall. Get both Weighted Storage Cubes through the portal. Finally, make sure that both portals are within the main testing area to entrap yourself. GLaDOS will apologize and open the exit door for you.
Music
Main article: Portal soundtrack
Android Hell by Valve Studio Orchestra [3:45]
Gallery
|


