The '''Finale''' is the final test chamber in [[Portal Stories: Mel]]. The boss battle against AEGIS takes place here. The level is focused in the use of [[turret]]s, but it also features electrified water or [[goo]] as a hazard.
The '''Finale''' is the final test chamber in [[Portal Stories: Mel]]. The boss battle against AEGIS takes place here. The level is focused in the use of [[turret]]s, but it also features electrified water or [[goo]] as a hazard.
==Hazards==
==Hazards==
*[[Turret]]s
*[[Turret]]s
Revision as of 06:50, 15 October 2019
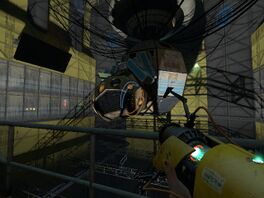
“Nope, still can't see!” This page would benefit from the addition of one or more images. Please add a suitable image, then remove this notice.
Finale
st_a2_finale (Story mode)
The Finale is the final test chamber in Portal Stories: Mel. The boss battle against AEGIS takes place here. The level is focused in the use of turrets, but it also features electrified water or goo as a hazard.
After entering the room, the player should go to the right room and fling themselves to the other side of it.
A white turret will be revealed, this is harmless and can respawn. Use it to destroy AEGIS' servers.
After destroying AEGIS' servers in the right room, return to the central room. AEGIS will start draining oxygen, limiting you with 4 and 6 minutes in Advanced and Story mode respectively.
Enter left room and use white turret from dispenser on far side of the room to destroy servers on bottom floor like you just did in previous room. Take care because 50's turrets will appear here as well as on second floor (these ones can harm you).
Go upstairs and grab turret near window: it will explode, breaking glass and making it possible to open portal upstairs and bring friendly turret there to destroy second part of servers.
Use portal surfaces under window broken by turret and one on right in far side of room (near turret dispenser) to fling yourself with friendly turret there and destroy remaining servers.
Without the servers, AEGIS will stop attacking (timer will stop) and can be entered for manual control. Fling yourself to its bridge and enter a small hole in AEGIS' core.
In this moment, a cutscene will appear. Here, Virgil remembers that there was another mechanical lifeform that AEGIS was trying to kill and tells Mel to discover who was it. The second mechanical target is revealed to be GlaDOS.
Virgil complains that he and Mel may have did something wrong and tells you to shut off AEGIS. The proccess requires a password: 2056 (not required to type by player).
Another cutscene will begin, where the Death Fizzler blocking the elevator is deactivated due to AEGIS shutdown. Mel is forced to throw her Portal Device in the Incinerator because the gun wasn' t allowed to get out of Aperture Science. Virgil says farewell to Mel, remembering everything they experienced in the escape. The elevator takes you to the surface and the game ends.