* This test is heavily implied to be the same as [[Portal Test Chamber 06|Chamber 06]] from the first game, as [[High Energy Pellet]] emitters and receptacles can be seen being swapped for their laser equivalents.
Latest revision as of 21:41, 21 February 2022
“OR, maybe your prejudiced worksite should have accommodated a nanobot of my size.” This page is UNDER CONSTRUCTION Please wait a day or so until the creator finishes the page. Or purge now
Portal 2 Chapter 2 Test Chamber 00
sp_a2_laser_intro.bspLaser Intro
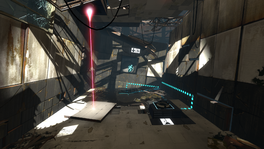
This is the tenth level of the game, and takes place within a dilapidated Test Chamber. This level introduces the Thermal Discouragement Beam, and the way in which it can be used to activate Panels and thereby grant access to inaccessible areas. This Chamber corresponds with Test Chamber 06 from the original Portal.
While standing on it, shoot a portal on the floor where the Thermal Discouragement Beam makes contact and place the other portal on the ceiling above the receptacle.
The Victory Lift will rise, proceed to the Chamberlock.