Portal 2 Co-op Course 5 Chamber 4: Difference between revisions
Jump to navigation
Jump to search


No edit summary |
No edit summary |
||
| (4 intermediate revisions by 2 users not shown) | |||
| Line 1: | Line 1: | ||
{{Chamber infobox | {{Chamber infobox | ||
| title = Co-op Course 5 Chamber 4 | | title = Co-op Course 5 Chamber 4 | ||
| Line 6: | Line 4: | ||
| number = 04 | | number = 04 | ||
| total = 08 | | total = 08 | ||
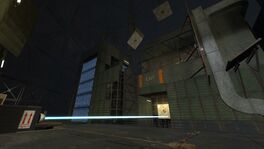
| screenshot = Portal 2 Co-op Course 5 Chamber 4 | | screenshot = Portal 2 Co-op Course 5 Chamber 4.jpeg | ||
| icon1 = fling enter | | icon1 = fling enter | ||
| icon2 = cube button | | icon2 = cube button | ||
| Line 20: | Line 18: | ||
| next = Portal 2 Co-op Course 5 Chamber 5 | | next = Portal 2 Co-op Course 5 Chamber 5 | ||
}} | }} | ||
Most beginners (or players who made a [[Cooperative_Testing_Initiative#Reset_progress|reset]] recently) get there from the [[Portal 2 Co-op Course 5 Chamber 3|03 ''Bridge Repulsion'']], Course 5: ''Mobility Gels''. Players can get there from the [[Hub]] when at least one player unlocked the 04 ''Wall Repulsion''... | |||
===Mechanics=== | ===Mechanics=== | ||
| Line 33: | Line 28: | ||
==Video Walkthrough== | ==Video Walkthrough== | ||
{{ | ==Images== | ||
==Bugs== | |||
{{Spoiler| | |||
==== Skip 1st part ==== | |||
The first section can be skipped by redirecting [[Hard Light Bridge]] with a very precise [[portal]] shot... | |||
# Consistent results with pos: 221.01 258.73 80.79 ang: -29.95 147.92 0.00 | |||
# Some results with pos: 218.57 259.39 80.79 ang: -30.01 147.74 0.00 | |||
# Some results with pos: 214.81 261.80 80.79 ang: -30.19 147.74 -0.00 | |||
==== Skip 2nd part ==== | |||
{{Gallery | |||
|width=192 | |||
|height=108 | |||
|lines=1 | |||
|File:mp_coop_paint_walljumps0501.jpg|alt1=|Run into the [[portal]] while moving mouse slowly to the left. Jump isn't needed. | |||
|File:mp_coop_paint_walljumps0502.jpg|alt2=| | |||
|File:mp_coop_paint_walljumps0503.jpg|alt3=|Players should land on the 3rd linear halogen lamp. | |||
|File:mp_coop_paint_walljumps0504.jpg|alt4=|Second step is to make small jump. Nothing special here. Don't panic. | |||
|File:mp_coop_paint_walljumps0505.jpg|alt5=| | |||
}} | |||
|block=yes | |||
}} | |||
[[Category:Portal 2 Co-op chambers]] | [[Category:Portal 2 Co-op chambers]] | ||
{{Needimage}} | |||
{{stub}} | |||
Latest revision as of 09:23, 10 May 2023
Co-op Course 5 Chamber 4
mp_coop_paint_walljumps.bsp

Most beginners (or players who made a reset recently) get there from the 03 Bridge Repulsion, Course 5: Mobility Gels. Players can get there from the Hub when at least one player unlocked the 04 Wall Repulsion...
Mechanics
hazards
Walkthrough
| # | Atlas | P-body |
|---|
Video Walkthrough
Images
Bugs
Skip 1st part
The first section can be skipped by redirecting Hard Light Bridge with a very precise portal shot...
- Consistent results with pos: 221.01 258.73 80.79 ang: -29.95 147.92 0.00
- Some results with pos: 218.57 259.39 80.79 ang: -30.01 147.74 0.00
- Some results with pos: 214.81 261.80 80.79 ang: -30.19 147.74 -0.00
Skip 2nd part
|


 | “Nope, still can't see!” This page would benefit from the addition of one or more images. Please add a suitable image, then remove this notice. |
 | “I can't get over how small you are!” This article is a stub. As such, it is not complete. You can help Portal wiki by expanding it. |