Wheatley: Difference between revisions
(Fixed image link) |
(General cleanup, mostly in the Overview section.) |
||
| Line 5: | Line 5: | ||
{{Quotation|'''Wheatley'''|I'll wait--I'll wait one hour. Then I'll come back and, assuming I can locate your dead body, I'll bury you. Alright? Brilliant! Go team! See you in an hour! Hopefully! If you're not... dead.|sound=Wheatley_sp_intro_03_afterfallalt09.wav}} | {{Quotation|'''Wheatley'''|I'll wait--I'll wait one hour. Then I'll come back and, assuming I can locate your dead body, I'll bury you. Alright? Brilliant! Go team! See you in an hour! Hopefully! If you're not... dead.|sound=Wheatley_sp_intro_03_afterfallalt09.wav}} | ||
'''Wheatley''', {{spoiler| | '''Wheatley''', {{spoiler|previously known as the Intelligence Dampening Sphere}}, is a [[Cores#Personality Cores|personality core]] of masculine programming and English West Country accent who appears in the single-player campaign of ''[[Portal 2]]''. | ||
He serves as the game's {{W|deuteragonist}}, guiding [[Chell]] through her efforts in escaping the [[Aperture Science]] Enrichment Center. {{spoiler|However, half-way through the game he and | He serves as the game's {{W|deuteragonist}}, guiding [[Chell]] through her efforts in escaping the [[Aperture Science]] Enrichment Center. {{spoiler|However, half-way through the game he and GLaDOS switch roles as she becomes Chell's deuteragonist and Wheatley becomes the game's main antagonist.}} | ||
Wheatley is voiced by British actor and comedian {{W|Stephen Merchant}}. | Wheatley is voiced by British actor and comedian {{W|Stephen Merchant}}. | ||
== Background == | == Background == | ||
{{spoiler|Wheatley was designed to be an Intelligence Dampening Sphere, one of the [[Cores#Personality Cores|cores]] to be attached on GLaDOS in order to "generate an endless stream of terrible ideas" | {{spoiler|Wheatley was designed to be an Intelligence Dampening Sphere, one of the [[Cores#Personality Cores|cores]] to be attached on GLaDOS in order to "generate an endless stream of terrible ideas" and inhibit her mental abilities. Although it was never explained, Wheatley was disconnected from her and given other jobs. Sometime before [[GLaDOS]] killed off the entire staff in the ''[[Portal 2: Lab Rat]]'' comic using neurotoxin, Wheatley had worked alongside staffs before he was put into storage with other cores seen at the end of ''[[Portal]]''. After a few years, though under unknown circumstances, he was put into deactivation along with many other personality cores and kept in storage.}} | ||
{{spoiler|Thanks to [[Chell]]'s havoc on the Enrichment Center via the destruction of GLaDOS at the conclusion of ''Portal'', Wheatley and the rest of the cores were reactivated in order to maintain the facility. Ironically, this backfired as many cores (except Wheatley and the [[Cores#Corrupted Cores|corrupted cores]] seen at the end of the game) appear to have been either killed off, gone insane, or ran low on power.}} | {{spoiler|Thanks to [[Chell]]'s havoc on the Enrichment Center via the destruction of GLaDOS at the conclusion of ''Portal'', Wheatley and the rest of the cores were reactivated in order to maintain the facility. Ironically, this backfired as many cores (except Wheatley and the [[Cores#Corrupted Cores|corrupted cores]] seen at the end of the game) appear to have been either killed off, gone insane, or ran low on power.}} | ||
| Line 24: | Line 24: | ||
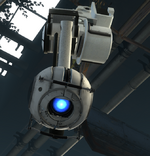
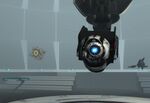
[[File:Wheatley intro rail.jpg|thumb|120px|right|Wheatley's first appearance.]] | [[File:Wheatley intro rail.jpg|thumb|120px|right|Wheatley's first appearance.]] | ||
Wheatley is first seen during the very beginning of the game | Wheatley is first seen during the very beginning of the game during the chapter ''The Courtesy Call'', wherein he removes Chell from her Relaxation Vault and puts her into one of the old testing tracks, so she can find a [[Handheld Portal Device]] and help him escape. After she acquires the device, he meets up with her and detaches himself from his management rail to accompany her to the [[Central AI Chamber]] so they can access an escape pod to the surface. He uses his compatibility with the Enrichment Center's systems to allow passage through a testing chamber's backstage. {{spoiler|When they reach the ruined Central AI Chamber and he tries to activate the escape pod, he accidentally reactivates [[GLaDOS]] instead. Chell and Wheatley are both captured by her. Wheatley is crushed by GLaDOS' pincers and tossed to the side. Chell is placed back in GLaDOS' testing tracks. However, he somehow survives and is placed back on his management rail, due to an incident involving a bird (Wheatley attempts to explain the events of this incident to Chell, but never gets the chance).}} | ||
{{spoiler| | {{spoiler|Throughout Chapters 2, 3, and 4, Wheatley observes Chell from behind the scenes of the test chambers, trying to figure out a way to break her out. Finally, at the end of Chapter 4, he is successful and they both escape into the manufacturing section of Aperture, just before GLaDOS is about to kill Chell. He hatches a plan to sabotage GLaDOS, then confront her, defeat her, and escape. They sabotage GLaDOS' [[turret]] production line, by replacing the template turret, and her [[neurotoxin]] generator, by cutting the neurotoxin hoses with a [[Thermal Discouragement Beam]].}} | ||
[[File:Wheatley extract potatos.jpg|thumb|150px|left|{{spoiler|Wheatley having extracted GLaDOS into a potato battery.}}]] | [[File:Wheatley extract potatos.jpg|thumb|150px|left|{{spoiler|Wheatley having extracted GLaDOS into a potato battery.}}]] | ||
{{spoiler|Once | {{spoiler|Once this is done, Chell and Wheatley return to the Central AI Chamber through the [[Tubes]] to confront GLaDOS. The [[Announcer]] detects GLaDOS as a corrupted [[Cores#Central Core|central core]] and offers a core transfer. A stalemate is reached between Wheatley and GLaDOS, and Chell has to push the Stalemate Resolution Button. Once Chell does this, the core transfer commences. GLaDOS' head is removed from her body and Wheatley is put in its place, putting him in control of the facility. He summons an elevator for Chell to escape to the surface, but just as the elevator is starting to rise, Wheatley grows corrupted with power and lowers it back down. He says spitefully that all Chell does is boss him around (Ironically, Chell never says a word in either game), but now ''he'' is the boss and she is at his mercy. Wheatley transfers GLaDOS' core programming to a small computer chip powered by a potato battery as an attempt to humiliate her. In her potato form, GLaDOS suddenly recognizes Wheatley's voice. She tells him that he was originally designed as an Intelligence Dampening Sphere, "producing an endless stream of terrible ideas", essentially "designed to be a moron". In a fit of rage, he accidentally knocks both her and Chell into the bottom of the elevator shaft leading to the depths of the Enrichment Center.}} | ||
[[File:Wheatleys test chambers.jpg|thumb|right|200px|{{spoiler|The Enrichment Center during Wheatley's control.}}]] | [[File:Wheatleys test chambers.jpg|thumb|right|200px|{{spoiler|The Enrichment Center during Wheatley's control.}}]] | ||
{{spoiler|After returning from the | {{spoiler|After returning from the bottom of the Enrichment Center, Chell and potato-GLaDOS learn that Wheatley's moronic actions are causing the facility's reactor to approach a nuclear meltdown because he consistently neglects the urgent warnings from the [[Announcer]], instead preferring to think of ways to satisfy the testing addiction he gets from inhabiting GLaDOS' body, which he calls "the itch". One such (unsuccessful) endeavor is the creation of [[Weighted Storage Cube|Cube]]/[[Turret]] hybrids, or "[[Frankenturret|Frankenturrets]]" designed to autonomously walk onto [[Super Button|buttons]]. When Wheatley discovers Chell and GLaDOS, the latter attempts to overclock Wheatley's processors by forcing him to interpret a paradox, but it doesn't work because he isn't smart enough to even understand that it is a paradox at all. When this attempt fails, Wheatley puts Chell and GLaDOS into his own testing tracks (most of them stolen from GLaDOS). As they go through the testing tracks, he examines the rest of the Enrichment Center and discovers [[Atlas]] and [[P-body]]. Realizing he no longer needs Chell to continue testing, he sets a trap, with which he can [[Crushers|crush]] her to death. However, Chell evades his trap, escapes the testing area, and prepares for the final confrontation with him.}} | ||
{{spoiler|Chell | {{spoiler|When Chell arrives in Wheatley's chamber, Wheatley employs a four-part plan to destroy her: no portal surfaces, start the [[neurotoxin]] immediately, bomb-proof shields, and [[bomb]] launchers. This backfires, however, when Chell uses a bomb to shatter a pipe of [[Conversion Gel]], then uses this gel to redirect bombs at Wheatley. Each bomb stuns Wheatley for long enough to attach a [[Cores#Corrupted Cores|corrupted core]] onto him. Once this is done three times, Wheatley is corrupt enough for the announcer to initiate a core transfer. A stalemate occurs once more between Wheatley and GLaDOS, and Chell must press the stalemate resolution button to finalize the transfer. However, Wheatley had booby trapped it with explosives before the fight, as the fifth part of his plan, and Chell is flung from the button. The explosion dislodges part of the ceiling, exposing the night sky and the Moon. Chell shoots a portal onto the Moon, causing both her and Wheatley to be sucked into space, both of them holding onto the central core body in order to stay anchored on Earth. While they are suspended here, the core transfer is completed. GLaDOS returns to her original place as Central Core, knocks Wheatley off her body, and rescues Chell. Wheatley flies off into space, accompanied by the [[Space Sphere]].}} | ||
{{spoiler|Wheatley is last seen in the epilogue after the end credits, with the [[Space Sphere|Space Core]] orbiting him, where he wishes he could say he was sorry for all he did to Chell.}} | {{spoiler|Wheatley is last seen in the epilogue after the end credits, with the [[Space Sphere|Space Core]] orbiting him, where he wishes he could say he was sorry for all he did to Chell.}} | ||
Revision as of 04:06, 31 July 2015
| “ | I'll wait--I'll wait one hour. Then I'll come back and, assuming I can locate your dead body, I'll bury you. Alright? Brilliant! Go team! See you in an hour! Hopefully! If you're not... dead.
— Wheatley
|
” |
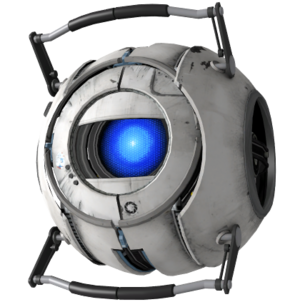
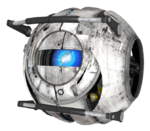
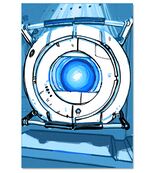
Wheatley, previously known as the Intelligence Dampening Sphere, is a personality core of masculine programming and English West Country accent who appears in the single-player campaign of Portal 2.
He serves as the game's deuteragonist, guiding Chell through her efforts in escaping the Aperture Science Enrichment Center. However, half-way through the game he and GLaDOS switch roles as she becomes Chell's deuteragonist and Wheatley becomes the game's main antagonist.
Wheatley is voiced by British actor and comedian Stephen Merchant.
Background
Wheatley was designed to be an Intelligence Dampening Sphere, one of the cores to be attached on GLaDOS in order to "generate an endless stream of terrible ideas" and inhibit her mental abilities. Although it was never explained, Wheatley was disconnected from her and given other jobs. Sometime before GLaDOS killed off the entire staff in the Portal 2: Lab Rat comic using neurotoxin, Wheatley had worked alongside staffs before he was put into storage with other cores seen at the end of Portal. After a few years, though under unknown circumstances, he was put into deactivation along with many other personality cores and kept in storage.
Thanks to Chell's havoc on the Enrichment Center via the destruction of GLaDOS at the conclusion of Portal, Wheatley and the rest of the cores were reactivated in order to maintain the facility. Ironically, this backfired as many cores (except Wheatley and the corrupted cores seen at the end of the game) appear to have been either killed off, gone insane, or ran low on power.
Prior to the events of Portal 2, Wheatley took charge of maintaining the Extended Relaxation Center - which houses test subjects in long-term cryogenic stasis before and after they are put through the testing courses. However, what he has done to actually manage the entire wing remains unmentioned. It was only until many centuries later that Wheatley decided to escape the facility. To accomplish this, he attempted to gather help from any remaining test subject that managed to last centuries after running out of cryogenic supply. Luckily for him, Chell was one of them if not the only one that lasted.
Overview
Portal 2
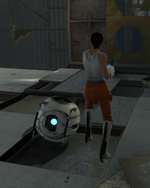
Wheatley is first seen during the very beginning of the game during the chapter The Courtesy Call, wherein he removes Chell from her Relaxation Vault and puts her into one of the old testing tracks, so she can find a Handheld Portal Device and help him escape. After she acquires the device, he meets up with her and detaches himself from his management rail to accompany her to the Central AI Chamber so they can access an escape pod to the surface. He uses his compatibility with the Enrichment Center's systems to allow passage through a testing chamber's backstage. When they reach the ruined Central AI Chamber and he tries to activate the escape pod, he accidentally reactivates GLaDOS instead. Chell and Wheatley are both captured by her. Wheatley is crushed by GLaDOS' pincers and tossed to the side. Chell is placed back in GLaDOS' testing tracks. However, he somehow survives and is placed back on his management rail, due to an incident involving a bird (Wheatley attempts to explain the events of this incident to Chell, but never gets the chance).
Throughout Chapters 2, 3, and 4, Wheatley observes Chell from behind the scenes of the test chambers, trying to figure out a way to break her out. Finally, at the end of Chapter 4, he is successful and they both escape into the manufacturing section of Aperture, just before GLaDOS is about to kill Chell. He hatches a plan to sabotage GLaDOS, then confront her, defeat her, and escape. They sabotage GLaDOS' turret production line, by replacing the template turret, and her neurotoxin generator, by cutting the neurotoxin hoses with a Thermal Discouragement Beam.
Once this is done, Chell and Wheatley return to the Central AI Chamber through the Tubes to confront GLaDOS. The Announcer detects GLaDOS as a corrupted central core and offers a core transfer. A stalemate is reached between Wheatley and GLaDOS, and Chell has to push the Stalemate Resolution Button. Once Chell does this, the core transfer commences. GLaDOS' head is removed from her body and Wheatley is put in its place, putting him in control of the facility. He summons an elevator for Chell to escape to the surface, but just as the elevator is starting to rise, Wheatley grows corrupted with power and lowers it back down. He says spitefully that all Chell does is boss him around (Ironically, Chell never says a word in either game), but now he is the boss and she is at his mercy. Wheatley transfers GLaDOS' core programming to a small computer chip powered by a potato battery as an attempt to humiliate her. In her potato form, GLaDOS suddenly recognizes Wheatley's voice. She tells him that he was originally designed as an Intelligence Dampening Sphere, "producing an endless stream of terrible ideas", essentially "designed to be a moron". In a fit of rage, he accidentally knocks both her and Chell into the bottom of the elevator shaft leading to the depths of the Enrichment Center.
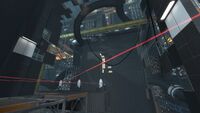
After returning from the bottom of the Enrichment Center, Chell and potato-GLaDOS learn that Wheatley's moronic actions are causing the facility's reactor to approach a nuclear meltdown because he consistently neglects the urgent warnings from the Announcer, instead preferring to think of ways to satisfy the testing addiction he gets from inhabiting GLaDOS' body, which he calls "the itch". One such (unsuccessful) endeavor is the creation of Cube/Turret hybrids, or "Frankenturrets" designed to autonomously walk onto buttons. When Wheatley discovers Chell and GLaDOS, the latter attempts to overclock Wheatley's processors by forcing him to interpret a paradox, but it doesn't work because he isn't smart enough to even understand that it is a paradox at all. When this attempt fails, Wheatley puts Chell and GLaDOS into his own testing tracks (most of them stolen from GLaDOS). As they go through the testing tracks, he examines the rest of the Enrichment Center and discovers Atlas and P-body. Realizing he no longer needs Chell to continue testing, he sets a trap, with which he can crush her to death. However, Chell evades his trap, escapes the testing area, and prepares for the final confrontation with him.
When Chell arrives in Wheatley's chamber, Wheatley employs a four-part plan to destroy her: no portal surfaces, start the neurotoxin immediately, bomb-proof shields, and bomb launchers. This backfires, however, when Chell uses a bomb to shatter a pipe of Conversion Gel, then uses this gel to redirect bombs at Wheatley. Each bomb stuns Wheatley for long enough to attach a corrupted core onto him. Once this is done three times, Wheatley is corrupt enough for the announcer to initiate a core transfer. A stalemate occurs once more between Wheatley and GLaDOS, and Chell must press the stalemate resolution button to finalize the transfer. However, Wheatley had booby trapped it with explosives before the fight, as the fifth part of his plan, and Chell is flung from the button. The explosion dislodges part of the ceiling, exposing the night sky and the Moon. Chell shoots a portal onto the Moon, causing both her and Wheatley to be sucked into space, both of them holding onto the central core body in order to stay anchored on Earth. While they are suspended here, the core transfer is completed. GLaDOS returns to her original place as Central Core, knocks Wheatley off her body, and rescues Chell. Wheatley flies off into space, accompanied by the Space Sphere.
Wheatley is last seen in the epilogue after the end credits, with the Space Core orbiting him, where he wishes he could say he was sorry for all he did to Chell.
Gallery
| Screenshots | ||||||||||||||||||||||||||||||||||||||||||||
| ||||||||||||||||||||||||||||||||||||||||||||
| Media | ||||||||||
| ||||||||||
Trivia
- Appearance-wise, Wheatley appears to be a variant of GLaDOS' Intelligence Core (the one telling the cake recipe), with a blue "eye" and three dots, though Wheatley has dots only on his right side and possesses a white light as his iris instead.
- Wheatley's Cockney accent heard in the Meet Wheatley (video) video shown at E3 2010 uses a placeholder voice provided by Valve animator Richard Lord.[1] Due to very positive feedback, Valve considered at some point making the voice official.[2] Later Lord himself emphasized that his voice was temporary, saying that "theres no way you will be dissapointed with the final voice - i'm over the moon with who it might be." [sic],[3] until it was announced that Stephen Merchant would provide the final voice.[4]
- During the 2011 Video Game Awards, Wheatley was nominated for "Character of the Year". He then made an appearance on the event which depicted him in space as he states that he would be even more honored for a space shuttle rescue.[5] Portal 2 then won the award for "Best Performance by a Human Male" with Stephen Merchant's portrayal of Wheatley.[6]
- Wheatley makes a cameo appearance in an official plugin, created by Bethesda and Valve, for The Elder Scrolls V: Skyrim, entitled Fall of the Space Core, Vol. 1. In it, he can be seen floating around the Skills menu
References
- ↑ Portal 2 Gains a Talkative Companion on Wired.com
- ↑ Portal 2 E3 gameplay video (single post) on the NeoGAF forums
- ↑ "Temp voice!" on Last Outpost of Sanity, Richard Lord's official blog
- ↑ Gamescom: Portal 2 gets Stephen Merchant on ComputerAndVideoGames.com
- ↑ Wheatley footage at VGA 2011 on GameTrailers
- ↑ Best Performance by a Human Male on Spike
See also
| ||||||||||||||

