Aperture Tag: The Paint Gun Testing Initiative Chapter 1 Test Chamber 4: Difference between revisions
Jump to navigation
Jump to search


(Update sign and add images) |
(As usual.) |
||
| Line 1: | Line 1: | ||
{{stub}} | {{stub}} | ||
{{ | {{User:ARJr/Sandbox/Template:ApTag Chamber infobox | ||
| title = Chapter 1 - Test Chamber 04 | | title = Chapter 1 - Test Chamber 04 | ||
| map = gg_blue_only_2_pt2 | | map = gg_blue_only_2_pt2 | ||
| Line 20: | Line 20: | ||
| previous = Aperture Tag: The Paint Gun Testing Initiative Chapter 1 Test Chamber 3 | | previous = Aperture Tag: The Paint Gun Testing Initiative Chapter 1 Test Chamber 3 | ||
| next = Aperture Tag: The Paint Gun Testing Initiative Chapter 1 Test Chamber 5 | | next = Aperture Tag: The Paint Gun Testing Initiative Chapter 1 Test Chamber 5 | ||
| gelindic1 = blue | |||
| gelindic2 = off | |||
}} | }} | ||
This is the fifth level of the game. | This is the fifth level of the game. | ||
== Hazards == | == Purpose == | ||
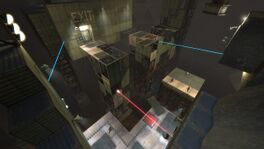
This chamber is the first actual puzzle of the game. The player is reintroduced to the Hard Light Bridge, the Sentry Turrets and the Discouragement Redirection Cube. | |||
== Contents == | |||
=== Mechanics === | |||
* [[Cubes]] ([[Weighted Storage Cube]], [[Discouragement Redirection Cube]]) | |||
* [[Heavy Duty Super-Colliding Super Button|Buttons]] | |||
* [[Excursion Funnel]] | |||
=== Hazards === | |||
* [[Goo]] | * [[Goo]] | ||
* [[Turrets]] | * [[Turrets]] | ||
* [[Thermal Discouragement Beam]] | * [[Thermal Discouragement Beam]] | ||
== Walkthrough == | |||
* {{spoiler|Get rid of the Turret to your left.}} | |||
* {{spoiler|Bounce to the platform with a Weighted Storage Cube. Get rid of the Turrets there.}} | |||
* {{spoiler|Bounce back to the starting area with the cube. Put it on the button.}} | |||
* {{spoiler|Bounce up to the Hard Light Bridge.}} | |||
* {{spoiler|Spray it with the gel and bounce up to the ledge it touches.}} | |||
* {{spoiler|Bounce to the platform with the other button.}} | |||
* {{spoiler|Spray the cube with the gel to get rid of it.}} | |||
* {{spoiler|Stand on the button to activate the Excursion Funnel before another cube gets delivered.}} | |||
* {{spoiler|Wait until the cube is above the platform you're on, then either grab it or step off of the button.}} | |||
* {{spoiler|Put the new cube onto the button.}} | |||
* {{spoiler|Go in the vertical funnel.}} | |||
* {{spoiler|Drop off to where you see the Discouragement Redirection Cube. While you fall, spray the gel directly at your feet to get enough height.}} | |||
* {{spoiler|Drop down all the way to the starting area with the Discouragement Redirection Cube.}} | |||
* {{spoiler|Put the cube on the button, making sure it also redirects the Thermal Discouragement Beam into its receptacle.}} | |||
* {{spoiler|Bounce back up to the exit [[Chamberlock]].}} | |||
== Gallery == | == Gallery == | ||
Revision as of 12:43, 19 September 2021
 | “I can't get over how small you are!” This article is a stub. As such, it is not complete. You can help Portal wiki by expanding it. |
Chapter 1 - Test Chamber 04
gg_blue_only_2_pt2

This is the fifth level of the game.
Purpose
This chamber is the first actual puzzle of the game. The player is reintroduced to the Hard Light Bridge, the Sentry Turrets and the Discouragement Redirection Cube.
Contents
Mechanics
Hazards
Walkthrough
- Get rid of the Turret to your left.
- Bounce to the platform with a Weighted Storage Cube. Get rid of the Turrets there.
- Bounce back to the starting area with the cube. Put it on the button.
- Bounce up to the Hard Light Bridge.
- Spray it with the gel and bounce up to the ledge it touches.
- Bounce to the platform with the other button.
- Spray the cube with the gel to get rid of it.
- Stand on the button to activate the Excursion Funnel before another cube gets delivered.
- Wait until the cube is above the platform you're on, then either grab it or step off of the button.
- Put the new cube onto the button.
- Go in the vertical funnel.
- Drop off to where you see the Discouragement Redirection Cube. While you fall, spray the gel directly at your feet to get enough height.
- Drop down all the way to the starting area with the Discouragement Redirection Cube.
- Put the cube on the button, making sure it also redirects the Thermal Discouragement Beam into its receptacle.
- Bounce back up to the exit Chamberlock.
Gallery
|
| |||||||||||||||||||||||||||||||||||||||||||||||||||||||||||||||||||||||||||||||||||||||