Central AI Chamber: Difference between revisions
No edit summary |
m (Reverting vandalism) |
||
| Line 1: | Line 1: | ||
{{see also|Portal GLaDOS' Chamber|l1=Walkthrough guide for ''GLaDOS' Chamber'' in Portal|Portal 2 Chapter 1 Her Chamber|l2=Walkthrough guide for the reactivation of GLaDOS in Portal 2|Portal 2 Chapter 5 GLaDOS' Lair|l3=Walkthrough guide for the Core Transfer in Portal 2|Portal 2 Chapter 9 Finale|l4=Walkthrough guide for the Portal 2 finale}} | |||
{{SpoilerHeavy}} | |||
The '''Central AI Chamber''' is a large bay housing the [[Cores#Central Core|central core]] machine, which [[GLaDOS]] is in place of. This chamber serves as the setting for many major events in ''[[Portal]]'' and the single-player campaign of ''[[Portal 2]]''. | |||
Throughout the series, GLaDOS controls many aspects of the [[Aperture Science]] computer-aided Enrichment Center with her position as the facility's central core. The chamber is destroyed after the events of ''Portal'' {{spoiler|but is redesigned entirely by GLaDOS herself later on in ''Portal 2''}}. | |||
== Overview == | |||
=== ''Portal'' === | |||
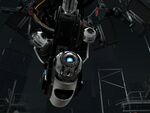
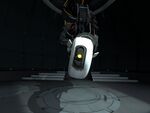
The room was a large octagonal chamber set in the center of the Enrichment Center, presumably near the surface. At the climax of ''[[Portal]]'', after [[Chell]] had escaped from the testing tracks, she had made her way through the entire facility in hopes of escape, instead she is led to the Central AI Chamber via a catwalk, where she is to confront [[GLaDOS]] once inside. | |||
It would appear that GLaDOS did not intend to bring Chell to her chamber, but to make the most out of it, she allows Chell to destroy her [[Cores#Morality Core|Morality Core]] - which in turn breaks the restriction of her need to kill anyone directly. GLaDOS then begins pumping [[neurotoxin]] through the vents surrounding the walls of her chamber, and deploys a [[Turrets#Rocket Turret|Rocket Turret]] through a hatch beside her. GLaDOS is also surrounded by a circular bridge platform with a staircase that leads up to it, which was used by technicians as seen in the ''[[Portal 2: Lab Rat]]'' comic. Behind the chamber spots an [[Emergency Intelligence Incinerator]], and as its name suggests, is used to incinerate any form of artificial intelligences such as GLaDOS' personality core attachments. On the left side of the chamber spots a bunker on a platform, housing a button that would open the hatch to the aforementioned incinerator. Surrounding the walls of the chamber on each sides are large horizontally placed monitor screens that displays random images that depends on GLaDOS' thought process. Eventually, these screens were used to handle the neurotoxin countdown for when the gasses can become deadly. | |||
Eventually, Chell manages to destroy all of GLaDOS' core attachments - which somehow kills GLaDOS and destroys the entire Enrichment Center in the process. Despite that most of GLaDOS' components were scattered around the parking lot, she seems to have been scattered around in the chamber again during the beginning of the single-player campaign in ''[[Portal 2]]''. This may have likely been the work of the [[Party Escort Bot]] dragging her parts back into the chamber. | |||
=== ''Portal 2'' === | |||
[[File:Chell and Dead GLaDOS Size Comparison.png|thumb|150px|right|[[Chell]] standing in front of GLaDOS' ruins in the chamber.]] | |||
Since ''[[Portal 2]]'' is set thousands of years after the events of ''Portal'', the entire Enrichment Center has been degrading and overgrown with nature. And most [[Cores#Personality Cores|personality cores]] that were awakened after the destruction of [[GLaDOS]] has long since been corrupted or destroyed in the surroundings. In turn, no personality cores have tried to reactivate GLaDOS or to replace her position as the central core with themselves since the chamber is out of their reach. The Central AI Chamber is evidently untouched for centuries. | |||
When [[Chell]] and [[Wheatley]] journey across the Central AI Chamber during the beginning of the single-player campaign, they are forced to enter the main breaker room beneath the chamber in an attempt to access an elevator to the surface. As they enter the breaker room, Wheatley accidentally triggers all the wrong buttons and ends up lifting each other back to the main chamber and reactivating GLaDOS in the process. {{spoiler|As she awakes, she immediately notices their presence and disposes of Wheatley before throwing Chell into her testing tracks.}} | |||
{{spoiler|As of the chapter ''The Escape'', GLaDOS has completely redesigned the chamber to her liking as she gained more control over the facility without the restrictions of the cores originally attached to her. The room is now half-spherical, made entirely out of test chamber [[panels]], and is considerably deep underground. Chell returns to the chamber to confront GLaDOS but falls into a trap in the process via a [[Relaxation Vault]]. When GLaDOS finds out that Chell and Wheatley had sabotaged her [[Turrets]], she opts for poisoning Chell with [[neurotoxin]]. As the neurotoxin tube is lowered into the chamber by moving panels aside, Wheatley arrives via the tube and manages to break all the glasses sealing the Relaxation Vault. The [[Announcer]] then manages to detect the presence of another core in the room and instructs Chell to initiate a core transfer to replace the [[Cores#Central Core|central core]] with Wheatley. To do this, the facility deploys a stalemate resolution annex into the chamber, beyond GLaDOS' control. To stop her, GLaDOS could only move a few panels on the floor inside the annex. The process succeeds when Chell presses the stalemate button to disable GLaDOS' control over the central core. Shortly after, GLaDOS is forcibly detached from the central core via the white maintenance hatch beneath her for Wheatley to be attached into it.}} | |||
[[File:Sp a2 core0476.jpg|thumb|150px|left|{{spoiler|GLaDOS lowering a neurotoxin tube, with [[Wheatley]] rolling inside.}}]] | |||
{{spoiler|When Wheatley finally took charge of the facility, he calls in an elevator ride to the surface and deploys it into the chamber for Chell via one of the many hatches surrounding the chamber. As Wheatley begins to grow mad with power, he uses the white core maintenance hatch beneath the central core to extract GLaDOS into a potato battery as revenge. Both Chell and the potato battery GLaDOS were then accidentally plunged into the depths of the Enrichment Center as Wheatley punches the elevator down using the core maintenance arms.}} | |||
{{spoiler|The chamber is visited for the last time in the single-player campaign, when Chell and GLaDOS began working together to place the latter in charge again when it was evident that that Wheatley was unable to handle the facility and was planning on killing them. The chamber appears to have been rearranged to his liking and instead, the chamber is much closer to the surface again as the moon could be spotted just above the chamber when the panels start to tear apart. Wheatley has also added various gel tubes around his chamber for unknown reasons. Like GLaDOS, Wheatley was bound by protocols and was unable to prevent deploying a stalemate resolution annex to the chamber (though that didn't stop him from rigging it with explosives in an attempt to kill Chell and prevent her from pressing the button.) When Chell won the conflict against Wheatley, GLaDOS instead plunged the latter into space.}} | |||
{{spoiler|When Chell was reawakened, the chamber has returned to GLaDOS' version. In addition, [[Atlas]] and [[P-body]] were able to witness her awakening in person before she is elevated to the surface to leave the Enrichment Center for good.}} | |||
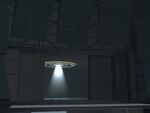
{{spoiler|The Central AI Chamber is seen once more during the ending cutscene of the additional [[Cooperative Testing Initiative|co-op]] testing course, [[Cooperative Testing Initiative#Art Therapy|Art Therapy]]. In the cutscene, GLaDOS deploys the Oviparous Warming Vault - a small vault that houses infant birds. The scene indicates that the lighting in her chamber depends on the central core's mood, in this case; GLaDOS.}} | |||
== Gallery == | |||
=== ''Portal 2'' === | |||
{{Gallery | |||
|lines = 4 | |||
|title = Screenshots | |||
|height = 150 | |||
|width = 150 | |||
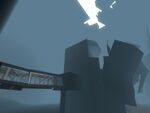
|File:Glados chamber ruined.jpg|alt1=P2chamber|Entrance to the ruined Central AI Chamber. | |||
|File:Chell and Dead GLaDOS Size Comparison.png|alt1=P2chamber|[[Chell]] with GLaDOS' remains in the chamber. | |||
|File:Main breaker room.jpg|alt1=P2chamber|{{spoiler|The main breaker room, one of the hatches surrounding the chamber.}}|spoiler3=yes | |||
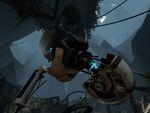
|File:Sp a1 wakeup0027.jpg|alt1=P2chamber|GLaDOS during her reawakening in the chamber. | |||
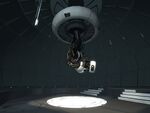
|File:P2 Central AI chamber.jpg|alt1=P2chamber|{{spoiler|GLaDOS' redesigned chamber as seen in the chapter, ''The Escape''.}}|spoiler5=yes | |||
|File:Sp a2 core0476.jpg|alt1=P2chamber|{{spoiler|GLaDOS lowering a neurotoxin tube into the chamber.}}|spoiler6=yes | |||
|File:Chell and GLaDOS Size Comparison.png|alt1=P2chamber|{{spoiler|Chell facing GLaDOS in the chamber.}}|spoiler7=yes | |||
|File:Stalemate resolution annex.jpg|alt1=P2chamber|{{spoiler|The stalemate resolution annex unveiling itself in the chamber.}}|spoiler8=yes | |||
|File:Glados core transfer.jpg|alt1=P2chamber|{{spoiler|Core maintenance hatch opening to perform the [[Cores#Central Core|central core]] transfer.}}|spoiler9=yes | |||
|File:Glados head dragged.jpg|alt1=P2chamber|{{spoiler|The core maintenance hatch dragging GLaDOS' head in.}}|spoiler10=yes | |||
|File:Sp a4 finale40001.jpg|alt1=P2chamber|{{spoiler|[[Wheatley]]'s chamber in the chapter, ''The Part Where He Kills You''.}}|spoiler11=yes | |||
|File:Neurotoxins countdown wheatley.jpg|alt1=P2chamber|{{spoiler|Wheatley flooding the chamber with neurotoxin.}}|spoiler12=yes | |||
|File:Glados core retransfer.jpg|alt1=P2chamber|{{spoiler|GLaDOS dragging herself back into the central core.}}|spoiler13=yes | |||
|File:Glados ending monologue.jpg|alt1=P2chamber|{{spoiler|GLaDOS during the single-player ending monologue.}}|spoiler14=yes | |||
}} | |||
{{Gallery | |||
|lines = 4 | |||
|title = Concept art | |||
|height = 150 | |||
|width = 150 | |||
|File:Collectoredition gladoschamber02.jpg|alt1=P2chamberconcept|Three different ruined chamber concepts. | |||
|File:Collectoredition gladoschamber03.png|alt1=P2chamberconcept|{{spoiler|GLaDOS' redesigned chamber, with white panels and during her core transfer.}}|spoiler2=yes | |||
|File:Collectoredition wheatleybattle.jpg|alt1=P2chamberconcept|{{spoiler|Finale battle with [[crusher]]s in the chamber, and [[Turrets#Sentry Turrets|Turrets]] attached to the central core.}}|spoiler3=yes | |||
}} | |||
== List of appearances == | |||
* ''[[Portal]]'' | |||
* ''[[Portal: Still Alive]]'' | |||
* ''[[Portal 2: Lab Rat]]'' | |||
* ''[[Portal 2]]'' | |||
* ''[[Portal 2 - The Final Hours]]'' | |||
== See Also == | |||
* [[Stalemate Resolution Annex]] | |||
Latest revision as of 04:19, 13 June 2023
The Central AI Chamber is a large bay housing the central core machine, which GLaDOS is in place of. This chamber serves as the setting for many major events in Portal and the single-player campaign of Portal 2.
Throughout the series, GLaDOS controls many aspects of the Aperture Science computer-aided Enrichment Center with her position as the facility's central core. The chamber is destroyed after the events of Portal but is redesigned entirely by GLaDOS herself later on in Portal 2.
Overview
Portal
The room was a large octagonal chamber set in the center of the Enrichment Center, presumably near the surface. At the climax of Portal, after Chell had escaped from the testing tracks, she had made her way through the entire facility in hopes of escape, instead she is led to the Central AI Chamber via a catwalk, where she is to confront GLaDOS once inside.
It would appear that GLaDOS did not intend to bring Chell to her chamber, but to make the most out of it, she allows Chell to destroy her Morality Core - which in turn breaks the restriction of her need to kill anyone directly. GLaDOS then begins pumping neurotoxin through the vents surrounding the walls of her chamber, and deploys a Rocket Turret through a hatch beside her. GLaDOS is also surrounded by a circular bridge platform with a staircase that leads up to it, which was used by technicians as seen in the Portal 2: Lab Rat comic. Behind the chamber spots an Emergency Intelligence Incinerator, and as its name suggests, is used to incinerate any form of artificial intelligences such as GLaDOS' personality core attachments. On the left side of the chamber spots a bunker on a platform, housing a button that would open the hatch to the aforementioned incinerator. Surrounding the walls of the chamber on each sides are large horizontally placed monitor screens that displays random images that depends on GLaDOS' thought process. Eventually, these screens were used to handle the neurotoxin countdown for when the gasses can become deadly.
Eventually, Chell manages to destroy all of GLaDOS' core attachments - which somehow kills GLaDOS and destroys the entire Enrichment Center in the process. Despite that most of GLaDOS' components were scattered around the parking lot, she seems to have been scattered around in the chamber again during the beginning of the single-player campaign in Portal 2. This may have likely been the work of the Party Escort Bot dragging her parts back into the chamber.
Portal 2

Since Portal 2 is set thousands of years after the events of Portal, the entire Enrichment Center has been degrading and overgrown with nature. And most personality cores that were awakened after the destruction of GLaDOS has long since been corrupted or destroyed in the surroundings. In turn, no personality cores have tried to reactivate GLaDOS or to replace her position as the central core with themselves since the chamber is out of their reach. The Central AI Chamber is evidently untouched for centuries.
When Chell and Wheatley journey across the Central AI Chamber during the beginning of the single-player campaign, they are forced to enter the main breaker room beneath the chamber in an attempt to access an elevator to the surface. As they enter the breaker room, Wheatley accidentally triggers all the wrong buttons and ends up lifting each other back to the main chamber and reactivating GLaDOS in the process. As she awakes, she immediately notices their presence and disposes of Wheatley before throwing Chell into her testing tracks.
As of the chapter The Escape, GLaDOS has completely redesigned the chamber to her liking as she gained more control over the facility without the restrictions of the cores originally attached to her. The room is now half-spherical, made entirely out of test chamber panels, and is considerably deep underground. Chell returns to the chamber to confront GLaDOS but falls into a trap in the process via a Relaxation Vault. When GLaDOS finds out that Chell and Wheatley had sabotaged her Turrets, she opts for poisoning Chell with neurotoxin. As the neurotoxin tube is lowered into the chamber by moving panels aside, Wheatley arrives via the tube and manages to break all the glasses sealing the Relaxation Vault. The Announcer then manages to detect the presence of another core in the room and instructs Chell to initiate a core transfer to replace the central core with Wheatley. To do this, the facility deploys a stalemate resolution annex into the chamber, beyond GLaDOS' control. To stop her, GLaDOS could only move a few panels on the floor inside the annex. The process succeeds when Chell presses the stalemate button to disable GLaDOS' control over the central core. Shortly after, GLaDOS is forcibly detached from the central core via the white maintenance hatch beneath her for Wheatley to be attached into it.

When Wheatley finally took charge of the facility, he calls in an elevator ride to the surface and deploys it into the chamber for Chell via one of the many hatches surrounding the chamber. As Wheatley begins to grow mad with power, he uses the white core maintenance hatch beneath the central core to extract GLaDOS into a potato battery as revenge. Both Chell and the potato battery GLaDOS were then accidentally plunged into the depths of the Enrichment Center as Wheatley punches the elevator down using the core maintenance arms.
The chamber is visited for the last time in the single-player campaign, when Chell and GLaDOS began working together to place the latter in charge again when it was evident that that Wheatley was unable to handle the facility and was planning on killing them. The chamber appears to have been rearranged to his liking and instead, the chamber is much closer to the surface again as the moon could be spotted just above the chamber when the panels start to tear apart. Wheatley has also added various gel tubes around his chamber for unknown reasons. Like GLaDOS, Wheatley was bound by protocols and was unable to prevent deploying a stalemate resolution annex to the chamber (though that didn't stop him from rigging it with explosives in an attempt to kill Chell and prevent her from pressing the button.) When Chell won the conflict against Wheatley, GLaDOS instead plunged the latter into space.
When Chell was reawakened, the chamber has returned to GLaDOS' version. In addition, Atlas and P-body were able to witness her awakening in person before she is elevated to the surface to leave the Enrichment Center for good.
The Central AI Chamber is seen once more during the ending cutscene of the additional co-op testing course, Art Therapy. In the cutscene, GLaDOS deploys the Oviparous Warming Vault - a small vault that houses infant birds. The scene indicates that the lighting in her chamber depends on the central core's mood, in this case; GLaDOS.
Gallery
Portal 2
| Screenshots | ||||||||||||||||||||||||||||
| ||||||||||||||||||||||||||||
| Concept art | |||||||||
| |||||||||

